Gitlab 安装、升级、备份、恢复、汉化等
2024-09-06 12:41:02
一、Gitlab安装
1. 基于yum方式安装Gitlab
安装步骤如下
(1)配置yum源
# vim /etc/yum.repos.d/gitlab-ce.repo
(2)复制如下内容并保存(注意baseurl的配置是centos7的地址,安装版本一定要正确)
[gitlab-ce]

name=gitlab-ce

baseurl=https://mirrors.tuna.tsinghua.edu.cn/gitlab-ce/yum/el7/

Repo_gpgcheck=0

Enabled=1

Gpgkey=https://packages.gitlab.com/gpg.key
(3)更新本地yum缓存
# sudo yum makecache
(4)yum安装gitlab,此处安装版本是11.8.0
# sudo yum install gitlab-ce #自动安装最新版
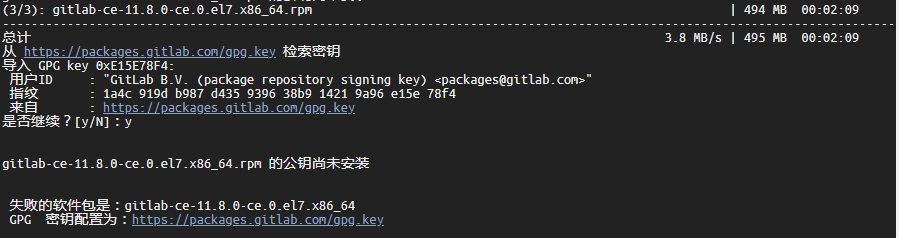
安装遇到以上错误提示,需要增加一个nogpgcheck参数:
# sudo yum install gitlab-ce --nogpgcheck #自动安装最新版
也可以安装指定的版本(迁移数据需要原库版本一致)
# sudo yum install gitlab-ce-11.8.0 --nogpgcheck #安装指定版本
- 基于rpm进行安装Gitlab
(1)安装依赖包、下载安装gitlab rpm包
# yum install curl openssh-server postfix cronie

# yum -y install policycoreutils-python   #必须安装该依赖包
(2)下载安装包
# wget --content-disposition https://packages.gitlab.com/gitlab/gitlab-ce/packages/el/7/gitlab-ce-10.8.0-ce.0.el7.x86_64.rpm/download.rpm

# rpm -ivh gitlab-ce-10.8.0-ce.0.el7.x86_64.rpm
(3)对GitLab进行编译
# gitlab-ctl reconfigure
二、Gitlab 配置
修改配置文件:
# mkdir -pv /oadata/git-data

# mkdir /oadata/gitlab/backup

# chown -R git.git /oadata/gitlab  # 备份目录

# chown -R git.git /oadata/git-data  # Git数据保存目录

# vim /etc/gitlab/gitlab.rb
external_url 'http://***'

gitlab_rails['time_zone'] = 'Asia/Shanghai'

gitlab_rails['gitlab_email_enabled'] = true

gitlab_rails['gitlab_email_from'] = '***'

gitlab_rails['gitlab_email_display_name'] = '***'

gitlab_rails['gitlab_email_reply_to'] = '***'

gitlab_rails['ldap_enabled'] = true

gitlab_rails['ldap_servers'] = YAML.load <<-'EOS'

   main: # 'main' is the GitLab 'provider ID' of this LDAP server

     label: '***'

     host: '***'

     port: 389

     uid: 'uid'

     bind_dn: 'cn=root,***'

     password: '***'

     encryption: 'plain' # "start_tls" or "simple_tls" or "plain"

     verify_certificates: false

     active_directory: true

     allow_username_or_email_login: true

     lowercase_usernames: true

     block_auto_created_users: false

     base: 'ou=users,***'

     user_filter: '(memberOf=cn=gitlab,ou=groups,***)'

EOS

gitlab_rails['manage_backup_path'] = true

gitlab_rails['backup_path'] = "/oadata/gitlab/backups"

gitlab_rails['backup_archive_permissions'] = 0644

gitlab_rails['backup_keep_time'] = 129600

git_data_dirs({

   "default" => {

     "path" => "/oadata/git-data"

    }

})

gitlab_rails['smtp_enable'] = true

gitlab_rails['smtp_address'] = "***"

gitlab_rails['smtp_port'] = 25

gitlab_rails['smtp_user_name'] = "***"

gitlab_rails['smtp_password'] = "***"

gitlab_rails['smtp_domain'] = "***"

gitlab_rails['smtp_authentication'] = "login"

gitlab_rails['smtp_enable_starttls_auto'] = true

gitlab_rails['smtp_tls'] = false
再次进行编译更新配置
# gitlab-ctl reconfigure
常用相关命令:
# gitlab-ctl stop   # 关闭服务

# gitlab-ctl start  # 开启服务

# gitlab-ctl restart  # 重启服务

# gitlab-ctl status  # 查看服务状态

# gitlab-ctl tail  # 查看日志

# gitlab-rake gitlab:backup:create  # 创建备份

# gitlab-rake gitlab:backup:restore BACKUP=备份文件编号  #  恢复备份

# cat /opt/gitlab/embedded/service/gitlab-rails/VERSION  # 查看版本信息
三、Gitlab汉化
(1)下载对应版本的汉化包
# wget https://gitlab.com/xhang/gitlab/-/archive/v11.8.0-zh/gitlab-v11.8.0-zh.tar
(2)更新语言包文件
# gitlab-ctl stop

# tar xvf gitlab-v11.8.0-zh.tar

# \cp -rf gitlab-v11.8.0-zh/* /opt/gitlab/embedded/service/gitlab-rails/

# chown -R

# gitlab-ctl reconfigure

# gitlab-ctl restart
四、Gitlab 备份与恢复
(1)备份脚本
# vim /oadata/gitlab/backup/sh/gitlab_backup.sh
#!/bin/bash

now=`date +%Y%m%d`

echo "开始执行gitlab备份..."

/opt/gitlab/bin/gitlab-rake gitlab:backup:create

echo "备份完成."

echo "清理超过10天的备份数据..."

/usr/bin/find /oadata/gitlab/backups/*gitlab_backup.tar -mtime +10 -exec rm -f {} \;

echo "清理完成."

echo "开始备份配置文件: gitlab.rb , gitlab-secrets.json"

tar -cvf /oadata/gitlab/backups/config/${now}_gitlab_config_backup.tar /etc/gitlab/gitlab.rb /etc/gitlab/gitlab-secrets.json

echo "清理超过30天的配置备份数据..."

/usr/bin/find /oadata/gitlab/backups/config/*gitlab_config_backup.tar -mtime +30 -exec rm -f {} \;

echo "清理完成."
# chmod 755 /oadata/gitlab/backup/sh/gitlab_backup.sh
(2)备注定时备份
- 每天2点50进行备份
50 02 * * * /oadata/gitlab/sh/gitlab_backup.sh
(3)Gitlab恢复
- 恢复前,首先停止相关数据连接服务
# gitlab-ctl stop unicorn

# gitlab-ctl stop sidekiq

# gitlab-rake gitlab:backup:restore BACKUP=备份文件编号
更换机器后进行恢复,还需要手工恢复文件: /etc/gitlab/gitlab.rb /etc/gitlab/gitlab-secrets.json
五、Gitlab升级
- 在升级前一定要做好备份,记录自己当前gitlab-ca的版本号。
# cat /opt/gitlab/embedded/service/gitlab-rails/VERSION

# gitlab-rake gitlab:backup:create
- 升级Gitlab(注意:由于升级不能跨越大版本号,因此只能升级到当前大版本号到最高版本,方可升级到下一个大版本号)
关闭连接服务
# gitlab-ctl stop unicorn

# gitlab-ctl stop sidekiq
以下为将Gitlab 11.8.0 升级为 12.0.3. 依次执行下面指令逐步升级命令,在每一步安装成功后如果发现界面500,不可访问,那么执行 gitlab-ctl reconfigure 指令刷新配置文件。(一定保证数据可以正常访问方可执行下一步升级指令)。
通过yum升级
# yum install gitlab-ce-11.11.5-ce.0.el7
测试各功能验证无问题后,再次进行升级操作:
# yum install gitlab-ce-12.0.3-ce.0.el7
或通过rpm升级
# rpm -Uvh gitlab-ce-11.11.5-ce.0.el7.rpm
测试各功能验证无问题后,再次进行升级操作:
rpm -Uvh gitlab-ce-11.11.5-ce.0.el7.rpm
六、访问Gitlab postgresql
1. 通过控制台访问数据库
[root@localhost ~]# su - gitlab-psql     //登陆用户

-sh-4.1$ psql -h /var/opt/gitlab/postgresql -d gitlabhq_production   连接到gitlabhq_production库

psql (9.2.18)

Type "help" for help.

gitlabhq_production=#  \h    查看帮助命令

Available help:

  ABORT                            CREATE FUNCTION                  DROP TABLE

  ALTER AGGREGATE                  CREATE GROUP                     DROP TABLESPACE

  ALTER COLLATION                  CREATE INDEX                     DROP TEXT SEARCH CONFIGURATION

  ALTER CONVERSION                 CREATE LANGUAGE                  DROP TEXT SEARCH DICTIONARY

  ALTER DATABASE                   CREATE OPERATOR                  DROP TEXT SEARCH PARSER

  ALTER DEFAULT PRIVILEGES         CREATE OPERATOR CLASS            DROP TEXT SEARCH TEMPLATE

  ALTER DOMAIN                     CREATE OPERATOR FAMILY           DROP TRIGGER

  ALTER EXTENSION                  CREATE ROLE                      DROP TYPE

……………………………………………………………………………………………………………………

gitlabhq_production-# \l     //查看数据库

                                             List of databases

        Name         |    Owner    | Encoding |   Collate   |    Ctype    |        Access privileges

---------------------+-------------+----------+-------------+-------------+---------------------------------

 gitlabhq_production | gitlab      | UTF8     | en_US.UTF-8 | en_US.UTF-8 |

 postgres            | gitlab-psql | UTF8     | en_US.UTF-8 | en_US.UTF-8 |

 template0           | gitlab-psql | UTF8     | en_US.UTF-8 | en_US.UTF-8 | =c/"gitlab-psql"               +

                     |             |          |             |             | "gitlab-psql"=CTc/"gitlab-psql"

 template1           | gitlab-psql | UTF8     | en_US.UTF-8 | en_US.UTF-8 | =c/"gitlab-psql"               +

                     |             |          |             |             | "gitlab-psql"=CTc/"gitlab-psql"

(4 rows)

gitlabhq_production-# \dt   //查看多表

                       List of relations

 Schema |                 Name                 | Type  | Owner

--------+--------------------------------------+-------+--------

 public | abuse_reports                        | table | gitlab

 public | appearances                          | table | gitlab

 public | application_settings                 | table | gitlab

 public | audit_events                         | table | gitlab

 public | award_emoji                          | table | gitlab

 public | boards                               | table | gitlab

 public | broadcast_messages                   | table | gitlab

……………………………………………………………………………………………………………………

gitlabhq_production-# \d abuse_reports    //查看单表

                                      Table "public.abuse_reports"

    Column    |            Type             |                         Modifiers

--------------+-----------------------------+------------------------------------------------------------

 id           | integer                     | not null default nextval('abuse_reports_id_seq'::regclass)

 reporter_id  | integer                     |

 user_id      | integer                     |

 message      | text                        |

 created_at   | timestamp without time zone |

 updated_at   | timestamp without time zone |

 message_html | text                        |

Indexes:

    "abuse_reports_pkey" PRIMARY KEY, btree (id)

gitlabhq_production-# \di    //查看索引

                                                        List of relations

 Schema |                              Name                               | Type  | Owner  |                Table

--------+-----------------------------------------------------------------+-------+--------+--------------------------------

------

 public | abuse_reports_pkey                                              | index | gitlab | abuse_reports

 public | appearances_pkey                                                | index | gitlab | appearances

 public | application_settings_pkey                                       | index | gitlab | application_settings

 public | audit_events_pkey                                               | index | gitlab | audit_events

 public | award_emoji_pkey                                                | index | gitlab | award_emoji

 public | boards_pkey                                                     | index | gitlab | boards

 public | broadcast_messages_pkey                                         | index | gitlab | broadcast_messages

 public | chat_names_pkey                                                 | index | gitlab | chat_names

 public | ci_application_settings_pkey                                    | index | gitlab | ci_application_settings

 public | ci_builds_pkey                                                  | index | gitlab | ci_builds

 public | ci_commits_pkey                                                 | index | gitlab | ci_commits

………………………………………………………………………………………………………………………………………………

gitlabhq_production=# SELECT spcname FROM pg_tablespace;  //查看所有表空间

  spcname

------------

 pg_default

 pg_global

(2 rows)

gitlabhq_production-# \q    //退出psql

-sh-4.1$ exit                //退出登录用户

logout
2. 开启临时远程无密码访问postgresql
(1)修改gitlab.rb
# vim /etc/gitlab/gitlab.rb
配置为:
postgresql['enable'] = true

postgresql['listen_address'] = '0.0.0.0'

postgresql['port'] = 5432

postgresql['data_dir'] = "/var/opt/gitlab/postgresql/data"

...

...

postgresql['custom_pg_hba_entries'] = {

  APPLICATION:[ { # APPLICATION should identify what the settings are used for

    type: "host",

    database: "all",

    user: "all",

    cidr: "0.0.0.0/0",

    method: "trust"

    }

  ]

}
# gitlab-ctl reconfigure
等待报错。没办法,上述修改,必然引发报错。
(2)修改pg_hba.conf
vim /var/opt/gitlab/postgresql/data/pg_hba.conf
修改为:
host all all 0.0.0.0/0 trust
注意:从此,不能再执行gitlab-ctl reconfigure 命令了,因为如果再执行gitlab-ctl reconfigure ,那么pg_hba.conf的修改就会被还原。
# gitlab-ctl restart
七、常见问题及解决参考
- 连接gitlab postgresql
- 最全官方文档 # 可以解决大多数你遇到的问题
- 数据恢复时遇到的一个问题
最新文章
- 帝国cms内容页调用缩略图的原始尺寸图片
- [翻译]写给精明Java开发者的测试技巧
- 简述block
- 开发基于C#.NET的mongodb桌面版的应用程序(1)
- Linux实现ftp账号同时访问两个目录方法
- redis学习笔记——(2)
- JQuery基础教程:入门
- halcon,C# 学习
- 项目用到异步加载头像LasyList
- jQuery动态实现title的修改 失效问题
- WPF Canvas小例子
- <link>: rel, href
- 【转】Fundebug上线微信小游戏错误监控!支持自动截屏!
- 壁虎书1 The Machine Learning Landscape
- html-div+span-4
- 如何利用 LTE/4G 伪基站+GSM 中间人攻击攻破所有短信验证
- FreeRTOS 任务与调度器(2)
- Azure vm 扩展脚本自动部署Elasticsearch集群
- Java知多少(26)源文件的声明规则
- css设计并排布局