centos7下编译安装redis5.05

准备环境:
1、一台centos7机器,配置没有什么要求(能联网)
2、下载好redis压缩包
下载redis包:
1、登录redis官网:
2、选择适合自己用的版本,一定要下载稳定版,不推荐下载最新版本
我这里就下载5.05版本作为案例:

下载其它版本:

其它历史版本需要在google code上下载
官方的安装教程:

我这边直接按照提供操作步骤安装出现报错:
解压安装包到/usr/local目录下
进入解压目录:
执行编译:
提示未找到gcc命令:
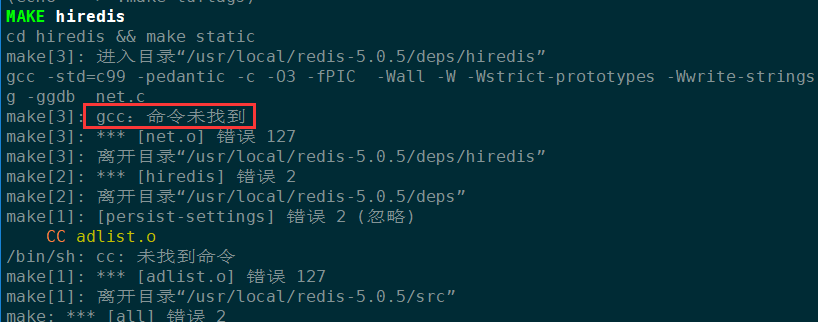
解决办法安装gcc命令:
# yum -y install gcc
gcc安装完成后从新执行make编译命令:
又出现报错:
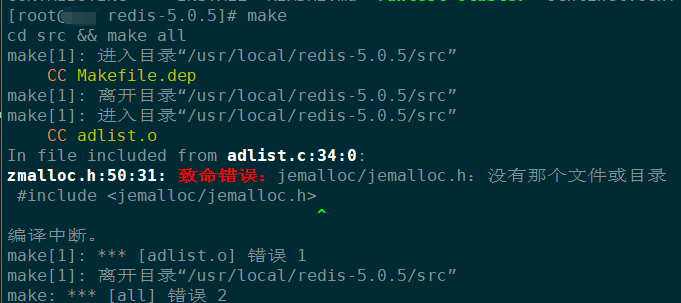
根据redis4.0的安装命令添加MALLOC=libc:
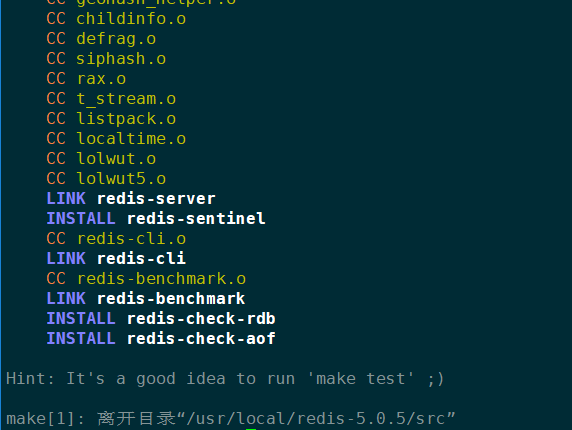
# make MALLOC=libc
执行成功:
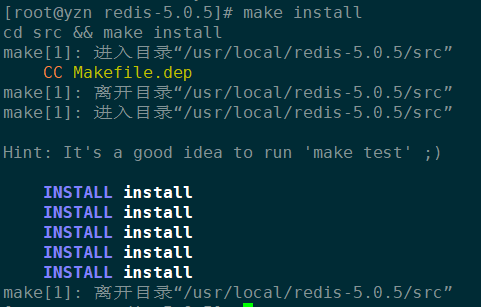
安装:
# make install
二、启动redis的三种方式:
切换到redis的src目录下:
[root@yzn redis-5.0.5]# cd src/
1、直接启动redis
[root@yzn src]# ./redis-server

12670:C 08 Jul 2019 15:17:07.387 # oO0OoO0OoO0Oo Redis is starting oO0OoO0OoO0Oo

12670:C 08 Jul 2019 15:17:07.387 # Redis version=5.0.5, bits=64, commit=00000000, modified=0, pid=12670, just started

12670:C 08 Jul 2019 15:17:07.387 # Warning: no config file specified, using the default config. In order to specify a config file use ./redis-server /path/to/redis.conf

12670:M 08 Jul 2019 15:17:07.389 * Increased maximum number of open files to 10032 (it was originally set to 1024).

                _._

           _.-``__ ''-._

      _.-``    `.  `_.  ''-._           Redis 5.0.5 (00000000/0) 64 bit

  .-`` .-```.  ```\/    _.,_ ''-._

 (    '      ,       .-`  | `,    )     Running in standalone mode

 |`-._`-...-` __...-.``-._|'` _.-'|     Port: 6379

 |    `-._   `._    /     _.-'    |     PID: 12670

  `-._    `-._  `-./  _.-'    _.-'

 |`-._`-._    `-.__.-'    _.-'_.-'|

 |    `-._`-._        _.-'_.-'    |           http://redis.io

  `-._    `-._`-.__.-'_.-'    _.-'

 |`-._`-._    `-.__.-'    _.-'_.-'|

 |    `-._`-._        _.-'_.-'    |

  `-._    `-._`-.__.-'_.-'    _.-'

      `-._    `-.__.-'    _.-'

          `-._        _.-'

              `-.__.-'

12670:M 08 Jul 2019 15:17:07.391 # WARNING: The TCP backlog setting of 511 cannot be enforced because /proc/sys/net/core/somaxconn is set to the lower value of 128.

12670:M 08 Jul 2019 15:17:07.391 # Server initialized

12670:M 08 Jul 2019 15:17:07.391 # WARNING overcommit_memory is set to 0! Background save may fail under low memory condition. To fix this issue add 'vm.overcommit_memory = 1' to /etc/sysctl.conf and then reboot or run the command 'sysctl vm.overcommit_memory=1' for this to take effect.

12670:M 08 Jul 2019 15:17:07.391 # WARNING you have Transparent Huge Pages (THP) support enabled in your kernel. This will create latency and memory usage issues with Redis. To fix this issue run the command 'echo never > /sys/kernel/mm/transparent_hugepage/enabled' as root, and add it to your /etc/rc.local in order to retain the setting after a reboot. Redis must be restarted after THP is disabled.

12670:M 08 Jul 2019 15:17:07.391 * Ready to accept connections
如图:redis启动成功,但是这种凡是需要一直打开窗口,不能进行其他操作,不方便
ctrl+c可以关闭程序
2、以后台进程方式启动redis
第一步:修改redis.conf文件
daemonize参数:

      redis.conf配置文件中daemonize守护进程,默认是NO。

      daemonize是用来指定redis是否要用守护进程的方式启动

daemonize设置yes或者no的区别:

  daemonize:yes:redis采用的是单进程多线程的模式,当redis.conf中选项daemonize参数为yes时,代表开启守护进程模式,该模式下,redis会在后台运行,并将进程pid号写入到redis.conf选项pidfile设置的文件中,此时redis将一直运行,除非手动kill该进程。

  daemonize:no:当daemonize选项设置为no时,当前界面将进入redis的命令界面,exit强制退出或者关闭连接工具(putty、xshell等工具)都会导致redis进程退出
redis的配置文件在redis的主目录下:
文件名:redis.conf
编辑文件:
# vim redis.conf

我们修改为yes:

绑定地址(默认仅主机可连接,修改为任意主机可以连接):
第二步:指定redis.conf文件启动
[root@yzn redis-5.0.5]# /usr/local/redis-5.0.5/src/redis-server /usr/local/redis-5.0.5/redis.conf
12706:C 08 Jul 2019 15:33:16.232 # oO0OoO0OoO0Oo Redis is starting oO0OoO0OoO0Oo
12706:C 08 Jul 2019 15:33:16.233 # Redis version=5.0.5, bits=64, commit=00000000, modified=0, pid=12706, just started
12706:C 08 Jul 2019 15:33:16.233 # Configuration loaded
查看程序是否启动

这里我们看到已经后台运行了,注意这里监听的地址为127.0.0.1:6379也就是只能本机连接需要局域网其它设别连接我们需要再修改配置文件修改bind参数
使用kill杀死进程:
# kill 12707
# 注意:这里的12707是进程id号,在ps命令中查到的
3、设置redis开机自启:
第一步、添加开机启动服务:
[root@yzn ~]# vim /etc/systemd/system/redis-server.service #文件不存在要编辑创建
[Unit]
Description=The redis-server Process Manager
After=syslog.target network.target
[Service]
Type=forking
PIDFile=/var/run/redis_6379.pid
ExecStart=/usr/local/redis-5.0.5/src/redis-server /usr/local/redis-5.0.5/redis.conf
PrivateTmp=True
[Install]
WantedBy=multi-user.target
设置为开机启动:
# systemctl daemon-reload
启动服务
# systemctl start redis-server
# 注:暂时没有添加暂停服务,后续会添加上
最新文章
- 自定义搭建PHP开发环境
- ajax获取数据的形象比喻,助于理解记忆
- iOS开发中的错误整理,启动图片设置了没有效果;单独创建xib需要注意的事项;图片取消系统渲染的快捷方式
- BZOJ2735 : 世博会
- 简单探索ContentProviderOperation
- JVM最多可创建多少线程
- C# DataGridView的列对象属性探讨 (未完待续)
- Eclipse编辑器基本设置
- Oracle函数function
- Python面向对象编程(四)
- R语言进行机器学习方法及实例(一)
- java+接口自动化+eclipse之-----环境搭建
- js 讲解
- KMP算法的next[]数组 的求法
- ZOJ3967 : Card Game
- BBS(第一天)项目之 注册功能实现通过forms验证与 前端ajax请求触发查询数据库判断用户是否存在的功能实现
- 浅析USB之设备枚举
- python 包详解
- DIOCP开源项目-数据库连接池的使用<多帐套数据库>
- keep-alive pipeline区别
热门文章
- 安装npm install时,长时间停留在fetchMetadata的解决方法
- 【redis】pipeline - 管道模型
- POJ-2299 Ultra-QuickSort(用树状数组求逆序对数)
- open Live Writer 代码插件安装
- ag.百家下三路怎么看,如何玩好百家了
- 双向队列 SDUT 1466
- 二、JVM之体系结构
- Swaps and Inversions HDU - 6318 树状数组+离散化
- STL与基本数据结构
- [ERR] Node goodsleep.vip:6379 is not empty. Either the node already knows other nodes (check with CLUSTER NODES) or contains some key in database 0.