vue3 门户网站搭建6-wangeditor
2024-09-08 17:27:50
门户网站的新闻、公告等文章,内容可配置,故引入 wagneditor
1、安装: npm i wangeditor
2、方便调用,抽成组件:
<template>

  <div ref='editor'></div>

</template>

<script setup>

import { ref, onMounted, onBeforeUnmount, getCurrentInstance, onUpdated } from 'vue';

import WangEditor from 'wangeditor';

import { getItem, StorageKey } from "@/utils/storage";

import { GetImageUploadUrl } from "@/api/admin";

const { proxy } = getCurrentInstance();

const editor = ref(null);

let params = defineProps([ 'data' ]);

let instance

onMounted(() => {

  createEditor();

});

onUpdated(() => {

  if (instance) {

    instance.txt.html(params.data)

  }

})

const createEditor = () => {

  instance = new WangEditor(editor.value)

  instance.config.showLinkImg = false

  instance.config.showLinkImgAlt = false

  instance.config.showLinkImgHref = false

  instance.config.uploadImgMaxSize = 2 * 1024 * 1024 // 2M

  instance.config.uploadFileName = 'file'

  instance.config.height = 700;

  // 图片上传需添加token到请求头

  instance.config.uploadImgShowBase64 = true;

  instance.config.uploadImgHeaders = {

    token: getItem(StorageKey.token)

  }

  // 图片返回格式不同,需要自定义返回格式

  instance.config.uploadImgHooks = {

    // 图片上传并返回了结果,想要自己把图片插入到编辑器中

    // 例如服务器端返回的不是 { errno: 0, data: [...] } 这种格式,可使用 customInsert

    customInsert: function(insertImgFn, result) {

      // console.log('result', result)

      // result 即服务端返回的接口

      // insertImgFn 可把图片插入到编辑器,传入图片 src ,执行函数即可

      if (result.data && result.data.length) {

        result.data.forEach(item => insertImgFn(item))

      }

    }

  }

  // 图片上传的地址url

  instance.config.uploadImgServer = GetImageUploadUrl();

  Object.assign(instance.config, {

    // 输入内容会触发change事件

    onchange(e) {

      console.log('change', e)

    },

  })

  instance.create()

}

onBeforeUnmount(() => {

  instance.destroy();

  instance = null;

})

</script>
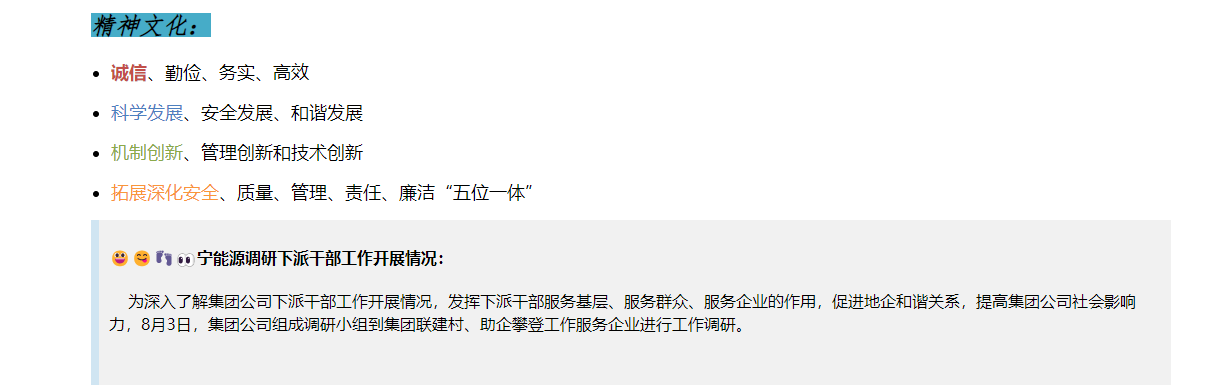
界面调用即可看到效果:
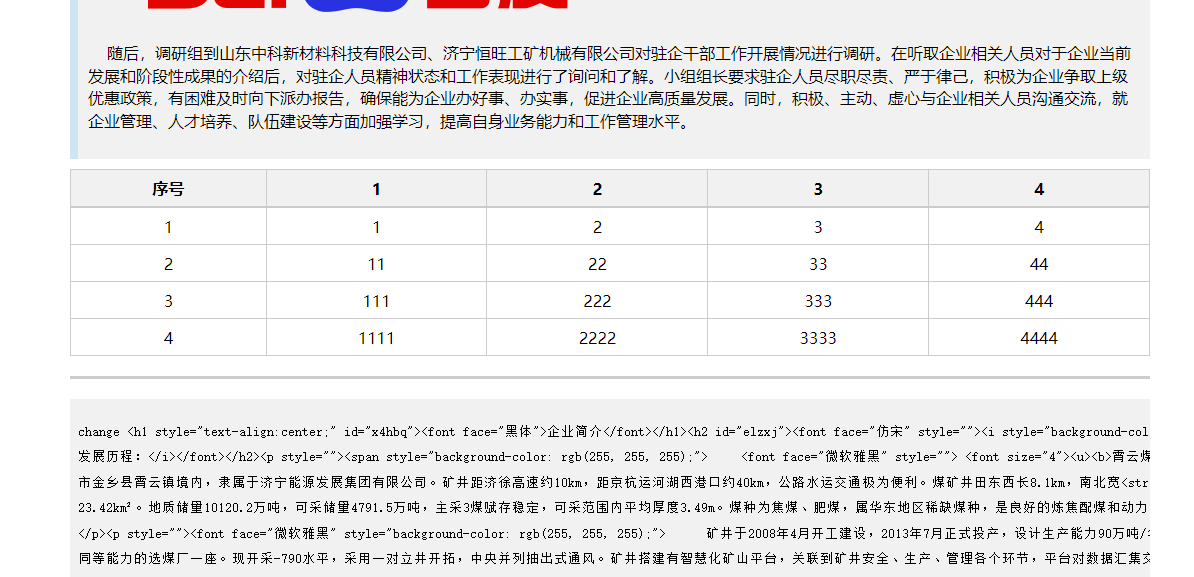
除了可编辑内容外,当然还要将编辑的内容渲染出来:(部分样式遇到问题,未渲染成功:
查看代码发现是对应的 class 不存在,源码中又没有 css 文件可以直接引入,都是些 less 文件。。。只能手动抽一下:
@mixin wangeditor {

  blockquote {

    display: block;

    border-left: 8px solid #d0e5f2;

    padding: 5px 10px;

    margin: 10px 0;

    line-height: 1.4;

    font-size: 100%;

    background-color: #f1f1f1;

  }

  ul, ol {

    padding-left: 20px;

  }

  table {

    border-top: 1px solid #ccc;

    border-left: 1px solid #ccc;

    td, th {

      border-bottom: 1px solid #ccc;

      border-right: 1px solid #ccc;

      padding: 3px 5px;

      min-height: 30px;

      height: 30px;

    }

    th {

      border-bottom: 2px solid #ccc;

      text-align: center;

      background-color: #f1f1f1;

    }

  }

  /*分割线样式*/

  hr {

    cursor: pointer;

    display: block;

    height: 0;

    border: 0;

    border-top: 3px solid #ccc;

    margin: 20px 0;

  }

  pre {

    line-height: 1.5;

    overflow: auto;

    background-color: #f1f1f1;

    code {

      display: block;

    }

  }

  /* 代码段 */

  code {

    display: inline-block;

    background-color: #f1f1f1;

    border-radius: 3px;

    padding: 3px 5px;

    margin: 0 3px;

  }

}
再看渲染,样式大体相同了:
最新文章
- C# GDI+发生一般性错误(A generic error occurred in GDI+))
- [蓝牙] 4、Heart Rate Service module
- 详解CSS中clear属性both、left、right值的含义
- SQLite常用网址
- mac 安装memcached服务
- BT3入门之中文语言支持
- C# 标准查询表达式
- Node.js 学习(七)Node项目部署工具之forever
- 【转】/etc/grub.conf文件详解
- 35个jQuery小技巧(转)
- [置顶] ANT build.xml文件详解
- CentOS 6.2下搭建Web服务器
- Linux kernel 的 sendfile 是如何提高性能的
- Lesson 2-2(列表,元组)
- 《程序设计入门——C语言》翁恺老师 第五周编程练习记录
- FFMEPG -- A ffmpeg and SDL Tutorial : tutorial05
- SqlServer表和EXCEL数据互相复制方法
- 步进电机 28BYJ-48介绍和驱动及编程
- apk静态注射[转]-未实践
- 敏捷转型中why与how的总结