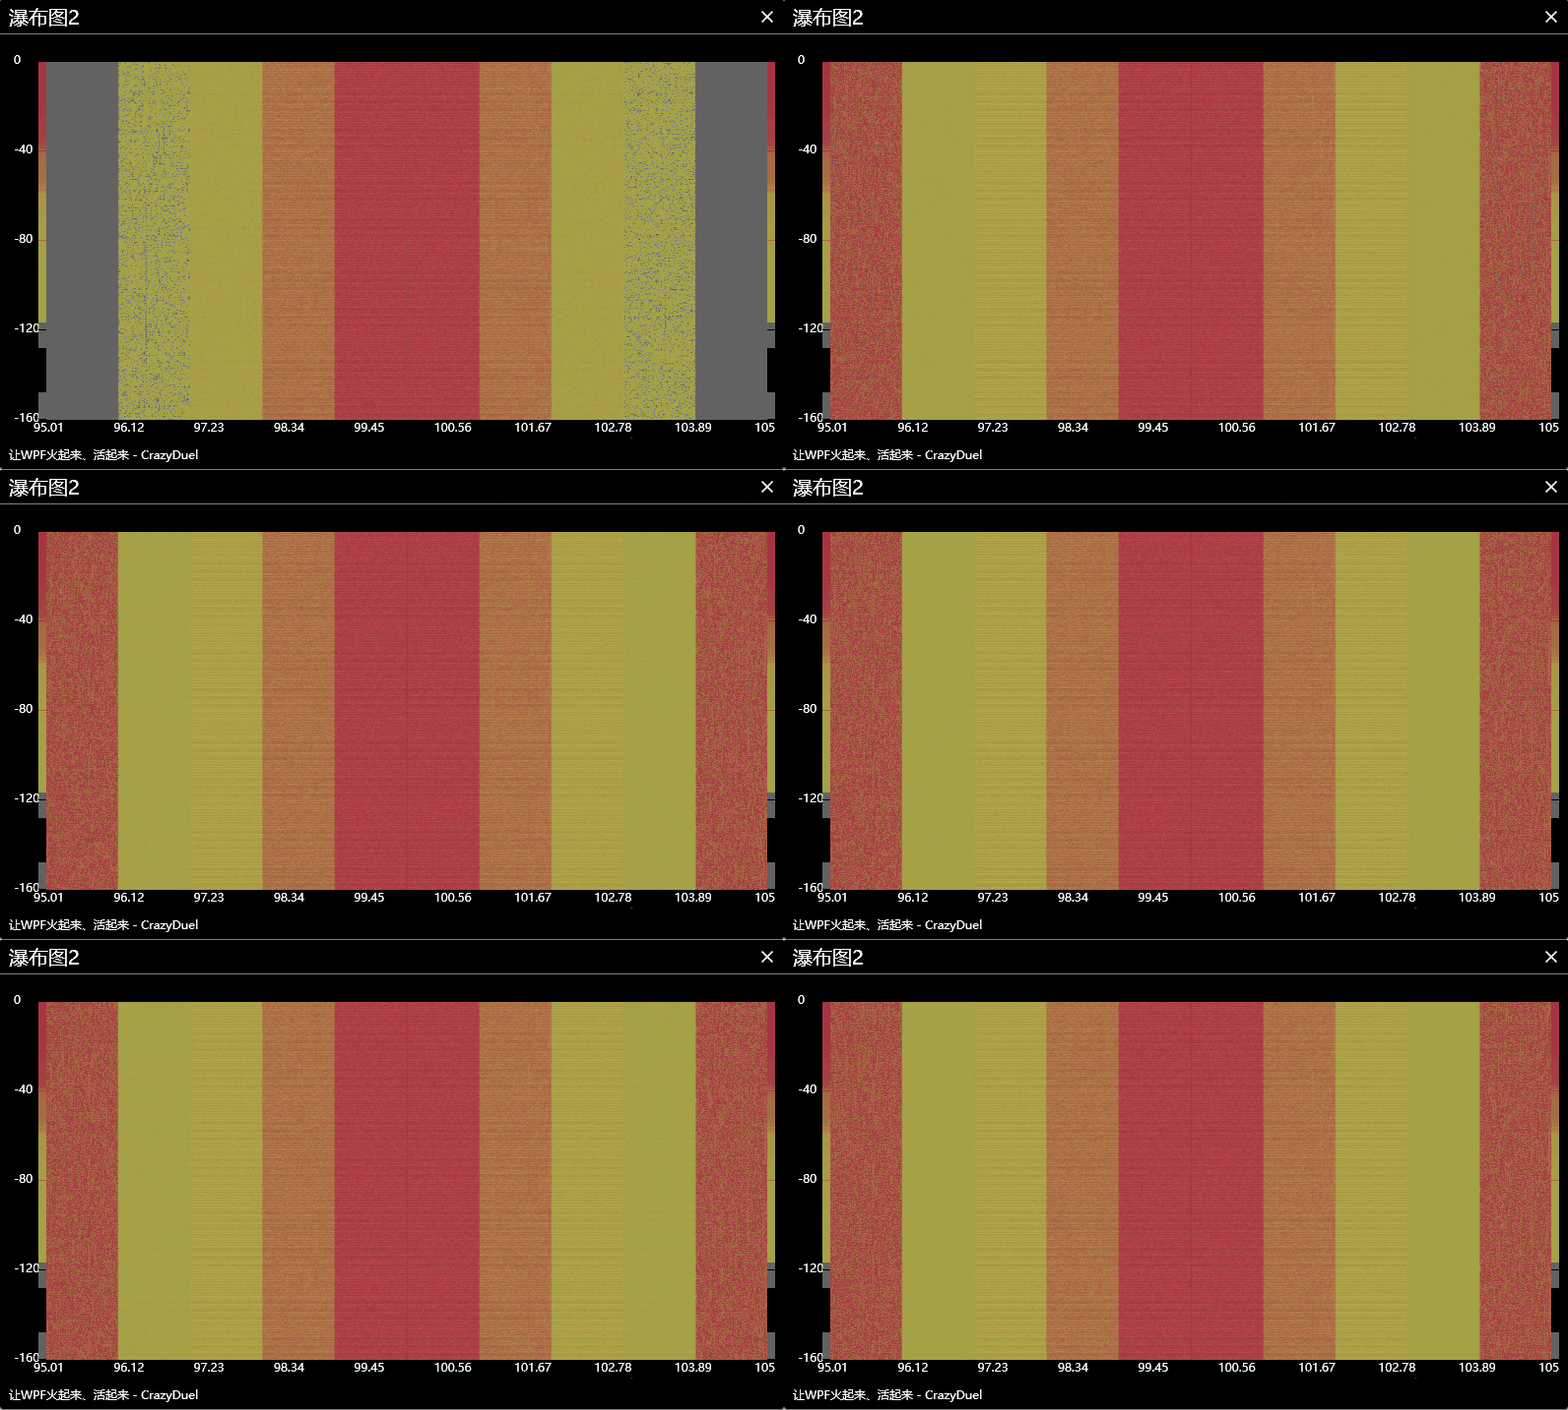
WPF数据可视化-瀑布图
2024-09-01 23:15:26
实现方式一:
将数据(Point[])根据索引沿X轴使用虚拟画布进行绘制,每个数据绘制大小为1px * 1px;最终绘制出的宽度等于数据的总长度。标记并存储当前绘制的图为PreviousBitmap; 继续置顶绘制第二组数据,第二组数据绘制完后,将标记的PreviousBitmap作为Image在Y轴距离顶部距离为1px的地方用DrawingContext.DrawImage()方式绘制,以此类推。核心代码如下:
private void DoAddDataArray(Point[] arrPoints)

{

    this.Dispatcher.Invoke(DispatcherPriority.Normal, new Action(() =>

    {

        double dPixelWidth = Pixel;

        double dContainerWidth = this.VbxContainer.ActualWidth;

        double dContainerHeight = this.VbxContainer.ActualHeight;

        double dPixelHeight = Pixel/2d;

        double dCellHeight = 1;

        double dCellWidth = 1;

        DrawingVisual drawingVisual = new DrawingVisual();

        DrawingContext drawingContext = drawingVisual.RenderOpen();

        drawingContext.DrawRectangle(new SolidColorBrush(Colors.Blue),

                new Pen(), new Rect(0, 0, dPixelWidth, dCellHeight));

        // 绘制新数据

        for (int i = 0; i < arrPoints.Length; i++)

        {

            double dCellX = Math.Round(((arrPoints[i].X - MinAxisX) / (MaxAxisX - MinAxisX)) * Pixel);

            double dY = arrPoints[i].Y;

            Color oColor = this.GetColor(dY);

            //drawingContext.DrawRectangle(new SolidColorBrush(oColor),

            //    new Pen(), new Rect(dCellX, 0, dCellWidth, dCellHeight));

            LinearGradientBrush lineBrush = new LinearGradientBrush();

            lineBrush.GradientStops.Add(new GradientStop(Colors.Transparent, 0));

            lineBrush.GradientStops.Add(new GradientStop(oColor, 0.25));

            lineBrush.GradientStops.Add(new GradientStop(oColor, 0.5));

            lineBrush.GradientStops.Add(new GradientStop(oColor, 0.75));

            lineBrush.GradientStops.Add(new GradientStop(Colors.Transparent, 1));

            drawingContext.DrawRectangle(lineBrush, new Pen(), new Rect(dCellX-1, 0, dCellWidth + 2, dCellHeight));

        }

        // 绘制历史数据

        if (this.PreviousBitmap != null)

            drawingContext.DrawImage(this.PreviousBitmap, new Rect(0, dCellHeight, dPixelWidth, dPixelHeight));

        drawingContext.Close();

        // 生成图像处理

        RenderTargetBitmap rtbCurrent = new RenderTargetBitmap((int)dPixelWidth,

            (int)dPixelHeight, 96, 96, PixelFormats.Pbgra32);

        rtbCurrent.Render(drawingVisual);

        this.PreviousBitmap = rtbCurrent; // 当前绘制的存为历史,下次绘制时直接调用

        this.ImgMain.Source = rtbCurrent; // 显示绘制的图像

    }));

}
运行效果


实现方式二:
将数据(Point[])根据索引沿X轴使用虚拟画布进行绘制,每个数据绘制大小为1px * 1px;最终绘制出的宽度等于数据的总长度。创建一个Rectangle,将绘制的图赋值给Rectangle.Fill属性,将绘制过程中不断创建的Rectangle插入控件Stackpanel的首位。核心代码如下:
private void DoAddDataArray(Point[] arrPoints)

{

    this.Dispatcher.Invoke(DispatcherPriority.Normal, new Action(() =>

    {

        double dPixelWidth = Pixel;

        double dContainerWidth = this.VbxContainer.ActualWidth;

        double dContainerHeight = this.VbxContainer.ActualHeight;

        double dPixelHeight = Pixel / 2d;

        DrawingVisual drawingVisual = new DrawingVisual();

        DrawingContext drawingContext = drawingVisual.RenderOpen();

        drawingContext.DrawRectangle(new SolidColorBrush(Colors.Blue),

                new Pen(), new Rect(, , dPixelWidth, ));

        // 绘制新数据

        double dCellHeight = ;

        double dCellWidth = ;

        for (int i = ; i < arrPoints.Length; i++)

        {

            double dCellX = Math.Round(((arrPoints[i].X - MinAxisX) / (MaxAxisX - MinAxisX)) * Pixel);

            double dY = arrPoints[i].Y;

            Color oColor = this.GetColor(dY);

            //drawingContext.DrawRectangle(new SolidColorBrush(oColor),

            //    new Pen(), new Rect(dCellX, 0, dCellWidth, dCellHeight));

            LinearGradientBrush lineBrush = new LinearGradientBrush();

            lineBrush.GradientStops.Add(new GradientStop(Colors.Transparent, ));

            lineBrush.GradientStops.Add(new GradientStop(oColor, 0.25));

            lineBrush.GradientStops.Add(new GradientStop(oColor, 0.5));

            lineBrush.GradientStops.Add(new GradientStop(oColor, 0.75));

            lineBrush.GradientStops.Add(new GradientStop(Colors.Transparent, ));

            drawingContext.DrawRectangle(lineBrush, new Pen(), new Rect(dCellX - 0.5, , dCellWidth + , dCellHeight));

        }

        drawingContext.Close();

        // 生成图像处理

        RenderTargetBitmap rtbCurrent = new RenderTargetBitmap((int)dPixelWidth, (int), , , PixelFormats.Pbgra32);

        rtbCurrent.Render(drawingVisual);

        Rectangle rect = new Rectangle();

        rect.Width = Pixel;

        rect.Height = ;

        rect.Fill = new ImageBrush(rtbCurrent);

        // SpContainers  ---- Stackpanel

        this.SpContainers.Children.Insert(, rect);

        if (this.SpContainers.Children.Count > )

            this.SpContainers.Children.RemoveAt();

    }));

}
运行效果:


相对而言,方式二由于不断插入新的Rectangle。下移效果为控件位置变化所呈现,不像方式一是一张完整图,故画质欠缺。
性能和测试:
采用Timer生成随机数据进行测试。10毫秒1组,每组1000个数据点。 相当于每秒绘制10万个点。

测试时在Release模式下,开启多个子模块,性能勉强能接受。

环境:
语言: C#
工程:WPF
工具:Visual Studio 2017
系统:Windows
第三方插件:无
微信扫码下载源代码:

最新文章
- ASP.NET MVC RenderPartial和Partial的区别
- 【BZOJ-3122】随机数生成器 BSGS
- 第一章 企业项目开发--maven+springmvc+spring+mybatis+velocity整合
- Quartz.NET Windows
- POJ 3414 Pots【bfs模拟倒水问题】
- Web存储(Web Storage)介绍
- 如何修改vsftpd的默认根目录/var/ftp/pub到另一个目录?
- 关于百度地图(离线)使用过程报“Cannot read property 'jb' of undefined ”错误的解决办法
- Nmap 进阶使用 [ 脚本篇 ]
- JavaScript中的number跟string
- vue内引入jsPlumb流程控制器(一)
- css中如何实现左边的高度随着右边改变而改变
- Eclipse中Hadoop插件配置
- C# WebBrowser控件使用整理
- solr初认识
- C/C++打印堆栈信息
- atp
- 搭建git服务器(临时服务器,命令行形式,针对2到5人左右,轻量)
- 成功配置TOMCAT的LOG4J日志系统,格式:HTML+每天以YYYY-MM-DD.LOG命名的日志文件
- $.ajax仿axios封装
热门文章
- 【Python成长之路】装逼的一行代码:快速共享文件【华为云分享】
- springboot整合thymleaf模板引擎
- luogu P2985 [USACO10FEB]吃巧克力Chocolate Eating
- [译]C#8.0中一个使接口更加灵活的新特性-默认接口实现
- React Native--Animated:`useNativeDriver`is not supported because the native animated module is missing
- maven与ecplise的整合
- Orleans 初接触
- Cisco学习记录(一):Cisco Packet Tracer官网下载方法
- 2019年Spring Boot面试都问了什么?快看看这22道面试题!
- ASP.NET Core知多少(13):路由重写及重定向