好玩的WPF第三弹:颤抖吧,地球!消失吧,地球!
2024-08-31 21:46:50
版权声明:转载请联系本人,感谢配合!本站地址:http://blog.csdn.net/nomasp https://blog.csdn.net/NoMasp/article/details/46476421
我承认这一篇比较标题党,不过下面这个GIF貌似也和适合这个标题嘛。
(画质比较烂是因为CSDN的博客图片限制在2M,所以我设置的是20帧,时间也很短,大家可以自己把项目拷回去慢慢看)
这个最终设计出来的样式:
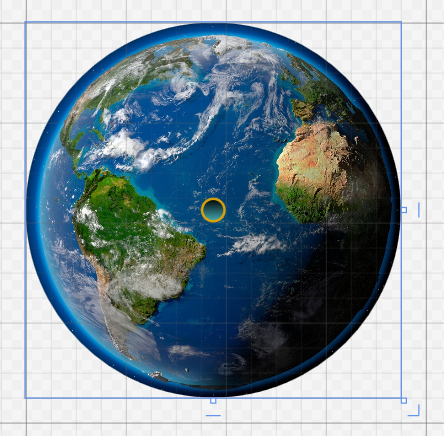
中间的小圆点是一个Button,外面是一个经过切割的Grid,Grid里面还有一个Image。
其中在加上Image(地球图片)之前,Button还是很大的,所以给他设计了渐变色。
<Button Padding="20" Foreground="White" BorderBrush="#FFD8A00A"

     FontSize="16" Click="OnClick" Margin="100" Width="20" Height="20"

     RenderTransformOrigin="0.54,-0.058">

   <Button.Background>

       <LinearGradientBrush EndPoint="0.5,1" StartPoint="0.5,0">

            <GradientStop Color="Black" Offset="0"/>

            <GradientStop Color="#FF45ADB7" Offset="1"/>

       </LinearGradientBrush>

   </Button.Background>

   <Button.Template>

       <ControlTemplate TargetType="{x:Type Button}">

           <Grid>

               <Ellipse x:Name="bg" Fill="{TemplateBinding Background}"

               Stroke="{TemplateBinding BorderBrush}" StrokeThickness="2" />

               <Ellipse x:Name="fr" Opacity="0" >

                    <Ellipse.Fill>

                         <LinearGradientBrush EndPoint="0.5,1" StartPoint="0.5,0">

                             <GradientStop Color="#CCFFFFFF" Offset="0"/>

                             <GradientStop Offset="1"/>

                             <GradientStop Color="#7FFFFFFF" Offset="0.392"/>

                          </LinearGradientBrush>

                     </Ellipse.Fill>

              </Ellipse>

             <ContentPresenter x:Name="ContentPresenter" Margin="{TemplateBinding Padding}"

                HorizontalAlignment="{TemplateBinding HorizontalContentAlignment}"

                VerticalAlignment="{TemplateBinding VerticalContentAlignment}"/>

          </Grid>

          <ControlTemplate.Triggers>

               <Trigger Property="IsMouseOver" Value="True" >

                     <Setter TargetName="fr" Property="Opacity" Value="1"/>

                     </Trigger>

               </ControlTemplate.Triggers>

          </ControlTemplate>

     </Button.Template>

</Button>
<Image Source="Earth.jpg" />上面这两个控件都放到Grid内部。
<Grid x:Name="layoutroot">

    <Grid.Resources>

        <Storyboard x:Key="std">

            <DoubleAnimation From="1" To="0" Duration="0:0:6"

                Storyboard.TargetName="layoutroot"

                Storyboard.TargetProperty="(UIElement.OpacityMask).(GradientBrush.GradientStops)[1].Offset"/>

            <DoubleAnimation Duration="0:0:4.5" BeginTime="0:0:1.5" From="1" To="0"

                Storyboard.TargetName="layoutroot"

                Storyboard.TargetProperty="(UIElement.OpacityMask).(GradientBrush.GradientStops)[2].Offset"/>

            <ColorAnimation Duration="0" To="#00000000" Storyboard.TargetName="layoutroot"

                Storyboard.TargetProperty="(UIElement.OpacityMask).(GradientBrush.GradientStops)[2].Color"/>

        </Storyboard>

    </Grid.Resources>

    <Grid.OpacityMask>

        <LinearGradientBrush EndPoint="0.5,1" StartPoint="0.5,0">

            <GradientStop Color="#FF000000" Offset="0"/>

            <GradientStop Color="#FF000000" Offset="1"/>

            <GradientStop Color="#FF000000" Offset="1"/>

        </LinearGradientBrush>

    </Grid.OpacityMask>

    <Grid.Clip>

        <EllipseGeometry Center="150 150" RadiusX="150" RadiusY="150"/>

    </Grid.Clip>

    <Grid.Background>

        <LinearGradientBrush EndPoint="0.5,1" StartPoint="0.5,0">

            <GradientStop Color="#FFFCFCFC" Offset="0.003"/>

            <GradientStop Color="#FF76253C" Offset="1"/>

            <GradientStop Color="#FF29769D" Offset="0.318"/>

            <GradientStop Color="#FFA94444" Offset="0.84"/>

            <GradientStop Color="#FFB2B62F" Offset="0.488"/>

            <GradientStop Color="#FF9B2BD3" Offset="0.666"/>

            <GradientStop Color="#FF5CC569" Offset="0.151"/>

        </LinearGradientBrush>

    </Grid.Background>

</Grid>
上面这些都是给Grid设置的渐变色,有了Image也没太大用了。
真正有用的是Resources。
后台文件中的抖动效果如下(在上一篇详细介绍了抖动过程):
// 全局变量

private double left = 0;

private double top = 0;

private Storyboard storyboard = new Storyboard();

// 初始化

left = mainWindow.Left;

top = mainWindow.Top;

private void DoubleAnimation()

{

    // 窗口抖动效果

    DoubleAnimation doubleAnimationL1 = new DoubleAnimation();

    doubleAnimationL1.BeginTime = TimeSpan.FromSeconds(0.01);

    doubleAnimationL1.Duration = TimeSpan.FromSeconds(0.01);

    doubleAnimationL1.From = mainWindow.Left;

    doubleAnimationL1.To = mainWindow.Left - 6;

    doubleAnimationL1.EasingFunction = new BounceEase() { Bounces = 12, EasingMode = EasingMode.EaseInOut };

    Storyboard.SetTarget(doubleAnimationL1, mainWindow);

    Storyboard.SetTargetProperty(doubleAnimationL1, new PropertyPath("(Left)"));

    DoubleAnimation doubleAnimationL2 = new DoubleAnimation();

    doubleAnimationL2.BeginTime = TimeSpan.FromSeconds(0.001);

    doubleAnimationL2.Duration = TimeSpan.FromSeconds(0.01);

    doubleAnimationL2.From = mainWindow.Left;

    doubleAnimationL2.To = mainWindow.Left + 6;

    doubleAnimationL2.EasingFunction = new BounceEase() { Bounces = 12, EasingMode = EasingMode.EaseInOut };

    Storyboard.SetTarget(doubleAnimationL2, mainWindow);

    Storyboard.SetTargetProperty(doubleAnimationL2, new PropertyPath("(Left)"));

    DoubleAnimation doubleAnimationT1 = new DoubleAnimation();

    doubleAnimationT1.BeginTime = TimeSpan.FromSeconds(0.01);

    doubleAnimationT1.Duration = TimeSpan.FromSeconds(0.01);

    doubleAnimationT1.From = mainWindow.Top;

    doubleAnimationT1.To = mainWindow.Top + 6; ;

    doubleAnimationT1.EasingFunction = new BounceEase() { Bounces = 12, EasingMode = EasingMode.EaseInOut };

    Storyboard.SetTarget(doubleAnimationT1, mainWindow);

    Storyboard.SetTargetProperty(doubleAnimationT1, new PropertyPath("(Top)"));

   DoubleAnimation doubleAnimationT2 = new DoubleAnimation();

   doubleAnimationT2.BeginTime = TimeSpan.FromSeconds(0.01);

   doubleAnimationT2.Duration = TimeSpan.FromSeconds(0.01);

   doubleAnimationT2.From = mainWindow.Top;

   doubleAnimationT2.To = mainWindow.Top - 6;

   doubleAnimationT2.EasingFunction = new BounceEase() { Bounces = 12, EasingMode = EasingMode.EaseInOut };

   Storyboard.SetTarget(doubleAnimationT2, mainWindow);

   Storyboard.SetTargetProperty(doubleAnimationT2, new PropertyPath("(Top)"));

   storyboard.Children.Add(doubleAnimationL1);

   storyboard.Children.Add(doubleAnimationL2);

   storyboard.Children.Add(doubleAnimationT1);

   storyboard.Children.Add(doubleAnimationT2);

   storyboard.RepeatBehavior = RepeatBehavior.Forever;

   storyboard.Completed += new EventHandler(storyboard_Completed);

   storyboard.Begin(this, true);

}

private void storyboard_Completed(object sender, EventArgs e)

{

    // 解除绑定

    storyboard.Remove(this);

    // 解除TextWindow窗口

    storyboard.Children.Clear();

    //grid.Children.Clear();

    // 恢复窗口初始位置

    mainWindow.Left = left;

    mainWindow.Top = top;

}
后台文件中的消失效果如下:
// 全局变量

Storyboard storyboard2 = null;

// 初始化

storyboard2 = (System.Windows.Media.Animation.Storyboard)layoutroot.Resources["std"];

storyboard2.Completed += (t, r) => this.Close();

this.layoutroot.Loaded += (aa, bb) =>

{

     EllipseGeometry ellipsegeometry = (EllipseGeometry)this.layoutroot.Clip;

     double dx = layoutroot.ActualWidth / 2d;

     double dy = layoutroot.ActualHeight / 2d;

     ellipsegeometry.Center = new Point(dx, dy);

     ellipsegeometry.RadiusX = dx;

     ellipsegeometry.RadiusY = dy;

};
然后是Button的OnClick事件:
private void OnClick(object sender, RoutedEventArgs e)

{

    if (storyboard2 != null)

    {

        storyboard2.Begin();

    }

    DoubleAnimation();

}
源码的话,上面也都有了。GIF我就不再上传咯,毕竟2M的限制太无趣了。
感谢您的访问,希望对您有所帮助。 欢迎大家关注、收藏以及评论。
为使本文得到斧正和提问,转载请注明出处:
http://blog.csdn.net/nomasp
最新文章
- php基础之gd图像生成、缩放、logo水印和简单验证码实现
- 关于PHP的curl开启问题
- 第一章,Linux常用命令
- Python入门神图
- Centos6.7安装docker1.7.1
- 第五章_PHP流程控制
- BZOJ3306: 树
- CAS(Compare and Swap)理解
- 读书笔记 (二) ———Fundamentals of Multiagent Systems with NetLogo Examples by Prof. Jose M Vidal
- Web安全检测工具的使用.
- C#高级编程:泛型优点和特性
- OpenSSL中的大数接口与基于其的自用RSA加密接口设计
- LINQ学习系列-----2.2 迭代器
- C# 给枚举类型增加一个描述特性
- console.log的返回值undefined
- CSS之垂直水平居中方法
- python str byte 转换
- 使用Sublime Text 3进行Node.js开发
- Python内置类型(4)--数值
- form 表单中 button 按钮用 return false 阻止默认刷新踩过的一个小坑