SpringSecurity:简单入门
SpringSecurity能做什么
SpringSecurity是一个安全框架,使用它可以让我们的系统变得安全一点,它可以对登陆系统的用户进行验证和授权
一个安全的系统需要做的事情很多,比如:防SQL注入、XSS攻击、CSRF等等,
还需要对每一个登陆系统的用户进行权限认证,即决定了每个用户能做什么、不能做什么
在权限管理之前,还得对用户进行授权,授权后根据权限区分用户
授予和权限认证就是SpringSecurity主要做的事情
很重要的一点是,在SpringBoot中使用,可以让原本对开发者来说复杂的SpringSecurity变得简单易用
当然SpringSecurity也有很明显的缺点,就是导入依赖之后,就默认实现了很多奇奇怪怪的东西,让人感觉莫名其妙
SpringSecurity怎么使用
1、首先使用maven导入依赖包
这里是直接在SpringBoot中集成的
     <dependency>

            <groupId>org.springframework.boot</groupId>

            <artifactId>spring-boot-starter-security</artifactId>

        </dependency>

        <dependency>

            <groupId>org.springframework.security</groupId>

            <artifactId>spring-security-test</artifactId>

            <scope>test</scope>

        </dependency>
2、创建一个Controller类测试一下,所以还要导入web依赖包
SecretController.java
 1 import org.springframework.web.bind.annotation.GetMapping;

 2 import org.springframework.web.bind.annotation.RestController;

 3

 4 @RestController

 5 public class SecretController {

 6     @GetMapping("/secret")

 7     public String getSecret(){

 8         return "this is secret";

 9     }

10 }
然后运行项目我们直接访问 http://localhost:8080/secret ,会发现页面重定向了,跳转到了一个登陆页面
我们甚至没有设置登陆用户名和密码
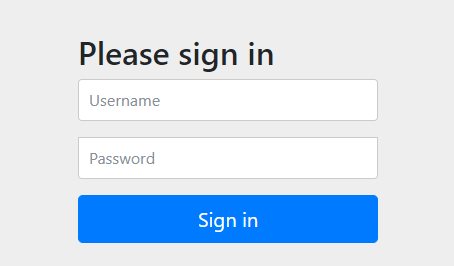
这个地方SpringSecurity默认的用户名是user,密码是动态生成的,在日志中会显示
这就是SpringSecurity强大的地方,仅仅是导入了依赖包,就默认进行了登陆验证,当然这也是弊端,因为我们根本不知道它是怎么配置的。
上面是SpringSecurity为我们默认配置的一个登陆页面,下面我们自己进行配置
2、使用SpringSecurity的配置(简单的例子)
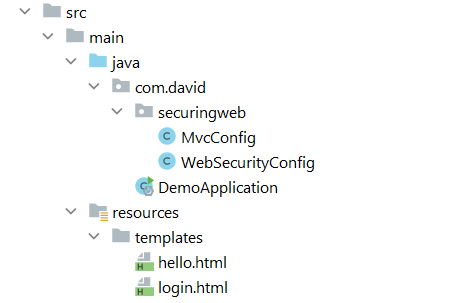
这里是整个例子的文件结构还有pom.xml,以及使用了thymeleaf,所以要导入依赖
文件结构
pom.xml
 1 <?xml version="1.0" encoding="UTF-8"?>

 2 <project xmlns="http://maven.apache.org/POM/4.0.0"

 3          xmlns:xsi="http://www.w3.org/2001/XMLSchema-instance"

 4          xsi:schemaLocation="http://maven.apache.org/POM/4.0.0 http://maven.apache.org/xsd/maven-4.0.0.xsd">

 5     <modelVersion>4.0.0</modelVersion>

 6

 7     <groupId>org.example</groupId>

 8     <artifactId>SecurityTest</artifactId>

 9     <version>1.0-SNAPSHOT</version>

10

11     <parent>

12         <groupId>org.springframework.boot</groupId>

13         <artifactId>spring-boot-starter-parent</artifactId>

14         <version>2.5.2</version>

15     </parent>

16

17     <dependencies>

18         <dependency>

19             <groupId>org.springframework.boot</groupId>

20             <artifactId>spring-boot-starter-web</artifactId>

21         </dependency>

22

23         <dependency>

24             <groupId>org.springframework.boot</groupId>

25             <artifactId>spring-boot-starter-thymeleaf</artifactId>

26         </dependency>

27

28         <dependency>

29             <groupId>org.springframework.boot</groupId>

30             <artifactId>spring-boot-starter-security</artifactId>

31         </dependency>

32     </dependencies>

33

34     <properties>

35         <maven.compiler.source>8</maven.compiler.source>

36         <maven.compiler.target>8</maven.compiler.target>

37     </properties>

38

39 </project>
首先我们要自己创建一个login页面,以及登录以后访问的页面
login.html
 1 <!DOCTYPE html>

 2 <html xmlns="http://www.w3.org/1999/xhtml" xmlns:th="https://www.thymeleaf.org"

 3       xmlns:sec="https://www.thymeleaf.org/thymeleaf-extras-springsecurity3">

 4 <head>

 5     <title>Spring Security Example </title>

 6 </head>

 7 <body>

 8 <div th:if="${param.error}">

 9     Invalid username and password.

10 </div>

11 <div th:if="${param.logout}">

12     You have been logged out.

13 </div>

14 <form th:action="@{/login}" method="post">

15     <div><label> User Name : <input type="text" name="username"/> </label></div>

16     <div><label> Password: <input type="password" name="password"/> </label></div>

17     <div><input type="submit" value="Sign In"/></div>

18 </form>

19 </body>

20 </html>
hello.html
 1 <!DOCTYPE html>

 2 <html xmlns="http://www.w3.org/1999/xhtml" xmlns:th="https://www.thymeleaf.org"

 3       xmlns:sec="https://www.thymeleaf.org/thymeleaf-extras-springsecurity3">

 4 <head>

 5     <title>Hello World!</title>

 6 </head>

 7 <body>

 8 <h1 th:inline="text">Hello [[${#httpServletRequest.remoteUser}]]!</h1>

 9

10 </body>

11 </html>
然后再MVC里面配置一下这两个页面,才可以通过url进行访问,MVC的配置需要实现WebMvcConfigurer接口
MvcConfig.java
 1 import org.springframework.context.annotation.Configuration;

 2 import org.springframework.web.servlet.config.annotation.ViewControllerRegistry;

 3 import org.springframework.web.servlet.config.annotation.WebMvcConfigurer;

 4

 5 @Configuration

 6 public class MvcConfig implements WebMvcConfigurer {

 7

 8     @Override

 9     public void addViewControllers(ViewControllerRegistry registry) {

10

11         registry.addViewController("/").setViewName("login");

12         registry.addViewController("/hello").setViewName("hello");

13         registry.addViewController("/login").setViewName("login");

14     }

15 }
然后我们需要进行SpringSecurity的配置,定义页面访问请求时,用户需要哪些权限,需要继承WebSecurityConfigurerAdapter类进行配置
现在配置中自己定义了一个用户(在实际项目中从数据库获取),而不再是由SpringSecurity默认定义
WebSecurityConfig.java
 1 import org.springframework.context.annotation.Bean;

 2 import org.springframework.context.annotation.Configuration;

 3 import org.springframework.security.config.annotation.web.builders.HttpSecurity;

 4 import org.springframework.security.config.annotation.web.configuration.EnableWebSecurity;

 5 import org.springframework.security.config.annotation.web.configuration.WebSecurityConfigurerAdapter;

 6 import org.springframework.security.core.userdetails.User;

 7 import org.springframework.security.core.userdetails.UserDetails;

 8 import org.springframework.security.core.userdetails.UserDetailsService;

 9 import org.springframework.security.crypto.bcrypt.BCryptPasswordEncoder;

10 import org.springframework.security.crypto.password.PasswordEncoder;

11 import org.springframework.security.provisioning.InMemoryUserDetailsManager;

12

13 @Configuration

14 @EnableWebSecurity

15 public class WebSecurityConfig extends WebSecurityConfigurerAdapter {

16 /*

17 @EnableWebSecurity注解让springsecurity集成springmvc

18  */

19     @Override

20     protected void configure(HttpSecurity http) throws Exception {

21 /*

22 定义了哪些路径访问是需要权限的,哪些不用

23 /和/login两个url是不需要权限就可以访问的

24 /hello需要有“USER”权限才能够访问

25  */

26         http.authorizeRequests()

27                 .antMatchers("/hello")

28                 .hasRole("USER")

29                 .and()

30                 .formLogin()

31                 .loginPage("/login")

32                 .permitAll();

33     }

34

35

36     @Bean

37     public PasswordEncoder passwordEncoder(){

38         /*

39         声明一个加密工具的Bean,供用户进行加密时调用

40          */

41         return new BCryptPasswordEncoder();

42     }

43

44     @Bean

45     @Override

46     protected UserDetailsService userDetailsService() {

47         /*

48         设置了一个预先存储在系统中的用户

49         赋予用户“USER”权限,才能够访问hello页面

50          */

51         String username = "user";

52         String password = "password";

53         UserDetails user = User.withUsername(username).password(new BCryptPasswordEncoder().encode(password)).roles("my").build();

54         return new InMemoryUserDetailsManager(user);

55     }

56 }
现在运行项目,在没有登录之前,访问/hello会被重定向到login页面,登录之后就能访问hello页面了
如果把上面代码里,用户的角色权限“USER”改成其他的,登录之后访问\hello则会抛出403错误,因为权限不够
最新文章
- SSIS Data Flow优化
- ObjectAnimator.start()工作原理
- thinkphp 添加 修改删除
- [转]解决GET请求时中文乱码的问题
- UOJ265 【NOIP2016】愤怒的小鸟
- Uva1398 Meteor
- [Java Web整合开发王者归来·刘京华] 2、 Java Web开发概述
- C语言--static全局使用示例
- Gold Coins 分类: POJ 2015-06-10 15:04 16人阅读 评论(0) 收藏
- 无状态、REST、RESTful 和 Web Services【整理】
- php gd 生成日历图
- Windows Server 2008 网站访问PHP响应慢的解决方法
- Asp.Net MVC5 格式化输出时间日期
- css06背景图片
- JDK和Tomcat的简单配置(菜鸟巧记一)
- MongoDB入门学习(一):MongoDB的安装和管理
- Java Web项目部署Tomcat运行出错
- JavaScript 延迟加载
- 《Python》线程之锁、信号量、事件、条件、定时器、队列
- jquery元素插入、删除、清空、找父子级元素