Netty入门官方例子
2024-09-05 12:21:38
参考链接:https://blog.csdn.net/wocjy/article/details/78661464
maven依赖:
<!-- Netty开始 -->

<!-- https://mvnrepository.com/artifact/io.netty/netty-all -->

<dependency>

   <groupId>io.netty</groupId>

   <artifactId>netty-all</artifactId>

   <version>4.1.6.Final</version>

</dependency>

<!-- Netty结束 -->
官方并没有使用Hello World来作为一个例子,而是采用RFC的DISCARD,这个协议定义了就是接收到请求后什么也不干。
第一步编写DiscardServerHandler类:
package io.netty.example.discard;

import io.netty.buffer.ByteBuf;

import io.netty.channel.ChannelHandlerContext;

import io.netty.channel.ChannelInboundHandlerAdapter;

import io.netty.util.ReferenceCountUtil;

//ChannelInboundHandlerAdapter实现自ChannelInboundHandler

//ChannelInboundHandler提供了不同的事件处理方法你可以重写

public class DiscardServerHandler extends ChannelInboundHandlerAdapter {

    /*

     * @作者:CJY

     * @说明:该方法用于接收从客户端接收的信息

     * @时间:2017-4-2下午12:25:05

     * @see io.netty.channel.ChannelInboundHandlerAdapter#channelRead(io.netty.channel.ChannelHandlerContext, java.lang.Object)

     * @param ctx

     * @param msg

     * @throws Exception

     */

    @Override

    public void channelRead(ChannelHandlerContext ctx, Object msg)

            throws Exception {

        //Discard the received data silently

        //ByteBuf是一个引用计数对象实现ReferenceCounted,他就是在有对象引用的时候计数+1,无的时候计数-1,当为0对象释放内存

        ByteBuf in=(ByteBuf)msg;

        try {

            while(in.isReadable()){

                System.out.println((char)in.readByte());

                System.out.flush();

            }

        } finally {

            ReferenceCountUtil.release(msg);

        }

    }

    @Override

    public void exceptionCaught(ChannelHandlerContext ctx, Throwable cause)

            throws Exception {

        cause.printStackTrace();

        ctx.close();

    }

}
第二步编写DiscardServer:
package io.netty.example.discard;

import io.netty.bootstrap.ServerBootstrap;

import io.netty.channel.ChannelFuture;

import io.netty.channel.ChannelInitializer;

import io.netty.channel.ChannelOption;

import io.netty.channel.EventLoopGroup;

import io.netty.channel.nio.NioEventLoopGroup;

import io.netty.channel.socket.SocketChannel;

import io.netty.channel.socket.nio.NioServerSocketChannel;

public class DiscardServer {

    private int port;

    public DiscardServer(int port){

        this.port = port;

    }

    public void run() throws Exception{

        //Group:群组,Loop:循环,Event:事件,这几个东西联在一起,相比大家也大概明白它的用途了。

        //Netty内部都是通过线程在处理各种数据,EventLoopGroup就是用来管理调度他们的,注册Channel,管理他们的生命周期。

        //NioEventLoopGroup是一个处理I/O操作的多线程事件循环

        //bossGroup作为boss,接收传入连接

        //因为bossGroup仅接收客户端连接,不做复杂的逻辑处理,为了尽可能减少资源的占用,取值越小越好

        EventLoopGroup bossGroup=new NioEventLoopGroup(1);

        //workerGroup作为worker,处理boss接收的连接的流量和将接收的连接注册进入这个worker

        EventLoopGroup workerGroup=new NioEventLoopGroup();

        try {

            //ServerBootstrap负责建立服务端

            //你可以直接使用Channel去建立服务端,但是大多数情况下你无需做这种乏味的事情

            ServerBootstrap b=new ServerBootstrap();

            b.group(bossGroup, workerGroup)

            //指定使用NioServerSocketChannel产生一个Channel用来接收连接

            .channel(NioServerSocketChannel.class)

            //ChannelInitializer用于配置一个新的Channel

            //用于向你的Channel当中添加ChannelInboundHandler的实现

            .childHandler(new ChannelInitializer<SocketChannel>() {

                public void initChannel(SocketChannel ch) throws Exception {

                    //ChannelPipeline用于存放管理ChannelHandel

                    //ChannelHandler用于处理请求响应的业务逻辑相关代码

                    ch.pipeline().addLast(new DiscardServerHandler());

                };

            })

            //对Channel进行一些配置

            //注意以下是socket的标准参数

            //BACKLOG用于构造服务端套接字ServerSocket对象,标识当服务器请求处理线程全满时,用于临时存放已完成三次握手的请求的队列的最大长度。如果未设置或所设置的值小于1,Java将使用默认值50。

            //Option是为了NioServerSocketChannel设置的,用来接收传入连接的

            .option(ChannelOption.SO_BACKLOG, 128)

            //是否启用心跳保活机制。在双方TCP套接字建立连接后(即都进入ESTABLISHED状态)并且在两个小时左右上层没有任何数据传输的情况下,这套机制才会被激活。

            //childOption是用来给父级ServerChannel之下的Channels设置参数的

            .childOption(ChannelOption.SO_KEEPALIVE, true);

            // Bind and start to accept incoming connections.

            ChannelFuture f=b.bind(port).sync();

            // Wait until the server socket is closed.

            // In this example, this does not happen, but you can do that to gracefully

            // shut down your server.

            //sync()会同步等待连接操作结果,用户线程将在此wait(),直到连接操作完成之后,线程被notify(),用户代码继续执行

            //closeFuture()当Channel关闭时返回一个ChannelFuture,用于链路检测

            f.channel().closeFuture().sync();

        }finally{

            //资源优雅释放

            bossGroup.shutdownGracefully();

            workerGroup.shutdownGracefully();

        }

    }

    public static void main(String[] args) {

        int port=8088;

        try {

            new DiscardServer(port).run();

        } catch (Exception e) {

            // TODO Auto-generated catch block

            e.printStackTrace();

        }

    }

}
三.测试
打开Window的命令行,输入telnet命令:telnet localhost 8088,如果能够正确连接就代表成功,在新打开的命令窗口随意输入字符,如果在myeclipse当中能够正确输出在console当中,就代表程序正常。

进入编辑状态
输入hello world
ctrl+]回显内容
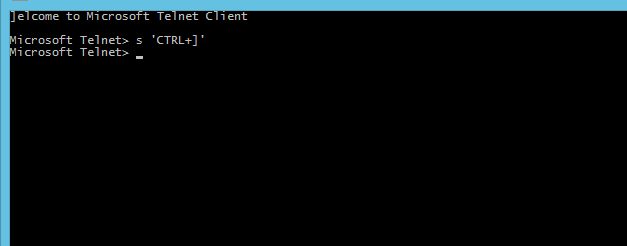
回车,进入编辑状态

后台可以输出:

telnet配置使用链接:https://www.cnblogs.com/nongzihong/p/11855918.html
最新文章
- Shell文件权限和脚本执行
- Eclipse - 修改默认user和类的创建日期
- React Native 中组件的生命周期
- NGUI Atlas, Atlas Type Reference
- Spring MVC 读取静态资源时404错误
- float,double和decimal的精度问题
- Pet
- php部分--文件操作
- 【面向对象设计原则】之里氏替换原则(LSP)
- Mybatis Generator实现分页功能
- 题解 P4008 【[NOI2003]文本编辑器】
- ZOJ 2588 Burning Bridges 割边(处理重边)
- 把ssl模块加入到已经编译好的apache中实现HTTPS
- Charles 抓包工具(新猿旺学习总结)
- Dispatch Queue 内存结构
- linux系统安装mysql详细配置
- echarts折现图配置
- 深入浅出SQL Server中的死锁(实战篇)
- Spark 实践——基于 Spark MLlib 和 YFCC 100M 数据集的景点推荐系统
- cnblogs客户端配置说明