Spring Security项目的搭建以及Spring Security的BCrypt加密
.personSunflowerP { background: rgba(51, 153, 0, 0.66); border-bottom: 1px solid rgba(0, 102, 0, 1); border-top-left-radius: 7px; border-top-right-radius: 7px; color: rgba(255, 255, 255, 1); height: 1.8em; line-height: 1.8em; padding: 5px }
spring-cecurity的简介:
Spring Security是一个能够为基于Spring的企业应用系统提供声明式的安全访问控制解决方案的安全框架。它提供了一组可以在Spring应用上下文中配置的Bean,充分利用了Spring IoC,DI(控制反转Inversion of Control ,DI:Dependency Injection 依赖注入)和AOP(面向切面编程)功能,为应用系统提供声明式的安全访问控制功能,减少了为企业系统安全控制编写大量重复代码的工作。
本博客包含的功能:
1)使用基本的spring-security demo的实现,采用spring-security默认的登录
2)在spring-security的基础上自定义登录页面以及注销功能
3)使用spring-security数据库中获取数据进行登录验证
4)使用spring-decurity的BCrypt对密码进行加密处理
1.新建一个war包类型的maven项目
注:新建的maven工程需要转换为Web工程的方法和项目的pom.xml中报错:web.xml is missing and <failOnMissingWebXml> is set to true 解决方法请看:
https://www.cnblogs.com/sun-flower1314/p/11732915.html
2.在pom.xml中加入Spring Security的maven配置
    <properties>

        <spring.version>4.2.4.RELEASE</spring.version>

    </properties>

    <dependencies>

        <dependency>

            <groupId>org.springframework</groupId>

            <artifactId>spring-core</artifactId>

            <version>${spring.version}</version>

        </dependency>

        <dependency>

            <groupId>org.springframework</groupId>

            <artifactId>spring-web</artifactId>

            <version>${spring.version}</version>

        </dependency>

        <dependency>

            <groupId>org.springframework</groupId>

            <artifactId>spring-webmvc</artifactId>

            <version>${spring.version}</version>

        </dependency>

        <dependency>

            <groupId>org.springframework</groupId>

            <artifactId>spring-context-support</artifactId>

            <version>${spring.version}</version>

        </dependency>

        <dependency>

            <groupId>org.springframework.security</groupId>

            <artifactId>spring-security-web</artifactId>

            <version>4.1.0.RELEASE</version>

        </dependency>

        <dependency>

            <groupId>org.springframework.security</groupId>

            <artifactId>spring-security-config</artifactId>

            <version>4.1.0.RELEASE</version>

        </dependency>

    </dependencies>

    <build>

        <plugins>

            <!-- java编译插件 -->

            <plugin>

                <groupId>org.apache.maven.plugins</groupId>

                <artifactId>maven-compiler-plugin</artifactId>

                <version>3.2</version>

                <configuration>

                    <source>1.7</source>

                    <target>1.7</target>

                    <encoding>UTF-8</encoding>

                </configuration>

            </plugin>

            <plugin>

                <groupId>org.apache.tomcat.maven</groupId>

                <artifactId>tomcat7-maven-plugin</artifactId>

                <configuration>

                    <!-- 指定端口 -->

                    <port>9080</port>

                    <!-- 请求路径 -->

                    <path>/</path>

                </configuration>

            </plugin>

        </plugins>

    </build>
3.在/src/main/resources下新建spring-security.xml的配置文件。
该配置文件与以往的稍有不同,需要注意的点有:
以往的前缀<beans ></beans>是直接这样,是默认为beans
现在的为<beans:beans > </beans:beans>,默认的xmlns为security的,因为这里使用的基本都是以<security:xxx >开头,为了省去麻烦,所以将security配置为默认的。
<?xml version="1.0" encoding="UTF-8"?>

<beans:beans xmlns="http://www.springframework.org/schema/security"

    xmlns:beans="http://www.springframework.org/schema/beans" xmlns:xsi="http://www.w3.org/2001/XMLSchema-instance"

    xsi:schemaLocation="http://www.springframework.org/schema/beans http://www.springframework.org/schema/beans/spring-beans.xsd

                        http://www.springframework.org/schema/security http://www.springframework.org/schema/security/spring-security.xsd">

    <http use-expressions="false">

        <intercept-url pattern="/**" access="ROLE_USER" />

        <form-login />

    </http>

    <!-- 认证管理器 -->

    <authentication-manager>

        <authentication-provider>

            <user-service>

                <user name="admin" password="123456" authorities="ROLE_USER" />

            </user-service>

        </authentication-provider>

    </authentication-manager>

</beans:beans>
spring-security.xml配置文件中属性说明:
<1> <http >标签中:属性use-expressions 表示是否启动SPEL表达式 false表示不启用,若不配置use-expressions属性,则在子标签intercept-url中需配置access=hasRole('ROLE_USER')
<2><intercept-url>表示拦截url,其属性pattern="/*" 表示只拦截根目录下的资源,不包括子目录中的资源, /** 拦截所有资源; 属性access表示配置角色名称 其值必须是【ROLE_】开头
<3><form-login /> 表示开启表单功能
<4><authentication-provider> 表示认证提供者
<5><user >标签配置当前系统的登录用户:用户名 name; 密码 password; 当前用户所属角色 authorities
4.配置web.xml文件,整个文件为:
其中包含加载了classpath:spring-security.xml文件以及加入了一个安全过滤器,其中的springSecurityFilterChain为固定名称,不能改变
<?xml version="1.0" encoding="UTF-8"?>

<web-app xmlns:xsi="http://www.w3.org/2001/XMLSchema-instance"

    xmlns="http://java.sun.com/xml/ns/javaee"

    xsi:schemaLocation="http://java.sun.com/xml/ns/javaee http://java.sun.com/xml/ns/javaee/web-app_2_5.xsd"

    version="2.5">

       <context-param>

        <param-name>contextConfigLocation</param-name>

        <param-value>classpath:spring-security.xml</param-value>

     </context-param>

     <listener>

        <listener-class>

            org.springframework.web.context.ContextLoaderListener

        </listener-class>

     </listener>

     <!-- 安全过滤器 -->

     <filter>

        <filter-name>springSecurityFilterChain</filter-name>

        <filter-class>org.springframework.web.filter.DelegatingFilterProxy</filter-class>

     </filter>

     <filter-mapping>

        <filter-name>springSecurityFilterChain</filter-name>

        <url-pattern>/*</url-pattern>

     </filter-mapping>

</web-app>
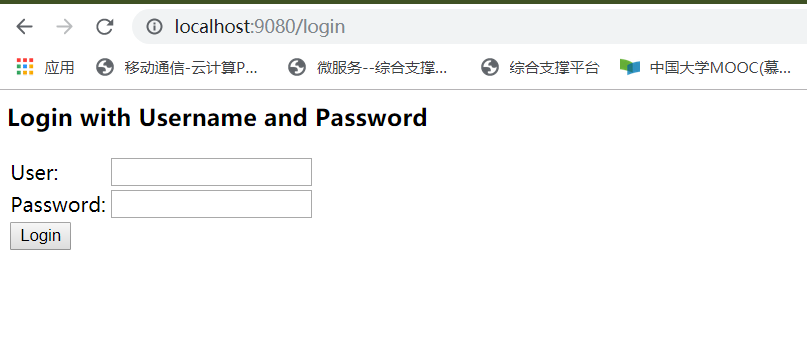
5. 然后启动用maven命令启动项目,tomcat7:run ,启动成功后,在浏览器中输入地址访问,即使没有写任何界面,也可看到security默认的登录界面:
6.输入用户名和密码,若输入错误的用户名和密码,可看到如下界面:
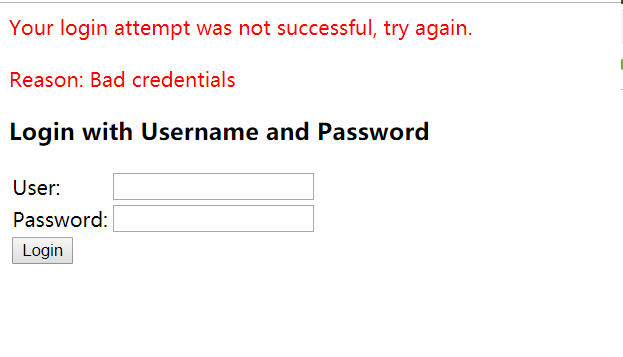
输入正确用户密码登录后,会显示404错误,因为没有配置默认的首页,在webapp下配置index.html页面即可。

7.用户自定义登录页
实际开发中,不可能使用系统的默认登录页
1)构建登录页
①form表单中规定 action=“/login" method="post"
②<input >输入用户规定的 name="username";输入密码框规定name="password"
即如下所示:
  <form action='/login' method='POST'>

        <table>

            <tr>

                <td>用户名:</td>

                <td><input type='text' name='username' value=''></td>

            </tr>

            <tr>

                <td>密码:</td>

                <td><input type='password' name='password' /></td>

            </tr>

            <tr>

                <td colspan='2'><input name="submit" type="submit" value="登陆" /></td>

            </tr>

        </table>

    </form>
2)构建登陆失败页 login_error.html(内容略)
3)再次修改spring-security.xml的配置文件
增加配置说明如下:
<1>login-page:指定登录页面。
<2>authentication-failure-url:指定了身份验证失败时跳转到的页面。
<3>default-target-url:指定了成功进行身份验证和授权后默认呈现给用户的页面。
<4>csrf disabled="true" 关闭csrf
<5><headers><frame-options policy="SAMEORIGIN"/> </headers> 表示在页面中还存在iframe标签嵌入其他页面
<6><logout/> 表示注销退出,并且在注销按钮中配置的action为:/logout
  <!-- 以下页面不被拦截 -->

    <http pattern="/login.html" security="none"></http>

    <http pattern="/login_error.html" security="none"></http>

    <!-- 页面拦截规则 -->

    <http use-expressions="false">

        <intercept-url pattern="/*" access="ROLE_USER" />

        <form-login login-page="/login.html" default-target-url="/index.html" authentication-failure-url="/login_error.html" always-use-default-target="true" />

        <csrf disabled="true"/>
<!-- <headers>
<frame-options policy="SAMEORIGIN"/>
</headers> -->
<logout/>
</http>
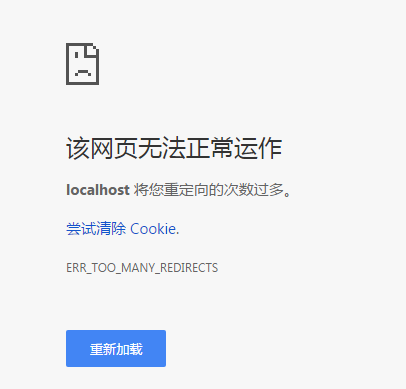
其中security="none"表示次资源不被拦截,若未设置登录页,则会出现以下错误
csrf disabled="true" 关闭csrf ,如果不加会出现错误,CSRF(Cross-site request forgery)跨站请求伪造,也被称为“One Click Attack”或者Session Riding,通常缩写为CSRF或者XSRF,是一种对网站的恶意利用。

8、从数据库中匹配用户名和密码,而不用配置文件中的用户名和密码
1)编写验证实现类,即继承Security自带的接口UserDetailsService
LoginCheck.java
package com.hxc.securityDemo;

import java.util.ArrayList;

import java.util.List;

import org.springframework.security.core.GrantedAuthority;

import org.springframework.security.core.authority.SimpleGrantedAuthority;

import org.springframework.security.core.userdetails.User;

import org.springframework.security.core.userdetails.UserDetails;

import org.springframework.security.core.userdetails.UserDetailsService;

import org.springframework.security.core.userdetails.UsernameNotFoundException;

public class LoginCheck implements UserDetailsService {

    @Override

    public UserDetails loadUserByUsername(String username) throws UsernameNotFoundException {

        //1.构建角色列表

        List<GrantedAuthority> grantedAuthorities = new ArrayList<GrantedAuthority>();

        grantedAuthorities.add(new SimpleGrantedAuthority("ROLE_ADMIN"));

        String password = "123456";

        //2.从数据库中查询数据进行检验

//        TbUser tbUser = userService.findOne(username);

//        if(tbUser == null) {

//            return null;

//        }

//        password = tbUser.getPassword();

        //...

        //new User 为Security包中的类,其中第一个参数为登录界面输入的用户名,第二个为后台参数的密码(即从数据库中查询),第三个为权限角色

        return new User(username, password, grantedAuthorities);

    }

}
2)在spring-security.xml配置文件中 将认证管理 修改为如下:
    <authentication-manager>

        <authentication-provider user-service-ref="userDetailService">

        </authentication-provider>

    </authentication-manager>

    <beans:bean id="userDetailService" class="com.hxc.securityDemo.LoginCheck"></beans:bean>
9.自定义密码加密处理
对于存入数据库中密码,不能显示成明文,而需要经过加密处理。而传统的MD5加密算法,虽然时不可逆算法加密,但可以在网上的彩虹表破解得到,因为其对同一密码MD5加密后生成的都是同一密码,固定不变。若采用BCrypt加密,即使时同一密码,其加密后得到的密码也是不同的。其原理是会先使用一个特定的字符串(如域名)加密,再使用一个随机的salt(盐值)加密。特定字符串是程序代码中固定的,salt是每个密码单独随机,混入最终加密后的密码,验证时也无需单独提供之前的salt,从而无需单独处理salt问题。
对于在项目中添加用户时密码处理如下:
    public boolean add(TbUser user) {

        String userPassword = user.getPassword();

        BCryptPasswordEncoder passwordEncoder = new BCryptPasswordEncoder();

        String encPassword = passwordEncoder.encode(userPassword);

//        System.out.println(encPassword);

        //存入数据库中....

        //.....

        // return true;

    }
用户登录验证时,在spring-security.xml中的认证管理配置如下:
    <beans:bean id="userDetailService" class="com.hxc.securityDemo.LoginCheck" />

    <beans:bean id="bcryptEncoder" class="org.springframework.security.crypto.bcrypt.BCryptPasswordEncoder" />

    <authentication-manager alias="authenticationManager">

        <authentication-provider user-service-ref='userDetailService'>

              <password-encoder ref="bcryptEncoder"></password-encoder>

        </authentication-provider>

    </authentication-manager>
自此 自定义配置完成
最新文章
- 编写高质量ios-之一 OC 语言的起源
- Android开发--推送
- 控制器controller与指令中的link、controller中变量作用域的关系
- Django框架全面讲解
- 码工具通过ICP备案
- Java Jpa 规范
- java集合系列——List集合之Stack介绍(五)
- Button标签自动刷新问题
- Parallel中分区器Partitioner的简单使用
- 震惊!计算机连0.3+0.6都算不对?浅谈IEEE754浮点数算数标准
- maya cmds pymel selectType() 选择类型切换
- js_初识js_js基本语法和数据类型
- JS 函数参数 及 函数数组
- 生产apollo搭建记录(五)
- 2、原生jdbc的dao模式
- C++虚表详解
- 根据条件返回相应值 decode(条件,值1,翻译值1,值2,翻译值2,...值n,翻译值n,缺省值)
- 6月17 练习ThinkPHP的增删改查
- oc 中的.m和.mm文件区别
- iOS 基础之NSArray数组去重
热门文章
- UI自动化学习笔记- Selenium元素等待(强制等待、显示等待、隐式等待)
- Docker:docker搭建redis一主多从集群(配置哨兵模式)
- 《PHP基础知识总结》系列分享专栏
- SpringBoot 整合 MybatisPlus 3.0
- deepin使用synergy鼠标越界软件实现和另一台windows系统共享鼠标
- 微信小程序云开发-数据库-用户删除数据
- 微信小程序云开发-数据库-获取用户添加的数据到数据库
- MYSQL一个设备上的主从复制实现-windows
- Beego和Vue的前后端分离跨域问题处理
- Scrapy+splash报错 Connection was refused by other side