Android_四大组件之Service
一、概述
Service是四大组件之一。它主要用于在后台执行耗时的逻辑,即使用户切换到其他应用甚至退出应用,它也能继续在后台运行。
下面主要介绍了service的两种形式启动和绑定 ,并通过简单例子说明了主要过程和用法。还包含服务与线程,服务的强制停止与前台服务等。
二、Service的主要过程
1.Service启动有两种形式:
(1).通过 startService() 启动 服务。一旦启动,服务即处于“启动”状态,服务即可在后台无限期运行,即使启动服务的组件已被销毁也不受影响。 已启动的服务通常是执行单一操作,而且不会将结果返回给调用方。
(2).通过 bindService() 绑定 到服务时,服务即处于“绑定”状态。绑定服务提供了一个客户端-服务器接口,允许组件与服务进行交互、发送请求、获取结果,甚至是利用进程间通信 (IPC) 跨进程执行这些操作。 仅当与另一个应用组件绑定时,绑定服务才会运行。 多个组件可以同时绑定到该服务,但全部取消绑定后,该服务即会被销毁。
接下来,通过简单代码 说明下这两种形式的大致过程。下图是Service的生命周期,比较清晰。

图1
2. Service基本用法:
(1) Service最重要的是自定义的服务类,继承android.app.Service。实现上述图片 Service生命周期包含的主要过程的方法,onCreate() onStartCommand() onBind() onUnbind() onDestroy()。
onStartCommand()
当另一个组件(如 Activity)通过调用 startService() 请求启动服务时,系统将调用此方法。一旦执行此方法,服务即会启动并可在后台无限期运行。 如果您实现此方法,则在服务工作完成后,需要由您通过调用 stopSelf() 或 stopService() 来停止服务。(如果您只想提供绑定,则无需实现此方法。)
onBind()
当另一个组件想通过调用 bindService() 与服务绑定时,系统将调用此方法。在此方法的实现中,您必须通过返回 IBinder 提供一个接口,供客户端用来与服务进行通信。请务必实现此方法,但如果您并不希望允许绑定,则应返回 null。
onCreate()
首次创建服务时,系统将调用此方法来执行一次性设置程序(在调用 onStartCommand() 或 onBind() 之前)。如果服务已在运行,则不会调用此方法。
onDestroy()
当服务不再使用且将被销毁时,系统将调用此方法。服务应该实现此方法来清理所有资源,如线程、注册的侦听器、接收器等。 这是服务接收的最后一个调用。
下面通过简单的例子,大致说明下启动服务(startService)和绑定服务(bindService)
(2).启动服务--startService(Intent intent)
创建TestService服务类,仅在主要方法里添加一些log.
package com.flx.testservice;

import android.app.Service;

import android.content.Intent;

import android.os.Binder;

import android.os.IBinder;

import android.util.Log;

public class TestService extends Service {

    final private static String TAG = "flx_TestServer";

    @Override

    public void onCreate() {

        Log.d(TAG, "TestServer thread id =" + Thread.currentThread().getId());

        Log.d(TAG, "onCreate");

        super.onCreate();

    }

    @Override

    public int onStartCommand(Intent intent, int flags, int startId) {

        Log.d(TAG, "onStartCommand flags=" + flags + ";startId=" + startId);

        stopSelf();

        /*返回变量 用于描述系统应该如何在服务终止的情况下继续运行服务

        START_NOT_STICKY

        除非有挂起 Intent 要传递,否则系统不会重建服务。这是最安全的选项,可以避免在不必要时以及应用能够轻松重启所有未完成的作业时运行服务。

        START_STICKY

        会重建服务并调用onStartCommand(),但不会重新传递最后一个 Intent。这适用于不执行命令、但无限期运行并等待作业的媒体播放器(或类似服务)。

        START_REDELIVER_INTENT

        会重建服务,并通过传递给服务的最后一个 Intent 调用 onStartCommand()。这适用于主动执行应该立即恢复的作业(例如下载文件)的服务。

         */

        return super.onStartCommand(intent, flags, startId);

    }

    @Override

    public IBinder onBind(Intent intent) {

        Log.d(TAG, "onBind");

        return null;

    }

    @Override

    public boolean onUnbind(Intent intent) {

        Log.d(TAG, "onUnbind");

        return super.onUnbind(intent);

    }

    @Override

    public void onDestroy() {

        Log.d(TAG, "onDestroy");

        super.onDestroy();

    }

}
在AndroidManifest.xml中声明service
<?xml version="1.0" encoding="utf-8"?>

<manifest xmlns:android="http://schemas.android.com/apk/res/android"

    package="com.flx.testservice">

    <application

        android:allowBackup="true"

        android:icon="@mipmap/ic_launcher"

        android:label="@string/app_name"

        android:roundIcon="@mipmap/ic_launcher_round"

        android:supportsRtl="true"

        android:theme="@style/AppTheme">

        <activity

            android:name="com.flx.testservice.MainActivity"

            android:label="@string/title_activity_main"

            android:theme="@style/AppTheme.NoActionBar">

            <intent-filter>

                <action android:name="android.intent.action.MAIN" />

                <category android:name="android.intent.category.LAUNCHER" />

            </intent-filter>

        </activity>

        /*

        android:exported="false"表示阻止被其他应用隐式调用,只能自己应用调用

        */

        <service android:name=".TestService"

            android:exported="true" />

    </application>

</manifest>
添加MainActivity类和布局
package com.flx.testservice;

import android.app.Activity;

import android.content.Intent;

import android.os.Bundle;

import android.util.Log;

import android.view.View;

import android.widget.Button;

public class MainActivity extends Activity implements View.OnClickListener {

    final private static String TAG = "flx_TestServer";

    private Button mStartServerBtn;

    private Button mStopServerBtn;

    @Override

    protected void onCreate(Bundle savedInstanceState) {

        super.onCreate(savedInstanceState);

        Log.d(TAG, "MainActivity thread id =" + Thread.currentThread().getId());

        setContentView(R.layout.activity_main);

        mStartServerBtn = findViewById(R.id.start_service_btn);

        mStopServerBtn = findViewById(R.id.stop_service_btn);

        mStartServerBtn.setOnClickListener(this);

        mStopServerBtn.setOnClickListener(this);

    }

    @Override

    public void onClick(View v) {

        Intent serverIntent = new Intent(this, TestService.class);

        switch (v.getId()) {

            case R.id.start_service_btn:

                startService(serverIntent);

                break;

            case R.id.stop_service_btn:

                stopService(serverIntent);

                break;

        }

    }

}
activity_main.xml
<?xml version="1.0" encoding="utf-8"?>

<LinearLayout xmlns:android="http://schemas.android.com/apk/res/android"

    android:layout_width="match_parent"

    android:layout_height="match_parent"

    android:orientation="vertical" >

    <Button

        android:id="@+id/start_service_btn"

        android:layout_width="match_parent"

        android:layout_height="wrap_content"

        android:textAllCaps="false"

        android:text="StartService" />

    <Button

        android:id="@+id/stop_service_btn"

        android:layout_width="match_parent"

        android:layout_height="wrap_content"

        android:textAllCaps="false"

        android:text="StopService" />

</LinearLayout>
Activity界面效果:
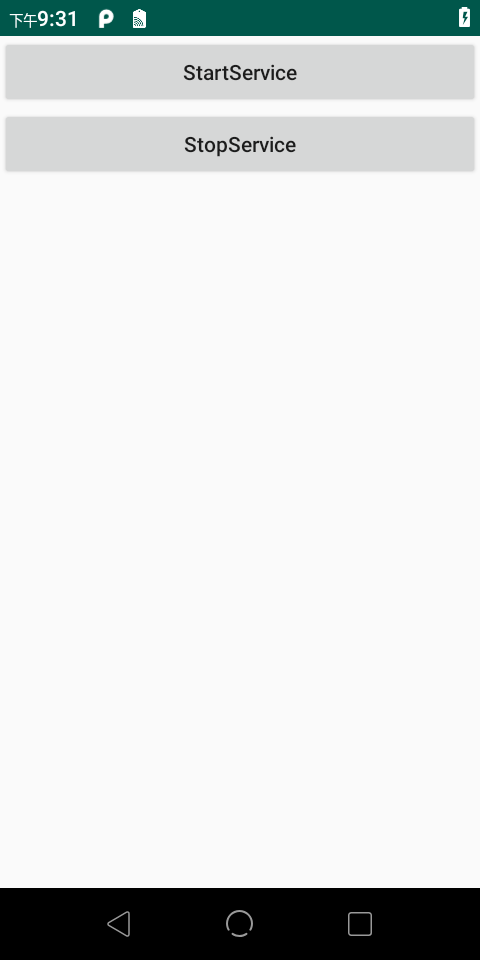
图2
启动服务:
点击StartService按钮,在点击StopService按钮。打印出来的log如下:
2019-07-28 04:08:53.307 19866-19866/com.flx.testservice D/flx_TestServer: onCreate

2019-07-28 04:08:53.312 19866-19866/com.flx.testservice D/flx_TestServer: onStartCommand flags=0;startId=1

2019-07-28 04:10:10.025 19866-19866/com.flx.testservice D/flx_TestServer: onDestroy
从代码和log看,通过点击StartService按钮,Acitivity组件调用startService(Intent intent)启动服务, 然后onCreate() onStartCommand()依次执行,Service的具体执行逻辑就可以放在这两个里面。点击StopService按钮,组件调用stopService(Intent intent) 停止服务,onDestroy()被回调。符合图1 左边部分(启动服务生命周期)过程。
点击StartService按钮3次,在点击StopService按钮。打印出来的log如下:
2019-07-28 04:13:02.272 19866-19866/com.flx.testservice D/flx_TestServer: onCreate

2019-07-28 04:13:02.277 19866-19866/com.flx.testservice D/flx_TestServer: onStartCommand flags=0;startId=1

2019-07-28 04:13:04.025 19866-19866/com.flx.testservice D/flx_TestServer: onStartCommand flags=0;startId=2

2019-07-28 04:13:04.714 19866-19866/com.flx.testservice D/flx_TestServer: onStartCommand flags=0;startId=3

2019-07-28 04:13:15.569 19866-19866/com.flx.testservice D/flx_TestServer: onDestroy
Service中的onCreate()只在首次创建服务时调用, 如果服务已经在运行了则不会再调用。它在onStartCommand()(和onBind() 后面可以看到)之前。
停止服务:
启动服务 可在后台无限运行,即使启动服务的组件已经销毁(除非系统资源紧张,系统收回了内存资源而被销毁)。因此,服务必须自己停止,两种方式,1是服务自身调用stopSelf()自行停止运行,另一种是组件通过调用stopService(Intent intent)来停止。
*但是,如果服务同时处理多个 onStartCommand() 请求,则不应在处理完一个启动请求之后停止服务,因为可能已经收到了新的启动请求(在第一个请求结束时停止服务会终止第二个请求)。为了避免这一问题,可以使用 stopSelf(int) 确保服务停止请求始终是最近的启动请求。也就说,在调用 stopSelf(int) 时,传递与停止请求的 ID 对应的启动请求的 ID(传递给 onStartCommand() 的 startId)。如果调用的 stopSelf(int) 与之前服务收到了新的启动请求,ID 不匹配,服务也就不会停止。
做个简单的验证:
如点击3次StartService,在点击StopService,在点击StartService,log如下
2019-07-27 10:05:49.677 28103-28103/com.flx.testservice D/flx_TestServer: onCreate

2019-07-27 10:05:49.683 28103-28103/com.flx.testservice D/flx_TestServer: onStartCommand flags=0;startId=1

2019-07-27 10:05:51.205 28103-28103/com.flx.testservice D/flx_TestServer: onStartCommand flags=0;startId=2

2019-07-27 10:05:51.866 28103-28103/com.flx.testservice D/flx_TestServer: onStartCommand flags=0;startId=3

2019-07-27 10:05:54.610 28103-28103/com.flx.testservice D/flx_TestServer: onDestroy

2019-07-27 10:05:55.603 28103-28103/com.flx.testservice D/flx_TestServer: TestServer thread id =2

2019-07-27 10:05:55.603 28103-28103/com.flx.testservice D/flx_TestServer: onCreate

2019-07-27 10:05:55.607 28103-28103/com.flx.testservice D/flx_TestServer: onStartCommand flags=0;startId=1
可以看出startId是onStartCommand执行的次数有关。点击StopService是组件调用的stopService,不管执行了几次启动服务,都会直接停止服务。
下面不点击StopService的按钮,在onStartCommand中有加stopSelf(5); 当startId=5时,ID匹配了会自己停止服务,其他情况不会停止。log如下,是符合的。
2019-07-27 10:11:51.214 28103-28103/com.flx.testservice D/flx_TestServer: onCreate

2019-07-27 10:11:51.218 28103-28103/com.flx.testservice D/flx_TestServer: onStartCommand flags=0;startId=1

2019-07-27 10:11:55.993 28103-28103/com.flx.testservice D/flx_TestServer: onStartCommand flags=0;startId=2

2019-07-27 10:11:56.662 28103-28103/com.flx.testservice D/flx_TestServer: onStartCommand flags=0;startId=3

2019-07-27 10:11:57.405 28103-28103/com.flx.testservice D/flx_TestServer: onStartCommand flags=0;startId=4

2019-07-27 10:11:58.159 28103-28103/com.flx.testservice D/flx_TestServer: onStartCommand flags=0;startId=5

2019-07-27 10:11:58.181 28103-28103/com.flx.testservice D/flx_TestServer: onDestroy
(3) 绑定服务---bindService
最开始已经介绍了启动服务和绑定服务。
要创建绑定服务,首先必须定义指定客户端如何与服务通信的接口。 服务与客户端之间的这个接口必须是 IBinder 的实现,并且服务必须从 onBind() 回调方法返回它。一旦客户端收到 IBinder,即可开始通过该接口与服务进行交互。
多个客户端可以同时绑定到服务。客户端完成与服务的交互后,会调用 unbindService() 取消绑定。一旦没有客户端绑定到该服务,系统就会销毁它(不必按通过 onStartCommand() 启动的服务那样来停止绑定服务)。
上述代码添加绑定服务相关代码和log,由于模拟多个客户端,所以创建了2个组件和ServiceConnection.
TestService.java
package com.flx.testservice;

import android.app.Service;

import android.content.Intent;

import android.os.Binder;

import android.os.IBinder;

import android.util.Log;

public class TestService extends Service {

    final private static String TAG = "flx_TestServer";

    @Override

    public void onCreate() {

        Log.d(TAG, "TestServer thread id =" + Thread.currentThread().getId());

        Log.d(TAG, "onCreate");

        super.onCreate();

    }

    @Override

    public int onStartCommand(Intent intent, int flags, int startId) {

        Log.d(TAG, "onStartCommand flags=" + flags + ";startId=" + startId);

        stopSelf();

        /*返回变量 用于描述系统应该如何在服务终止的情况下继续运行服务

        START_NOT_STICKY

        除非有挂起 Intent 要传递,否则系统不会重建服务。这是最安全的选项,可以避免在不必要时以及应用能够轻松重启所有未完成的作业时运行服务。

        START_STICKY

        会重建服务并调用onStartCommand(),但不会重新传递最后一个 Intent。这适用于不执行命令、但无限期运行并等待作业的媒体播放器(或类似服务)。

        START_REDELIVER_INTENT

        会重建服务,并通过传递给服务的最后一个 Intent 调用 onStartCommand()。这适用于主动执行应该立即恢复的作业(例如下载文件)的服务。

         */

        return super.onStartCommand(intent, flags, startId);

    }

    @Override

    public IBinder onBind(Intent intent) {

        Log.d(TAG, "onBind");

        return binder;

    }

    @Override

    public boolean onUnbind(Intent intent) {

        Log.d(TAG, "onUnbind");

        return super.onUnbind(intent);

    }

    @Override

    public void onDestroy() {

        Log.d(TAG, "onDestroy");

        super.onDestroy();

    }

    private MyBinder binder = new MyBinder();

    int testNum = ;

    class MyBinder extends Binder{

        public void test(int num) {

            Log.d(TAG, "MyBinder test()="+(testNum+=num));

        }

    }

}
MainActivity.java
package com.flx.testservice;

import android.app.Activity;

import android.app.Service;

import android.content.ComponentName;

import android.content.Intent;

import android.content.ServiceConnection;

import android.os.Bundle;

import android.os.IBinder;

import android.util.Log;

import android.view.View;

import android.widget.Button;

public class MainActivity extends Activity implements View.OnClickListener {

    final private static String TAG = "flx_TestServer";

    @Override

    protected void onCreate(Bundle savedInstanceState) {

        super.onCreate(savedInstanceState);

        Log.d(TAG, "MainActivity thread id =" + Thread.currentThread().getId());

        setContentView(R.layout.activity_main);

        Button mStartServerBtn = findViewById(R.id.start_service_btn);

        Button mStopServerBtn = findViewById(R.id.stop_service_btn);

        Button mBindServerBtn = findViewById(R.id.bind_service_btn);

        Button mBindServerBtn2 = findViewById(R.id.bind_service_btn2);

        Button mUnbindServerBtn = findViewById(R.id.unbind_service_btn);

        Button mUnbindServerBtn2 = findViewById(R.id.unbind_service_btn2);

        mStartServerBtn.setOnClickListener(this);

        mStopServerBtn.setOnClickListener(this);

        mBindServerBtn.setOnClickListener(this);

        mBindServerBtn2.setOnClickListener(this);

        mUnbindServerBtn.setOnClickListener(this);

        mUnbindServerBtn2.setOnClickListener(this);

    }

    @Override

    public void onClick(View v) {

        Intent serverIntent = new Intent(this, TestService.class);

        switch (v.getId()) {

            case R.id.start_service_btn:

                startService(serverIntent);

                break;

            case R.id.stop_service_btn:

                stopService(serverIntent);

                break;

            case R.id.bind_service_btn:

                bindService(serverIntent, mServerConnect, Service.BIND_AUTO_CREATE);

                break;

            case R.id.bind_service_btn2:

                bindService(serverIntent, mServerConnect2, Service.BIND_AUTO_CREATE);

                break;

            case R.id.unbind_service_btn:

                unbindService(mServerConnect);

                break;

            case R.id.unbind_service_btn2:

                unbindService(mServerConnect2);

                break;

        }

    }

    private ServiceConnection mServerConnect2 = new ServiceConnection() {

        @Override

        public void onServiceConnected(ComponentName name, IBinder service) {

            Log.d(TAG, "ServiceConnection2 onServiceConnected");

            TestService.MyBinder myBinder = (TestService.MyBinder) service;

            myBinder.test();

        }

        @Override

        public void onServiceDisconnected(ComponentName name) {

            Log.d(TAG, "ServiceConnection2 onServiceDisconnected");

        }

    };

    private ServiceConnection mServerConnect = new ServiceConnection() {

        @Override

        public void onServiceConnected(ComponentName name, IBinder service) {

            Log.d(TAG, "ServiceConnection onServiceConnected");

            TestService.MyBinder myBinder = (TestService.MyBinder) service;

            myBinder.test();

        }

        @Override

        public void onServiceDisconnected(ComponentName name) {

            Log.d(TAG, "ServiceConnection onServiceDisconnected");

        }

    };

}
activity_main.xml
<?xml version="1.0" encoding="utf-8"?>

<LinearLayout xmlns:android="http://schemas.android.com/apk/res/android"

    android:layout_width="match_parent"

    android:layout_height="match_parent"

    android:orientation="vertical" >

    <Button

        android:id="@+id/start_service_btn"

        android:layout_width="match_parent"

        android:layout_height="wrap_content"

        android:textAllCaps="false"

        android:text="StartService" />

    <Button

        android:id="@+id/stop_service_btn"

        android:layout_width="match_parent"

        android:layout_height="wrap_content"

        android:textAllCaps="false"

        android:text="StopService" />

    <Button

        android:id="@+id/bind_service_btn"

        android:layout_width="match_parent"

        android:layout_height="wrap_content"

        android:textAllCaps="false"

        android:text="BindService" />

    <Button

        android:id="@+id/bind_service_btn2"

        android:layout_width="match_parent"

        android:layout_height="wrap_content"

        android:textAllCaps="false"

        android:text="BindService2"/>

    <Button

        android:id="@+id/unbind_service_btn"

        android:layout_width="match_parent"

        android:layout_height="wrap_content"

        android:textAllCaps="false"

        android:text="UnbindService"/>

    <Button

        android:id="@+id/unbind_service_btn2"

        android:layout_width="match_parent"

        android:layout_height="wrap_content"

        android:textAllCaps="false"

        android:text="UnbindService2"/>

</LinearLayout>
效果界面
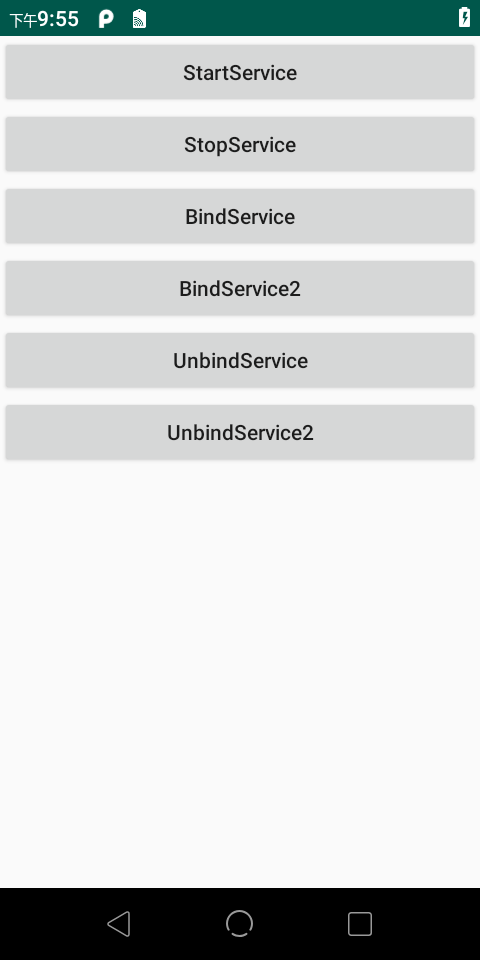
图3
点击BindService按钮,组件调用的bindService()绑定服务。再点击UnbindService按钮,组件调用unbindService解除绑定。
2019-07-28 04:45:52.546 22060-22060/com.flx.testservice D/flx_TestServer: onCreate

2019-07-28 04:45:52.549 22060-22060/com.flx.testservice D/flx_TestServer: onBind

2019-07-28 04:45:52.577 22060-22060/com.flx.testservice D/flx_TestServer: ServiceConnection onServiceConnected

2019-07-28 04:45:52.577 22060-22060/com.flx.testservice D/flx_TestServer: MyBinder test()=10

2019-07-28 04:45:55.043 22060-22060/com.flx.testservice D/flx_TestServer: onUnbind

2019-07-28 04:45:55.045 22060-22060/com.flx.testservice D/flx_TestServer: onDestroy
绑定及解除绑定依次执行了onCreate(),onBind(),onUnbind(),onDestory()。符合图1右边部分的 绑定服务的生命周期。绑定过的组件,再次点击也是无效的,不能多此绑定。
点击BindService按钮,再点击BindService2按钮,点击UnbindService按钮或者点击UnbindService2按钮,效果如下:
2019-07-28 04:59:18.137 22837-22837/com.flx.testservice D/flx_TestServer: onCreate

2019-07-28 04:59:18.139 22837-22837/com.flx.testservice D/flx_TestServer: onBind

2019-07-28 04:59:18.152 22837-22837/com.flx.testservice D/flx_TestServer: ServiceConnection onServiceConnected

2019-07-28 04:59:18.152 22837-22837/com.flx.testservice D/flx_TestServer: MyBinder test()=10

2019-07-28 04:59:19.029 22837-22837/com.flx.testservice D/flx_TestServer: ServiceConnection2 onServiceConnected

2019-07-28 04:59:19.029 22837-22837/com.flx.testservice D/flx_TestServer: MyBinder test()=20
所以如果不是所有绑定的都解除绑定,服务是不会销毁停止。当两个绑定都解除绑定后,服务会被销毁(BindService->BindService2->UnbindService->UnbindService2)
2019-07-28 05:01:50.802 23164-23164/com.flx.testservice D/flx_TestServer: onCreate

2019-07-28 05:01:50.803 23164-23164/com.flx.testservice D/flx_TestServer: onBind

2019-07-28 05:01:50.815 23164-23164/com.flx.testservice D/flx_TestServer: ServiceConnection onServiceConnected

2019-07-28 05:01:50.815 23164-23164/com.flx.testservice D/flx_TestServer: MyBinder test()=10

2019-07-28 05:01:51.453 23164-23164/com.flx.testservice D/flx_TestServer: ServiceConnection2 onServiceConnected

2019-07-28 05:01:51.453 23164-23164/com.flx.testservice D/flx_TestServer: MyBinder test()=20

2019-07-28 05:01:52.738 23164-23164/com.flx.testservice D/flx_TestServer: onUnbind

2019-07-28 05:01:52.745 23164-23164/com.flx.testservice D/flx_TestServer: onDestroy
注:如果服务已解除绑定,再执行解除绑定会报错。
java.lang.IllegalArgumentException: Service not registered: com.flx.testservice.MainActivity$2@72e6895
bindService是有返回值的,所以在解除绑定前做一个判断就可以避免了。
返回值的说明---true if the system is in the process of bringing up a service that your client has permission to bind to; false if the system couldn't find the service or if your client doesn't have permission to bind to it. If this value is true, you should later call unbindService(ServiceConnection) to release the connection.
ManiActivity中修改如下即可:
   private boolean mIsConn = false;

    private boolean mIsConn2 = false;

    @Override

    public void onClick(View v) {

        Intent serverIntent = new Intent(this, TestService.class);

        switch (v.getId()) {

            case R.id.start_service_btn:

                startService(serverIntent);

                break;

            case R.id.stop_service_btn:

                stopService(serverIntent);

                break;

            case R.id.bind_service_btn:

                mIsConn=bindService(serverIntent, mServerConnect, Service.BIND_AUTO_CREATE);

                break;

            case R.id.bind_service_btn2:

                mIsConn2=bindService(serverIntent, mServerConnect2, Service.BIND_AUTO_CREATE);

                break;

            case R.id.unbind_service_btn:

                if (mIsConn){

                    mIsConn = false;

                    unbindService(mServerConnect);

                }

                break;

            case R.id.unbind_service_btn2:

                if (mIsConn2) {

                    mIsConn2 = false;

                    unbindService(mServerConnect2);

                }

                break;

        }

        Log.d(TAG, "MainActivity after click mIsConn="+mIsConn+";mIsConn2="+mIsConn2);

    }
三、其他注意
1.Service和线程
2019-07-28 07:26:21.978 27802-27802/com.flx.testservice D/flx_TestServer: MainActivity thread id =2

2019-07-28 07:26:24.663 27802-27802/com.flx.testservice D/flx_TestServer: MainActivity after click mIsConn=true;mIsConn2=false

2019-07-28 07:26:24.703 27802-27802/com.flx.testservice D/flx_TestServer: TestServer thread id =2
上述例子中有打印Activity和Service的线程id, 是一样的。
默认情况下,服务是在应用的主线程中运行的。服务在其托管进程的主线程中运行,它既不创建自己的线程,也不在单独的进程中运行(除非另行指定)。因此,如果服务执行的是密集型或阻塞性操作,则仍应在服务内创建新线程。服务和线程没有直接关系。
服务如果不停止会一直运行在后台(特殊情况下面说),即使Activity被销毁,只要进程还在 服务就能一直运行,这是线程做不到的。
2.强制停止服务
如果系统内存不足,达到一定条件,一直运行的服务可能被强制停止。如果不主动停止,服务在后台一直运行下去,随着服务在后台运行时间越来越长,系统会不断降低服务在后台列表的位置,当系统资源不足情况下,会越容易被强制停止 释放资源被系统回收。
那么如何尽量保证服务不会被强制停止呢?(比较正常合理的情况)
(1)如果服务绑定到具有用户焦点的Activity上,则不太可能被强制停止。
(2)onStartCommand的返回值 可以决定当系统资源 再次足够可用了,是否重启服务或已什么方式重启服务。具体的值在上述TestService中onStartCommand()方法中 注释里详细说明了。
(3)设置为前台服务。
前台服务被认为是用户主动意识到的一种服务,因此在内存不足时,系统也不会考虑将其终止。 前台服务必须为状态栏提供通知,除非服务停止或从前台移除,否则不能清除通知。例如,状态栏中的通知可能表示正在播放的歌曲,并允许用户启动 Activity 来与音乐播放器进行交互。
设置前台服务:
startForeground(int id, Notification notification), 注意,id不能为0
大致如下,在Service类onCreate()中添加的。
@Override

    public void onCreate() {

        Log.d(TAG, "TestServer thread id =" + Thread.currentThread().getId());

        Log.d(TAG, "onCreate");

        String CHANNEL_ID = "test_service_channelId";

        String CHANNEL_NAME = "test_service";

        NotificationChannel notificationChannel = new NotificationChannel(CHANNEL_ID,CHANNEL_NAME, NotificationManager.IMPORTANCE_LOW);

        NotificationManager notificationManager = (NotificationManager) getSystemService(Context.NOTIFICATION_SERVICE);

        notificationManager.createNotificationChannel(notificationChannel);

        Notification notification = new NotificationCompat.Builder(this, CHANNEL_ID)

                                .setSmallIcon(R.drawable.ic_launcher_background)

                                .setContentTitle("TestService Notification ABC")

                                .setContentText("AAAAA")

                                .setCategory(Notification.CATEGORY_SERVICE)

                                .build();

        startForeground(, notification);

        super.onCreate();

    }
因为用的Andoid P调试的,通知的创建如上代码。 注意别忘了添加权限。<uses-permission android:name="android.permission.FOREGROUND_SERVICE" />
效果如图

图4
即使最近任务中关闭应用,任务也是运行的,通知栏一直存在。停止任务后才会消失。
停止前台服务:
停止前台服务使用stopForeground(boolean removeNotification),方法中的boolean值表示是否移除通知栏的通知,该方法不会停止服务。但如果服务被停止了,则前台服务的通知也会被移除。
最新文章
- [LeetCode] Delete Node in a BST 删除二叉搜索树中的节点
- 利用pip安装模块(以安装pyperclip为例)
- hdu 5692 Snacks 线段树+dfs
- Rectangle(csu)
- 超实用的JavaScript代码段 Item8 -- js对象的(深)拷贝
- 与众不同 windows phone (22) - Device(设备)之摄像头(硬件快门, 自动对焦, 实时修改捕获视频)
- 安德鲁斯Selector简介
- Android开发学习资源
- Android开发艺术1之Activity的生命周期
- B - Tree Rotations HYSBZ - 2212 (线段树合并)
- Automatic Summarization of Bug Reports
- mysql windows开启客户端连接权限
- CentOS 6.x安装配置MongoDB 3.4.x
- 解题:CQOI 2013 和谐矩阵
- 使用Avd 调试慢的解决方案
- EasyUI学习总结(五)——EasyUI组件使用(转载)
- AFNetworking 和 ASIHTTPRequest
- poj2411 Mondriaan's Dream[简单状压dp]
- linux下的时间
- js报变量 is not a function