spark Master启动流程
2024-08-27 04:11:54
spark Master是spark集群的首脑,负责资源调度,任务分配,负载平衡等功能
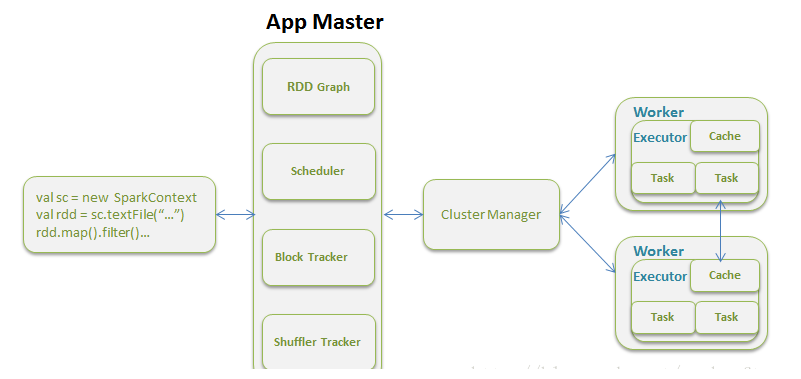
以下是master启动流程概述
通过shell进行对master进行启动
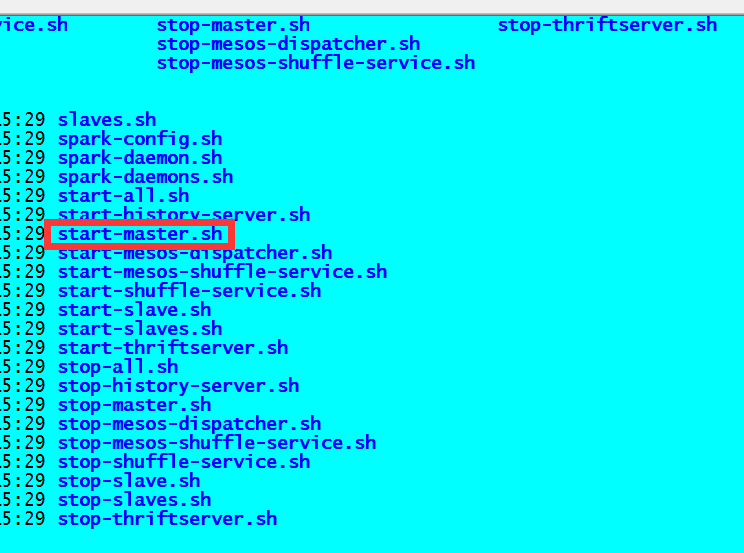
首先看一下启动脚本more start-master.sh
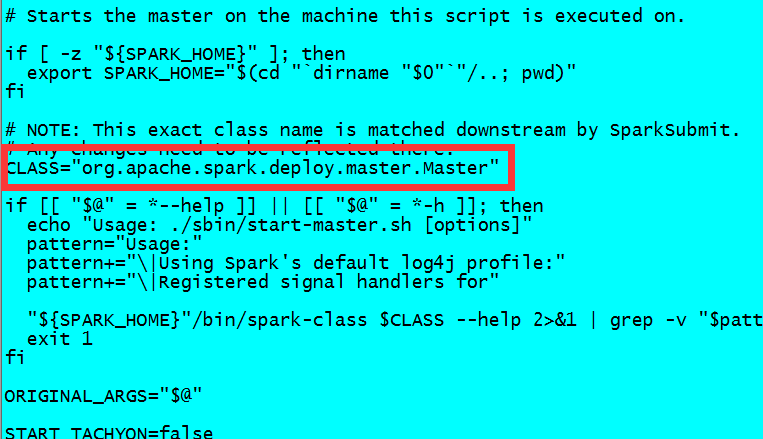
此时我们知道最终调用的是org.apache.spark.deploy.master.Master
这是Master源码:
private[spark] object Master extends Logging {
  val systemName = "sparkMaster"
  private val actorName = "Master"

  //master启动的入口
  def main(argStrings: Array[String]) {
    SignalLogger.register(log)
    //创建SparkConf
    val conf = new SparkConf
    //保存参数到SparkConf
    val args = new MasterArguments(argStrings, conf)
    //创建ActorSystem和Actor
    val (actorSystem, _, _, _) = startSystemAndActor(args.host, args.port, args.webUiPort, conf)
    //等待结束
    actorSystem.awaitTermination()
  }

  /**
   * Returns an `akka.tcp://...` URL for the Master actor given a sparkUrl `spark://host:port`.
   *
   * @throws SparkException if the url is invalid
   */
  def toAkkaUrl(sparkUrl: String, protocol: String): String = {
    val (host, port) = Utils.extractHostPortFromSparkUrl(sparkUrl)
    AkkaUtils.address(protocol, systemName, host, port, actorName)
  }

  /**
   * Returns an akka `Address` for the Master actor given a sparkUrl `spark://host:port`.
   *
   * @throws SparkException if the url is invalid
   */
  def toAkkaAddress(sparkUrl: String, protocol: String): Address = {
    val (host, port) = Utils.extractHostPortFromSparkUrl(sparkUrl)
    Address(protocol, systemName, host, port)
  }

  /**
   * Start the Master and return a four tuple of:
   *   (1) The Master actor system
   *   (2) The bound port
   *   (3) The web UI bound port
   *   (4) The REST server bound port, if any
   */
  def startSystemAndActor(
      host: String,
      port: Int,
      webUiPort: Int,
      conf: SparkConf): (ActorSystem, Int, Int, Option[Int]) = {
    val securityMgr = new SecurityManager(conf)
    //利用AkkaUtils创建ActorSystem
    val (actorSystem, boundPort) = AkkaUtils.createActorSystem(systemName, host, port, conf = conf,
      securityManager = securityMgr)
    //通过ActorSystem创建Actor -> actorSystem.actorOf, 就会执行Master的构造方法->然后执行生命周期方法
    val actor = actorSystem.actorOf(
      Props(classOf[Master], host, boundPort, webUiPort, securityMgr, conf), actorName)
    val timeout = AkkaUtils.askTimeout(conf)
    val portsRequest = actor.ask(BoundPortsRequest)(timeout)
    val portsResponse = Await.result(portsRequest, timeout).asInstanceOf[BoundPortsResponse]
    (actorSystem, boundPort, portsResponse.webUIPort, portsResponse.restPort)
  }
}
最终会通过Master的main函数进行最jvm进程启动
最新文章
- android 帧动画
- 固定Table的头部和左边的列-在Knockout Js使用场景下
- EF架构~EF异步改造之路~仓储接口的改造~续
- 《Android深度探索》(卷1)HAL与驱动开发读后感:
- 网站用域名能访问,用域名IP不能访问的原因分析
- android studio问题rendering problems no render target selected
- ThinkPHP中的三大自动简介
- php编写验证码
- 【CSS3】---块状元素、内联元素(又叫行内元素)和内联块状元素
- Git 安装与使用(二)
- 【Flume NG用户指南】(2)构造
- (转载)测试工具monkey
- TextView 实现跑马灯效果
- JVM高级特性-三、垃圾收集之判断对象存活算法
- canvas探照灯效果
- 微信小程序上的map组件bindregionchange地图视野变化函数成功回调会产生2次值的问题?
- linux系统ansible一键完成三大服务器基础配置(剧本)
- 『Python CoolBook』C扩展库_其一_用法讲解
- Solidity的地址 数组如何判断是否包含一个给定的地址?
- Java内部类详解(一)