Spring集成Swagger,Java自动生成Api文档
2024-08-26 22:47:10
博主很懒...
Swagger官网:http://swagger.io
GitHub地址:https://github.com/swagger-api
官方注解文档:http://docs.swagger.io/swagger-core/apidocs/index.html
Swagger-UI地址:https://github.com/swagger-api/swagger-ui
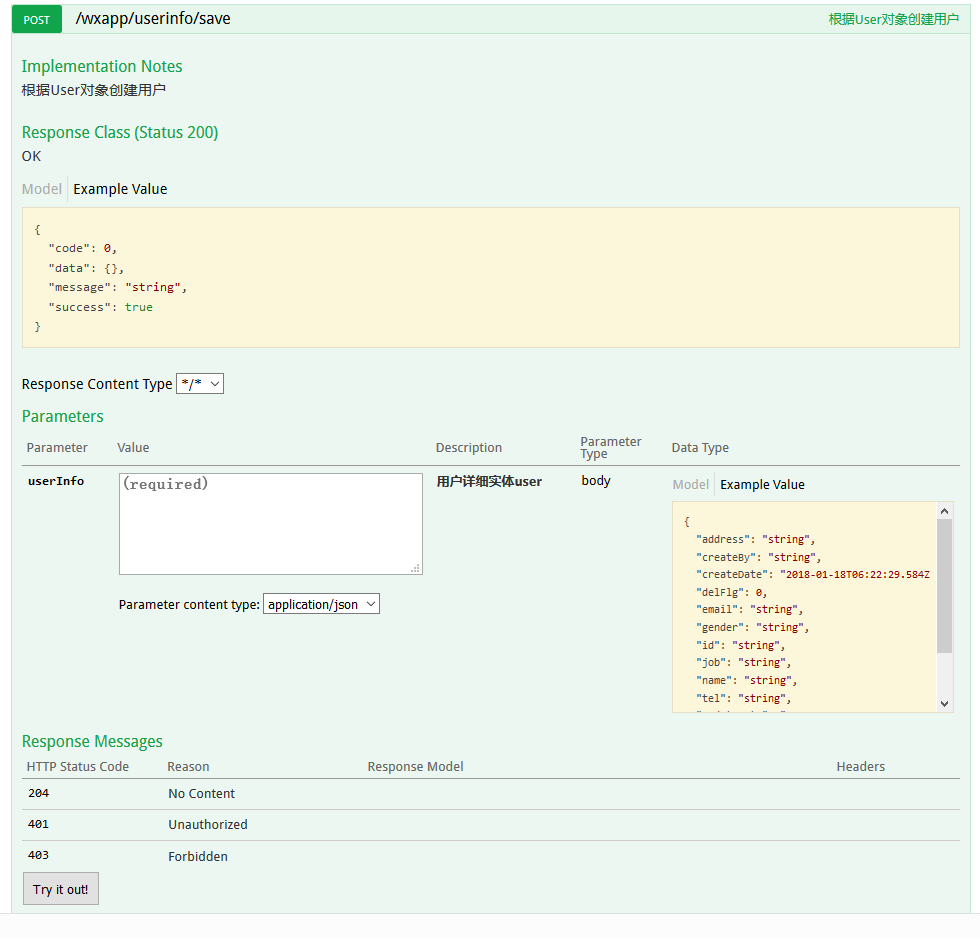
swagger最终效果图

好,开始说Spring怎么配置Swagger了
1.pom.xml引入需要的jar包
<!-- 构建Restful API 我这版本是2.6.1 -->

<dependency>

    <groupId>io.springfox</groupId>

    <artifactId>springfox-swagger2</artifactId>

    <version>${swagger2.version}</version>

</dependency>

<dependency>

    <groupId>io.springfox</groupId>

    <artifactId>springfox-swagger-ui</artifactId>

    <version>${swagger2.version}</version>

</dependency>
2.扫描你的Swagger2config.java所在的包
<!-- url是你需要扫描swagger的包路径 -->

<context:component-scan  base-package="com.nickwilde.microtrain.common.config.swagger"/>
3.Swagger2config.java[类名自定义]
package com.nickwilde.microtrain.common.config.swagger2;

import org.springframework.context.annotation.Bean;

import org.springframework.context.annotation.Configuration;

import springfox.documentation.builders.ApiInfoBuilder;

import springfox.documentation.builders.PathSelectors;

import springfox.documentation.builders.RequestHandlerSelectors;

import springfox.documentation.service.ApiInfo;

import springfox.documentation.service.Contact;

import springfox.documentation.spi.DocumentationType;

import springfox.documentation.spring.web.plugins.Docket;

import springfox.documentation.swagger2.annotations.EnableSwagger2;

/**

 * @author NickWilde

 * @version 2018/1/18 10:23

 * @description: Swagger2Config

 * TODO 用一句话描述

 */

@Configuration

@EnableSwagger2

public class Swagger2Config{

    @Bean

    public Docket api() {

        return new Docket(DocumentationType.SWAGGER_2).forCodeGeneration(true)

                .select()

                .apis(RequestHandlerSelectors.any())

                //过滤生成链接

                .paths(PathSelectors.any())

                .build()

                .apiInfo(apiInfo());

    }

    //api接口作者相关信息

    private ApiInfo apiInfo() {

        Contact contact = new Contact("NickWilde", "", "1064698801@qq.com");

        ApiInfo apiInfo = new ApiInfoBuilder()

                .license("Apache License Version 2.0")

                .title("Unexpectedly系统")

                .description("接口文档")

                .contact(contact)

                .version("1.0")

                .build();

        return apiInfo;

    }

}
4.给你的controller加上额外注解(不加也是有的)
@ApiOperation(value="根据User对象创建用户", notes="根据User对象创建用户",httpMethod = "POST") //httpMehtod如果不定义,那么swagger会有把该接口的所有请求方法都一一列举出来

@ApiImplicitParam(name = "data", value = "data描述", required = true, dataType = "UserInfo") //参数定义..类型..之类的,这是基础简单,其余的看api吧~
最新文章
- iOS-开发进阶
- Walle - 瓦力上线部署系统搭建攻略
- ubuntu安装py27 spyder
- Javascript优化后的加减乘除(解决js浮点数计算bug)
- 网上搜集了点资料,学web的人互相分享共同进步吧(php编码的好习惯必须养成)
- 论MySQL的监控和调优
- 多线程调用WebClient速度变慢的问题
- File类和RandomAccessFile类
- 黄聪:使用WORDPRESS自带AJAX方法
- DataTable导入到Excel文件
- JS事件监听 JS:attachEvent和addEventListener 使用方法
- C++ template随笔
- 【机器学习算法-python实现】Adaboost的实现(1)-单层决策树(decision stump)
- Google Earth数据存储、管理、表现及开发机制
- Mongodb 监测
- leetCode没那么难啦 in Java (二)
- js 操作本地sqlite
- ios dispatch_async使用
- Permanent Space 和 Heap Space
- IIS7 开发与 管理 编程 之 Microsoft.Web.Administration
热门文章
- 用烂点子打破沉默的"麦当劳理论"
- Go 在 TiDB 的实践
- python 多进程和子进程1
- How to Be Assertive Asking for What You Want Firmly and Fairly
- Python实例---爬取下载喜马拉雅音频文件
- Go语言学习笔记(六)net & net/http
- It was not possible to find any compatible framework version
- November 01st, 2017 Week 44th Wednesday
- 2019 wannafly winter camp
- Phoenix安装配置