springboot(十三)-分库分表-手动配置
sharding-jdbc简介
Sharding-JDBC直接封装JDBC API,可以理解为增强版的JDBC驱动,旧代码迁移成本几乎为零:
可适用于任何基于java的ORM框架,如:JPA, Hibernate, Mybatis, Spring JDBC Template或直接使用JDBC。
可基于任何第三方的数据库连接池,如:DBCP, C3P0, BoneCP, Druid等。
理论上可支持任意实现JDBC规范的数据库。虽然目前仅支持MySQL,但已有支持Oracle,SQLServer,DB2等数据库的计划。
Sharding-JDBC定位为轻量级java框架,使用客户端直连数据库,以jar包形式提供服务,未使用中间层,无需额外部署,无其他依赖,DBA也无需改变原有的运维方式。SQL解析使用Druid解析器,是目前性能最高的SQL解析器。
具体的介绍可以上它的文档那里看看,简单归纳起来就是,它是一个增强版的JDBC,对使用者透明,逻辑代码什么的都不用动,它来完成分库分表的操作;然后它还支持分布式事务(不完善)。看起来很不错的样子。
下面用个小例子来看一下分库分表的使用。使用的是SpringBoot,mybatis,DBCP连接池。
1.新建一个springboot项目
ArtifactId为sharding-jdbc-manualConfiguration.自己配置好目录结构。

2.pom.xml
<project xmlns="http://maven.apache.org/POM/4.0.0" xmlns:xsi="http://www.w3.org/2001/XMLSchema-instance"

  xsi:schemaLocation="http://maven.apache.org/POM/4.0.0 http://maven.apache.org/xsd/maven-4.0.0.xsd">

  <modelVersion>4.0.0</modelVersion>

  <groupId>com.itmuch.boot</groupId>

  <artifactId>sharding-jdbc-manualConfiguration</artifactId>

  <version>0.0.1-SNAPSHOT</version>

  <packaging>jar</packaging>

  <name>sharding-jdbc-manualConfiguration</name>

  <url>http://maven.apache.org</url>

  <parent>

        <groupId>org.springframework.boot</groupId>

        <artifactId>spring-boot-starter-parent</artifactId>

        <version>1.5.9.RELEASE</version>

        <relativePath/> <!-- lookup parent from repository -->

    </parent>

    <properties>

        <project.build.sourceEncoding>UTF-8</project.build.sourceEncoding>

        <project.reporting.outputEncoding>UTF-8</project.reporting.outputEncoding>

        <java.version>1.8</java.version>

    </properties>

    <dependencies>

        <dependency>

            <groupId>org.springframework.boot</groupId>

            <artifactId>spring-boot-starter-web</artifactId>

        </dependency>

        <dependency>

            <groupId>org.mybatis.spring.boot</groupId>

            <artifactId>mybatis-spring-boot-starter</artifactId>

            <version>1.3.1</version>

        </dependency>

        <dependency>

            <groupId>mysql</groupId>

            <artifactId>mysql-connector-java</artifactId>

            <scope>runtime</scope>

        </dependency>

        <dependency>

            <groupId>org.springframework.boot</groupId>

            <artifactId>spring-boot-starter-test</artifactId>

            <scope>test</scope>

        </dependency>

        <!--sharding-jdbc -->

        <dependency>

            <groupId>io.shardingjdbc</groupId>

            <artifactId>sharding-jdbc-core</artifactId>

            <version>2.0.3</version>

        </dependency>

        <dependency>

            <groupId>org.springframework.boot</groupId>

            <artifactId>spring-boot-devtools</artifactId>

        </dependency>

<!--         <dependency> -->

<!--             <groupId>com.alibaba</groupId> -->

<!--             <artifactId>druid</artifactId> -->

<!--             <version>1.1.3</version> -->

<!--         </dependency> -->

        <dependency>

            <groupId>commons-dbcp</groupId>

            <artifactId>commons-dbcp</artifactId>

        </dependency>

        <dependency>

            <groupId>mysql</groupId>

            <artifactId>mysql-connector-java</artifactId>

        </dependency>

        <!-- https://mvnrepository.com/artifact/com.alibaba/fastjson -->

        <dependency>

            <groupId>com.alibaba</groupId>

            <artifactId>fastjson</artifactId>

            <version>1.2.47</version>

        </dependency>

    </dependencies>

    <build>

        <plugins>

            <plugin>

                <groupId>org.springframework.boot</groupId>

                <artifactId>spring-boot-maven-plugin</artifactId>

            </plugin>

        </plugins>

    </build>

</project>
简单提一下:
这里主要是这个依赖
     <dependency>

            <groupId>io.shardingjdbc</groupId>

            <artifactId>sharding-jdbc-core</artifactId>

            <version>2.0.3</version>

        </dependency>
它是当当网开源的sharding-jdbc,当然这个不重要啦!
顺便说一下:
<!--         <dependency> -->

<!--             <groupId>com.alibaba</groupId> -->

<!--             <artifactId>druid</artifactId> -->

<!--             <version>1.1.3</version> -->

<!--         </dependency> -->

        <dependency>

            <groupId>commons-dbcp</groupId>

            <artifactId>commons-dbcp</artifactId>

        </dependency>
我是用的DBCP数据库连接池,这里的druid连接池被我注掉了,当然你也可以使用它,把DBCP注掉。它们都差不多。我想很多其他博友应该有写。大家找找看咯!
在这里我要吐槽下:TMD,CSDN博客上面的文章叫什么东西啊,我读过几次,在上面down下来的代码都是不能运行的,然后在博客园上面再找相同内容的东西,一比对,发现很明显的配置漏洞。我也是无语了。
所以我是推荐咱博客园的文章的,大家都很优秀!!!
application.yml
我们是手动配置数据源,那这里我们可以上面都不用谢了呀!直接放个空文件得了,当然你如果不想使用8080端口,想在这里配置一下当前项目的使用端口号,你可以在这里配置下咯!!!
数据库
我们要准备三个数据库user_0,user_1,user_2,每个数据库里准备两张表user_info_0,user_info_1.一共使用六张一样一样的表。
DROP TABLE IF EXISTS `user_info_0`;

CREATE TABLE `user_info_0` (

  `user_id` bigint(19) NOT NULL,

  `user_name` varchar(45) DEFAULT NULL,

  `account` varchar(45) DEFAULT NULL,

  `password` varchar(45) DEFAULT NULL,

  PRIMARY KEY (`user_id`)

) ENGINE=InnoDB DEFAULT CHARSET=utf8;

-- ----------------------------

-- Table structure for user_info_1

-- ----------------------------

DROP TABLE IF EXISTS `user_info_1`;

CREATE TABLE `user_info_1` (

  `user_id` bigint(19) NOT NULL,

  `user_name` varchar(45) DEFAULT NULL,

  `account` varchar(45) DEFAULT NULL,

  `password` varchar(45) DEFAULT NULL,

  PRIMARY KEY (`user_id`)

) ENGINE=InnoDB DEFAULT CHARSET=utf8;
Application.java
@SpringBootApplication

@EnableAutoConfiguration(exclude = { DataSourceAutoConfiguration.class })

public class Application {

    public static void main(String[] args) {

        SpringApplication.run(Application.class, args);

    }

}
启动类嘛,我们都一样!不不不。。。注意了,多了个注解,看到它要干嘛了吗?它要把自动配置数据源的功能排除掉。
这里你要是看过我前面的文章“为什么用springboot”中的springboot自动配置的原理,这个东西,so easy啦!
testController.java
@RestController

public class testController {

    @Resource

    UserInfoMapper userInfoMaper;

    @Resource

    DemoService demoService;

    @GetMapping("insert/{id}")

    public String insertData(@PathVariable Long id) {

        demoService.demo();

        return "success";

    }

    @GetMapping("get/{id}")

    public String getData(@PathVariable Long id) {

        UserInfo userInfoByUserId = demoService.getUserInfoByUserId(id);

        System.out.println("得到的结果为:" + JSON.toJSON(userInfoByUserId));

        return JSON.toJSON(userInfoByUserId).toString();

    }

}
对外接口,我们提供两个吧,向数据库插入数据传的id没用,我传了玩儿的!!!
插入的内容请看下面的service.
DemoService.java
@Service

public class DemoService {

    @Resource

    UserInfoMapper userInfoMapper;

    public static Long userId = 100L;

    public void demo() {

        System.out.println("Insert--------------");

        for (int i = 1; i <= 100; i++) {

            UserInfo userInfo = new UserInfo();

            userInfo.setUserId(userId);

            System.out.println(userId);

            userInfo.setAccount("Account" + i);

            userInfo.setPassword("pass" + i);

            userInfo.setUserName("name" + i);

            userId++;

            userInfoMapper.insert(userInfo);

            System.out.println("第" + i + "条");

        }

        System.out.println("over..........");

    }

    public UserInfo getUserInfoByUserId(Long id) {

        return userInfoMapper.selectByPrimaryKey(id);

    }

}
我们就试验向数据库插100条数据咯,再提供下查询方法。哦哦,Entity在下面
UserInfo.java
 public class UserInfo {

     private Long userId;

     private String userName;

     private String account;

     private String password;

     public Long getUserId() {

         return userId;

     }

     public void setUserId(Long userId) {

         this.userId = userId;

     }

     public String getUserName() {

         return userName;

     }

     public void setUserName(String userName) {

         this.userName = userName == null ? null : userName.trim();

     }

     public String getAccount() {

         return account;

     }

     public void setAccount(String account) {

         this.account = account == null ? null : account.trim();

     }

     public String getPassword() {

         return password;

     }

     public void setPassword(String password) {

         this.password = password == null ? null : password.trim();

     }

 }
点击展开
UserInfoMapper.java
@Mapper

public interface UserInfoMapper {

    /**

     * This method was generated by MyBatis Generator. This method corresponds to

     * the database table user_info

     *

     * @mbg.generated Tue Mar 13 23:47:19 CST 2018

     */

    int insert(UserInfo record);

    /**

     * This method was generated by MyBatis Generator. This method corresponds to

     * the database table user_info

     *

     * @mbg.generated Tue Mar 13 23:47:19 CST 2018

     */

    int insertSelective(UserInfo record);

    /**

     * This method was generated by MyBatis Generator. This method corresponds to

     * the database table user_info

     *

     * @mbg.generated Tue Mar 13 23:47:19 CST 2018

     */

    UserInfo selectByPrimaryKey(Long userId);

    /**

     * This method was generated by MyBatis Generator. This method corresponds to

     * the database table user_info

     *

     * @mbg.generated Tue Mar 13 23:47:19 CST 2018

     */

    int updateByPrimaryKeySelective(UserInfo record);

    /**

     * This method was generated by MyBatis Generator. This method corresponds to

     * the database table user_info

     *

     * @mbg.generated Tue Mar 13 23:47:19 CST 2018

     */

    int updateByPrimaryKey(UserInfo record);

}
因为是用mybatis的逆向工程自动生成的,东西多余了点。懒得删了。但是注意下,类名上面的@Mapper注解是我加的。
这里我展开说一下,我在网上看到很多人在springboot项目中使用Mybatis作为持久层框架的时候,都不这么用。都是在resource根目录下面建一个文件夹mapper,然后把所有的XXXMapper.xml文件放到里面,XXXMapper.java还是放到com...mapper中不变。然后在启动类上面添加一个针对这个com...mapper文件夹的@ComponentScan(“com...mapper”)注解。还要在根目录resource下面配置mybatis-config.xml文件。更有甚者,居然有人在application.properties文件或application.yml文件中配置mybatis的东西,例如:
mybatis:
mapper-locations: classpath:mybatis/mapper/*.xml
type-aliases-package: com.sun.shard.bean
虽然springboot也能支持这样使用,但是我是不建议也不喜欢这样的风格,因为你想啊,我们为什么要用springboot?不就是想尽量少写点配置嘛,把这些繁琐的东西交给springboot来做就得了!要不然springboot出mybatis-spring-boot-starter这个启动器干啥!
对了,大家想了解为啥,建议大家自己看下源码,你加了mybatis-spring-boot-starter这个依赖,在Maven Dependencies下面找到
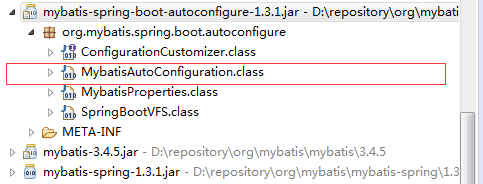
看明白这个类,基本就没啥东西了。
扯远了,我们继续我们的分库分表。
UserInfoMapper.xml
 <?xml version="1.0" encoding="UTF-8"?>

 <!DOCTYPE mapper PUBLIC "-//mybatis.org//DTD Mapper 3.0//EN" "http://mybatis.org/dtd/mybatis-3-mapper.dtd">

 <mapper namespace="com.itmuch.boot.mapper.UserInfoMapper">

   <resultMap id="BaseResultMap" type="com.itmuch.boot.entity.UserInfo">

     <!--

       WARNING - @mbg.generated

       This element is automatically generated by MyBatis Generator, do not modify.

       This element was generated on Tue Mar 13 23:47:19 CST 2018.

     -->

     <id column="user_id" jdbcType="BIGINT" property="userId" />

     <result column="user_name" jdbcType="VARCHAR" property="userName" />

     <result column="account" jdbcType="VARCHAR" property="account" />

     <result column="password" jdbcType="VARCHAR" property="password" />

   </resultMap>

   <sql id="Base_Column_List">

     <!--

       WARNING - @mbg.generated

       This element is automatically generated by MyBatis Generator, do not modify.

       This element was generated on Tue Mar 13 23:47:19 CST 2018.

     -->

     user_id, user_name, account, password

   </sql>

   <select id="selectByPrimaryKey" parameterType="java.lang.Long" resultMap="BaseResultMap">

     <!--

       WARNING - @mbg.generated

       This element is automatically generated by MyBatis Generator, do not modify.

       This element was generated on Tue Mar 13 23:47:19 CST 2018.

     -->

     select

     <include refid="Base_Column_List" />

     from user_info

     where user_id = #{userId,jdbcType=BIGINT}

   </select>

   <insert id="insert" parameterType="com.itmuch.boot.entity.UserInfo">

     <!--

       WARNING - @mbg.generated

       This element is automatically generated by MyBatis Generator, do not modify.

       This element was generated on Tue Mar 13 23:47:19 CST 2018.

     -->

     insert into user_info (user_id, user_name, account,

       password)

     values (#{userId,jdbcType=BIGINT}, #{userName,jdbcType=VARCHAR}, #{account,jdbcType=VARCHAR},

       #{password,jdbcType=VARCHAR})

   </insert>

   <insert id="insertSelective" parameterType="com.itmuch.boot.entity.UserInfo">

     <!--

       WARNING - @mbg.generated

       This element is automatically generated by MyBatis Generator, do not modify.

       This element was generated on Tue Mar 13 23:47:19 CST 2018.

     -->

     insert into user_info

     <trim prefix="(" suffix=")" suffixOverrides=",">

       <if test="userId != null">

         user_id,

       </if>

       <if test="userName != null">

         user_name,

       </if>

       <if test="account != null">

         account,

       </if>

       <if test="password != null">

         password,

       </if>

     </trim>

     <trim prefix="values (" suffix=")" suffixOverrides=",">

       <if test="userId != null">

         #{userId,jdbcType=BIGINT},

       </if>

       <if test="userName != null">

         #{userName,jdbcType=VARCHAR},

       </if>

       <if test="account != null">

         #{account,jdbcType=VARCHAR},

       </if>

       <if test="password != null">

         #{password,jdbcType=VARCHAR},

       </if>

     </trim>

   </insert>

   <update id="updateByPrimaryKeySelective" parameterType="com.itmuch.boot.entity.UserInfo">

     <!--

       WARNING - @mbg.generated

       This element is automatically generated by MyBatis Generator, do not modify.

       This element was generated on Tue Mar 13 23:47:19 CST 2018.

     -->

     update user_info

     <set>

       <if test="userName != null">

         user_name = #{userName,jdbcType=VARCHAR},

       </if>

       <if test="account != null">

         account = #{account,jdbcType=VARCHAR},

       </if>

       <if test="password != null">

         password = #{password,jdbcType=VARCHAR},

       </if>

     </set>

     where user_id = #{userId,jdbcType=BIGINT}

   </update>

   <update id="updateByPrimaryKey" parameterType="com.itmuch.boot.entity.UserInfo">

     <!--

       WARNING - @mbg.generated

       This element is automatically generated by MyBatis Generator, do not modify.

       This element was generated on Tue Mar 13 23:47:19 CST 2018.

     -->

     update user_info

     set user_name = #{userName,jdbcType=VARCHAR},

       account = #{account,jdbcType=VARCHAR},

       password = #{password,jdbcType=VARCHAR}

     where user_id = #{userId,jdbcType=BIGINT}

   </update>

 </mapper>
点击展开
到这里我们一套流程算是下来了。接下来是重点,手动添加数据源配置。
DataSourceConfig.java
 @Configuration

 @MapperScan(basePackages = "com.itmuch.boot.mapper")

 public class DataSourceConfig {

     @Bean(name = "shardingDataSource")

     DataSource getShardingDataSource() throws SQLException {

         ShardingRuleConfiguration shardingRuleConfig;

         shardingRuleConfig = new ShardingRuleConfiguration();

         shardingRuleConfig.getTableRuleConfigs().add(getUserTableRuleConfiguration());

         shardingRuleConfig.getBindingTableGroups().add("user_info");

         shardingRuleConfig.setDefaultDatabaseShardingStrategyConfig(

                 new StandardShardingStrategyConfiguration("user_id", DemoDatabaseShardingAlgorithm.class.getName()));

         shardingRuleConfig.setDefaultTableShardingStrategyConfig(

                 new StandardShardingStrategyConfiguration("user_id", DemoTableShardingAlgorithm.class.getName()));

         return new ShardingDataSource(shardingRuleConfig.build(createDataSourceMap()));

     }

     @Bean

     TableRuleConfiguration getUserTableRuleConfiguration() {

         TableRuleConfiguration orderTableRuleConfig = new TableRuleConfiguration();

         orderTableRuleConfig.setLogicTable("user_info");

         orderTableRuleConfig.setActualDataNodes("user_${0..2}.user_info_${0..1}");

         orderTableRuleConfig.setKeyGeneratorColumnName("user_id");

         return orderTableRuleConfig;

     }

     private Map<String, DataSource> createDataSourceMap() {

         Map<String, DataSource> result = new HashMap<>();

         result.put("user_0", createDataSource("user_0"));

         result.put("user_1", createDataSource("user_1"));

         result.put("user_2", createDataSource("user_2"));

         return result;

     }

     private DataSource createDataSource(final String dataSourceName) {

         BasicDataSource result = new BasicDataSource();

         result.setDriverClassName(com.mysql.jdbc.Driver.class.getName());

         result.setUrl(String.format("jdbc:mysql://localhost:3306/%s", dataSourceName));

         result.setUsername("root");

         result.setPassword("root");

         return result;

     }

 }
这个数据源配置类大家也看到了,并不复杂,你看啊,我们准备了三个数据库user_0,user_1,user_2;每个数据中准备了两张相同的业务表user_info_0和user_info_1.带着这个信息去看这个类,不用多说。
DemoDatabaseShardingAlgorithm.java
public class DemoDatabaseShardingAlgorithm implements PreciseShardingAlgorithm<Long> {

    @Override

    public String doSharding(Collection<String> collection, PreciseShardingValue<Long> preciseShardingValue) {

        for (String each : collection) {

            if (each.endsWith(Long.parseLong(preciseShardingValue.getValue().toString()) % 3 + "")) {

                return each;

            }

        }

        throw new IllegalArgumentException();

    }

}
顾名思义,这是分库算法,根据选择的字段(上面DataSourceConfig.java第12行我们选的字段是user_id)对3取余。
DemoTableShardingAlgorithm.java
public class DemoTableShardingAlgorithm implements PreciseShardingAlgorithm<Long> {

    @Override

    public String doSharding(Collection<String> collection, PreciseShardingValue<Long> preciseShardingValue) {

        for (String each : collection) {

            if (each.endsWith(Long.parseLong(preciseShardingValue.getValue().toString()) % 2 + "")) {

                return each;

            }

        }

        throw new IllegalArgumentException();

    }

}
顾名思义,这是分表算法,根据选择的字段(上面DataSourceConfig.java第14行我们选的字段也是user_id)对2取余。
测试
代码就这么多,启动application.java类,我们访问localhost:8080/insert/1试试。
然后看数据库:我们之前建的三个库,共六张表,四张表都是17条记录,两张表里面分别有16条,一共100条。根据user_id判断,没有重复的,那基本哦了呀!
代码地址:https://gitee.com/fengyuduke/my_open_resources/blob/master/sharding-jdbc-manualConfiguration.rar
最新文章
- 基于正则的INI读写工具类,支持加密解密
- 孙鑫MFC学习笔记20:Hook编程
- YAML 技术研究
- HDU5052 Yaoge’s maximum profit(LCT)
- 配置使VirtualBox下的linux可以宿主机互访并上网
- AWS RDS 使用笔记
- C++ —— 时间与日期
- Delphi TcxTreeList 读取 TcxImageComboBoxItem类型的值
- Alert Views
- linux 硬软链接区别
- luogu P1723 高手过愚人节
- JAVA单链表的实现-不带头结点但带有尾指针
- ActiveMQ整合spring、同步索引库
- C++中的抽象类
- Redis 五大数据类型及常用操作
- Java注册帐号邮箱激活验证实现
- HDU 1518 Square(DFS)
- JAVAWEB tomcat服务器启动错误原因总结
- 382. Linked List Random Node(蓄水池采样)
- Hot resize Multipath Disk – Linux