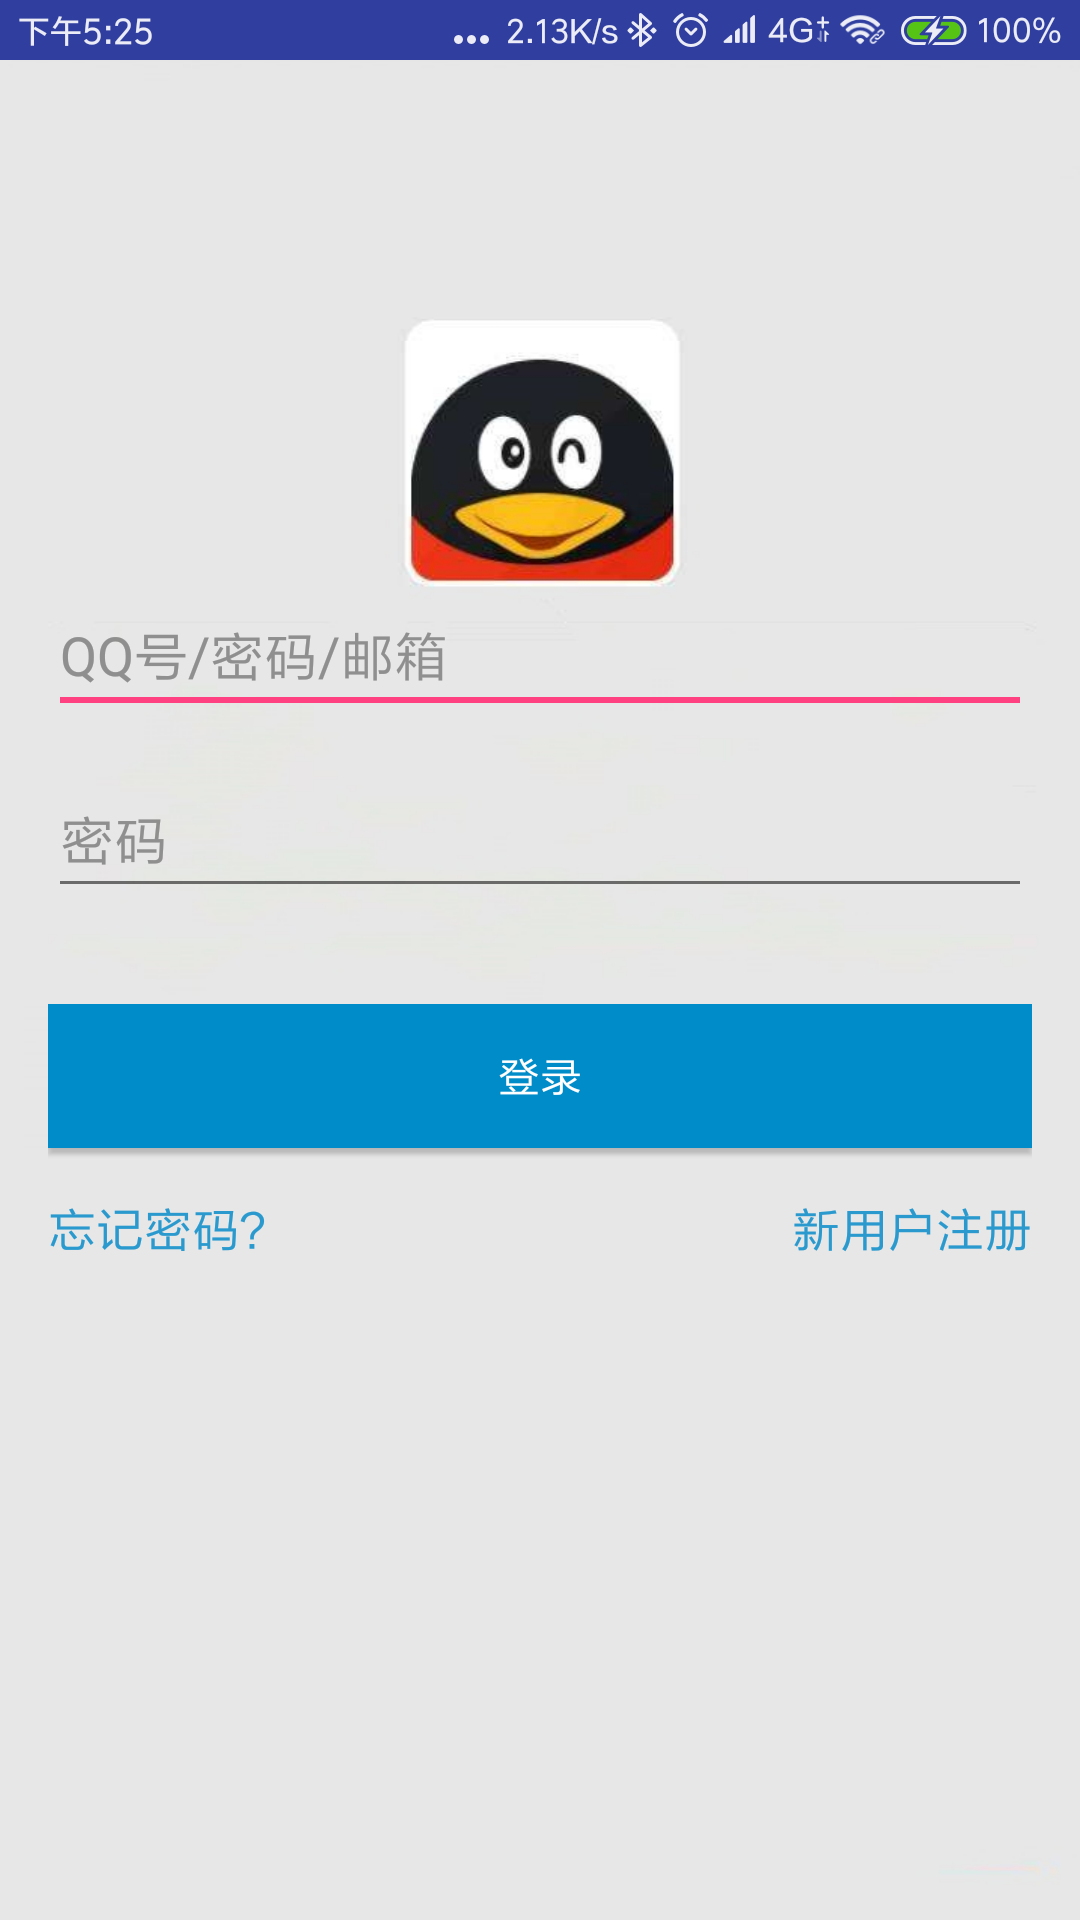
安卓开发学习笔记(七):仿写腾讯QQ登录注册界面
这段代码的关键主要是在我们的相对布局以及线性布局上面,我们首先在总体布局里设置为线性布局,然后再在里面设置为相对布局,这是一个十分常见的XML布局模式。
废话不多说,直接上代码:
一.activity.xml
<?xml version="1.0" encoding="utf-8"?>

<LinearLayout xmlns:android="http://schemas.android.com/apk/res/android"

    android:layout_width="match_parent"

    android:layout_height="match_parent"

    android:orientation="vertical"

    android:background="@drawable/bg2"

    >

    <!--头部内容-->

    <RelativeLayout

        android:layout_width="match_parent"

        android:layout_height="160dp"

        android:padding="16dp"

        android:layout_margin="0dp"

        >

    </RelativeLayout>

    <!--输入框-->

    <RelativeLayout

        android:layout_width="match_parent"

        android:layout_height="wrap_content"

        android:padding="16dp"

        android:layout_margin="0dp"

        >

        <EditText

            android:id="@+id/account"

            android:layout_width="match_parent"

            android:layout_height="wrap_content"

            android:layout_marginBottom="16dp"

            android:hint="QQ号/密码/邮箱"/>

        />

        <EditText

            android:layout_below="@id/account"

            android:id="@+id/password"

            android:layout_width="match_parent"

            android:layout_height="wrap_content"

            android:password="true"

            android:hint="密码"/>

        />

    </RelativeLayout>

    <RelativeLayout

        android:layout_width="match_parent"

        android:layout_height="33dp"

        android:padding="0dp"

        android:layout_margin="0dp"

        >

        <CheckBox

            android:id="@+id/remember_pass"

            android:layout_width="wrap_content"

            android:layout_height="wrap_content"

            android:text="记住密码"/>

    </RelativeLayout>

    <!--密码功能-->

    <RelativeLayout

        android:layout_width="match_parent"

        android:layout_height="wrap_content"

        android:layout_margin="16dp">

        <Button

            android:id="@+id/login"

            android:layout_width="match_parent"

            android:layout_height="wrap_content"

            android:text="登录"

            android:textColor="#fff"

            android:background="#008cc9"/>

        <Button

            android:id="@+id/forget_pwd"

            android:layout_below="@id/login"

            android:layout_width="wrap_content"

            android:layout_height="wrap_content"

            android:background="@null"

            android:textColor="#2999ce"

            android:gravity="start"

            android:layout_marginTop="16dp"

            android:textSize="16dp"

            android:text="忘记密码?"/>

        <Button

            android:id="@+id/register"

            android:layout_below="@id/login"

            android:layout_width="wrap_content"

            android:layout_height="wrap_content"

            android:background="@null"

            android:textColor="#2999ce"

            android:gravity="end"

            android:text="新用户注册"

            android:layout_marginTop="16dp"

            android:textSize="16dp"

            android:layout_alignParentRight="true"/>

    </RelativeLayout>

<RelativeLayout

    android:layout_width="match_parent"

    android:layout_height="80dp"

    android:padding="16dp"

    android:layout_margin="0dp">

 <TextView

     android:layout_width="wrap_content"

     android:layout_height="wrap_content" />

</RelativeLayout>

</LinearLayout>
二.main.java
package com.example.lenovo.fqq;

import android.content.Intent;

import android.support.v7.app.ActionBar;

import android.support.v7.app.AppCompatActivity;

import android.os.Bundle;

import android.view.View;

import android.widget.Button;

public class Main3Activity extends AppCompatActivity {

    @Override

    protected void onCreate(Bundle savedInstanceState) {

        super.onCreate(savedInstanceState);

        setContentView(R.layout.activity_main3);

        Button button=(Button) findViewById(R.id.login);

        button.setOnClickListener(new View.OnClickListener() {

            @Override

            public void onClick(View v) {

                Intent intent=new Intent(Main3Activity.this,Main2Activity.class);

                startActivity(intent);

            }

        });

        ActionBar a=getSupportActionBar();

        if(a!=null)

        {

            a.hide();

        }

    }

}
其中的代码:
 ActionBar a=getSupportActionBar();

        if(a!=null)

        {

            a.hide();

        }

    }

}
主要是为了能够将我们的标题栏隐藏,不然的话就会显示出标题栏,达不到我们仿写的效果了。
Button button=(Button) findViewById(R.id.login);

        button.setOnClickListener(new View.OnClickListener() {

            @Override

            public void onClick(View v) {

                Intent intent=new Intent(Main3Activity.this,Main2Activity.class);

                startActivity(intent);

            }

        });
上面这一段代码主要是用到了活动的跳转,不然登录是登录不进去的!这里因为我们直接使用了java当中活动的跳转。点击登录就会立刻跳转到下一个界面进行登录,当然
TextView简介:
TextView,是View的直接子类。它是一个文本显示控件,提供了基本的显示文本的功能,并且是大部分UI控件的父类,因为大部分UI控件都需要展示信息。
如果仅仅是展示文本,那么TextView的作用就太小了,所以它还预定义了一些类似于HTML的标签,通过这些标签可以使TextView控件显示不同的颜色、大小、字体、图片、链接。这些HTML标签都需要android.text.Html类的支持,但是并不包括所有的HTML标签。
常用的可以再TextView中设定的标签有:
- <font>:设置颜色和字体。
- <big>:设置字体大号
- <small>:设置字体小号
- <i>\<b>:斜体\粗体
- <a>:连接网址
- <img>:图片
使用这些标签可以用Html.fromHtml方法将这些标签的字符串转换成CharSequence接口,然后在TextView.setText()中进行设置。如果需要响应设置的HTML标签进行响应,需要设置TextView.setMovementMethod(LinkMovementMethod.getInstance())。
CharSequence为接口类型,大家可能对其有点陌生,但是它的子类肯定会让大家有熟悉的感觉,String、StringBuffer、StringBuilder、SpannableString、SpannableStringBuilder都是其子类,它包括了字符串的所有类,因为面向对象的多态性,在这里把他理解成字符串类的抽象即可。
除了使用HTML标签的方式设定显示文本中的URL地址、邮箱地址、电话等产生超链接出发相应的服务,可以使用android:autoLink属性来设置,以下是android:autoLink属性的介绍:
- None:默认的,不匹配任何连接。
- web:网址。
- email:邮箱。
- phone:电话号码。
- map:匹配映射网址。
- all:匹配所有连接。
最终搞定,实现具体效果如下:
最新文章
- 使用jquery-qrcode生成二维码
- ruby第一次实践 ”hello world“
- Java设计模式学习笔记(单例模式)
- Vijos1451圆环取数[环形DP|区间DP]
- Oracle Database 11g Express Edition学习笔记
- 如果 if - 迈克.杰克逊的墓志铭
- 【BZOJ】1202: [HNOI2005]狡猾的商人(并查集+前缀和)
- linux gcc 编译动态类库(.so)和静态类库(.a)
- 利用excel数据透视表实现快速统计相关数据
- java1.8的几大新特性(一)
- Unity NGUI中Anchor的用法
- (三)Angularjs - 小实例
- To restore the database on a new host-将数据库恢复至一个新的主机上
- HTML5游戏开发引擎Pixi.js完全入门手册(二)元素对象属性解析
- Shell grep 和正则
- Zuul(SpringCloud学习笔记一)
- 浅谈java中的"=="和eqals区别
- python设计模式---结构型之代理模式
- jquery库的cookie用法
- 【问题解决:启动卡死】Eclipse启动卡死的解决办法