Upload Files In ASP.NET Core 1.0 (Form POST And JQuery Ajax)
Uploading files is a common requirement in web applications. In ASP.NET Core 1.0 uploading files and saving them on the server is quite easy. To that end this article shows how to do just that.
Begin by creating a new ASP.NET Core project. Then add HomeController to the controllers folder. Then add UploadFiles view to Views > Home folder of the application.
HTML form for uploading files
Open the UploadFiles view and add the following HTML markup in it:
<form asp-action="UploadFiles"

      asp-controller="Home"

      method="post"

      enctype="multipart/form-data">

    <input type="file" name="files" multiple />

    <input type="submit" value="Upload Selected Files" />

</form>
The above markup uses form tag helper of ASP.NET Core MVC. The asp-action attribute indicates that the form will be processed by the UploadFiles action upon submission. The asp-controller attribute specifies the name of the controller containing the action method. The form is submitted using POST method. The enctype attribute of the form is set to multipart/form-data indicating that it will be used for file upload operation.
The form contains an input field of type file. The name attribute of the file input field is set to files and the presence of multiple attribute indicates that multiple files can be uploaded at once. The submit button submits the form to the server.
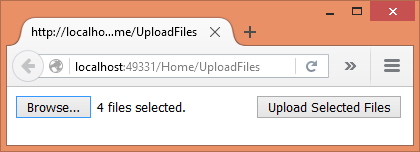
If you run the application at this stage, the UploadFiles view should look like this:
Constructor and UploadFiles() GET action
Now, open the HomeController and add a constructor to it as shown below:
public class HomeController : Controller

{

    private IHostingEnvironment hostingEnv;

    public HomeController(IHostingEnvironment env)

    {

        this.hostingEnv = env;

    }

}
The constructor has a parameter of type IHostingEnvironment (Microsoft.AspNet.Hosting namespace). This parameter will be injected by MVC framework into the constructor. You need this parameter to construct the full path for saving the uploaded files. The IHostingEnvironment object is saved into a local variable for later use.
Then add UploadFiles() action for GET requests as shown below:
public IActionResult UploadFiles()

{

    return View();

}
UploadFiles() POST action
Finally, add UploadFiles() action for handling the POST requests.
[HttpPost]

public IActionResult UploadFiles(IList<IFormFile> files)

{

    long size = 0;

    foreach(var file in files)

    {

        var filename = ContentDispositionHeaderValue

                        .Parse(file.ContentDisposition)

                        .FileName

                        .Trim('"');

        filename = hostingEnv.WebRootPath + $@"\{fileName}";

        size += file.Length;

        using (FileStream fs = System.IO.File.Create(filename))

        {

           file.CopyTo(fs);

           fs.Flush();

        }

    }

    ViewBag.Message = $"{files.Count} file(s) /

                      {size} bytes uploaded successfully!";

    return View();

}
The UploadFiles() action has a parameter - IList<IFormFile> - to receive the uploaded files. The IFormFile object represents a single uploaded file. Inside, a size variable keeps track of how much data is being uploaded. Then a foreach loop iterates through the files collection.
The client side file name of an uploaded file is extracted using the ContentDispositionHeaderValue class (Microsoft.Net.Http.Headers namespace) and the ContentDisposition property of the IFormFile object. Let's assume that you wish to save the uploaded files into the wwwroot folder. So, to arrive at the full path you use the WebRootPath property of IHostingEnvironment and append the filename to it.
Finally, the file is saved by the code inside the using block. That code basically creates a new FileStream and copies the uploaded file into it. This is done using the Create() and the CopyTo() methods. A message is stored in ViewBag to be displayed to the end user.
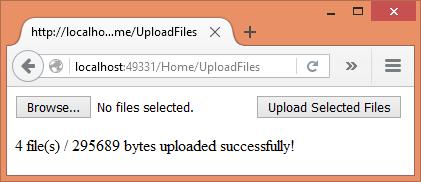
The following figure shows a sample successful run of the application:
Using jQuery Ajax to upload the files
In the preceding example you used form POST to submit the files to the server. What if you wish to send files through Ajax? You can accomplish the task with a little bit of change to the <form> and the action.
Modify the <form> to have a plain push button instead of submit button as shown below:
<form method="post" enctype="multipart/form-data">

    <input type="file" id="files"

           name="files" multiple />

    <input type="button"

           id="upload"

           value="Upload Selected Files" />

</form>
Then add a <script> reference to the jQuery library and write the following code to handle the click event of the upload button:
$(document).ready(function () {

    $("#upload").click(function (evt) {

        var fileUpload = $("#files").get(0);

        var files = fileUpload.files;

        var data = new FormData();

        for (var i = 0; i < files.length ; i++) {

            data.append(files[i].name, files[i]);

        }

        $.ajax({

            type: "POST",

            url: "/home/UploadFilesAjax",

            contentType: false,

            processData: false,

            data: data,

            success: function (message) {

                alert(message);

            },

            error: function () {

                alert("There was error uploading files!");

            }

        });

    });

});
The above code grabs each file from the file field and adds it to a FormData object (HTML5 feature). Then $.ajax() method POSTs the FormData object to the UploadFilesAjax() action of the HomeController. Notice that the contentType and processData properties are set to false since the FormData contains multipart/form-data content. The data property holds the FormData object.
Finally, add UploadFilesAjax() action as follows:
[HttpPost]

public IActionResult UploadFilesAjax()

{

    long size = 0;

    var files = Request.Form.Files;

    foreach (var file in files)

    {

        var filename = ContentDispositionHeaderValue

                        .Parse(file.ContentDisposition)

                        .FileName

                        .Trim('"');

        filename = hostingEnv.WebRootPath + $@"\{filename}";

        size += file.Length;

        using (FileStream fs = System.IO.File.Create(filename))

        {

           file.CopyTo(fs);

           fs.Flush();

        }

    }

    string message = $"{files.Count} file(s) /

                       {size} bytes uploaded successfully!";

    return Json(message);

}
The code inside UploadFilesAjax() is quite similar to UploadFiles() you wrote earlier. The main difference is how the files are received. The UploadFilesAjax() doesn't have IList<IFormFile> parameter. Instead it receives the files through the Request.Form.Files property. Secondly, the UploadFilesAjax() action returns a JSON string message to the caller for the sake of displaying in the browser.
That's it for now! Keep coding!!
最新文章
- Java异常处理和设计
- web前端~~浏览器兼容问题(百度)
- Spring学习笔记之三----基于Annotation的Spring IOC配置
- (五) openwrt打包过程
- PHP基础12:数组
- DNS主配置文件的几个选项
- 【优先队列】【最近连STL都写不出来了/(ㄒoㄒ)/~~】hdu_5360/多校#6_1008
- 安卓开发中使用Genymotion模拟器
- 2016年9月3日 文成小盆友python-num18 - django进阶一
- form表单提交转为可被 getModel(PROJECT.class ,null);接收
- CentOS7系统 ansible自动化部署多台服务器部署
- 清北学堂 清北-Day5-R2-xor
- OPENJDK 源码编译
- Hiveserver2 OOM问题解法
- redis水平扩展实践,完全配置,无需代码改动
- A Bug's Life-----poj2492(关系并查集)
- NOIP模拟题 2017.7.3 - 模拟 - 贪心 - 记忆化搜索
- 查找占用CPU高线程
- 笔试题之javaweb
- bzoj1224