快速部署一个Kubernetes集群
官方提供的三种部署方式
1. 安装要求
在开始之前,部署Kubernetes集群机器需要满足以下几个条件:
- 一台或多台机器,操作系统 CentOS7.x-86_x64
- 硬件配置:2GB或更多RAM,2个CPU或更多CPU,硬盘30GB或更多
- 集群中所有机器之间网络互通
- 可以访问外网,需要拉取镜像
- 禁止swap分区
2. 学习目标
1. 在所有节点上安装Docker和kubeadm
2. 部署Kubernetes Master
3. 部署容器网络插件
4. 部署 Kubernetes Node,将节点加入Kubernetes集群中
5. 部署Dashboard Web页面,可视化查看Kubernetes资源
3. 准备环境
关闭防火墙:
systemctl stop firewalld

systemctl disable firewalld
关闭selinux:
sed -i 's/enforcing/disabled/' /etc/selinux/config

setenforce
关闭swap:
swapoff -a # 临时

vim /etc/fstab # 永久
添加主机名与IP对应关系):
cat /etc/hosts

192.168.140.130 k8s-master

192.168.140.131 k8s-node1

192.168.140.132 k8s-node2
设置Maeter/node1/node2主机名:
hostnamectl set-hostname k8s-master

hostnamectl set-hostname k8s-node1

hostnamectl set-hostname k8s-node2
将桥接的IPv4流量传递到iptables的链:
cat > /etc/sysctl.d/k8s.conf << EOF

net.bridge.bridge-nf-call-ip6tables =

net.bridge.bridge-nf-call-iptables =

EOF
sysctl --system
设置时间同步
yum -y install ntpdate

ntpdate time.windows.com
4. 所有节点安装Docker/kubeadm/kubelet
Kubernetes默认CRI(容器运行时)为Docker,因此先安装Docker。
4.1 安装Docker
每台机器上安装Docker,建议使用18.09版本。
wget https://mirrors.aliyun.com/docker-ce/linux/centos/docker-ce.repo -O /etc/yum.repos.d/docker-ce.repo

yum list docker-ce --showduplicates | sort -r

yum -y install docker-ce-18.09.-.el7
设置cgroup驱动,推荐systemd:
 cat > /etc/docker/daemon.json <<EOF

{

  "exec-opts": ["native.cgroupdriver=systemd"],

  "log-driver": "json-file",

  "log-opts": {

    "max-size": "100m"

  },

  "storage-driver": "overlay2"

}

EOF

systemctl enable docker

systemctl start docker
镜像下载加速:
curl -sSL https://get.daocloud.io/daotools/set_mirror.sh | sh -s http://f1361db2.m.daocloud.io
因为追加过cgroup驱动的配置,运行以上命令加载静态加速会使daemon.json的格式不正确,修改为如下
{"registry-mirrors": ["http://f1361db2.m.daocloud.io"],

  "exec-opts": ["native.cgroupdriver=systemd"],

  "log-driver": "json-file",

  "log-opts": {"max-size": "100m"},

  "storage-driver": "overlay2"

}

重新加载

systemctl restart docker
4.2 添加阿里云YUM软件源
cat > /etc/yum.repos.d/kubernetes.repo << EOF

[kubernetes]

name=Kubernetes

baseurl=https://mirrors.aliyun.com/kubernetes/yum/repos/kubernetes-el7-x86_64

enabled=

gpgcheck=

repo_gpgcheck=

gpgkey=https://mirrors.aliyun.com/kubernetes/yum/doc/yum-key.gpg https://mirrors.aliyun.com/kubernetes/yum/doc/rpm-package-key.gpg

EOF
4.3 安装kubeadm,kubelet和kubectl
由于版本更新频繁,这里指定版本号部署:
yum install -y kubelet-1.16. kubeadm-1.16. kubectl-1.16.

systemctl enable kubelet
5. 部署Kubernetes Master
在192.168.140.130(Master)执行。
 kubeadm init \

  --apiserver-advertise-address=192.168.140.130 \

  --image-repository registry.aliyuncs.com/google_containers \

  --kubernetes-version v1.16.0 \

  --service-cidr=10.1.0.0/ \

  --pod-network-cidr=10.244.0.0/
由于默认拉取镜像地址k8s.gcr.io国内无法访问,这里指定阿里云镜像仓库地址。
具体创建过程
[root@k8s-master ~]# kubeadm init   --apiserver-advertise-address=192.168.146.130   --image-repository registry.aliyuncs.com/google_containers   --kubernetes-version v1.16.0   --service-cidr=10.1.0.0/   --pod-network-cidr=10.244.0.0/

[init] Using Kubernetes version: v1.16.0

[preflight] Running pre-flight checks

[preflight] Pulling images required for setting up a Kubernetes cluster

[preflight] This might take a minute or two, depending on the speed of your internet connection

[preflight] You can also perform this action in beforehand using 'kubeadm config images pull'

[kubelet-start] Writing kubelet environment file with flags to file "/var/lib/kubelet/kubeadm-flags.env"

[kubelet-start] Writing kubelet configuration to file "/var/lib/kubelet/config.yaml"

[kubelet-start] Activating the kubelet service

[certs] Using certificateDir folder "/etc/kubernetes/pki"

[certs] Generating "ca" certificate and key

[certs] Generating "apiserver" certificate and key

[certs] apiserver serving cert is signed for DNS names [k8s-master kubernetes kubernetes.default kubernetes.default.svc kubernetes.default.svc.cluster.local] and IPs [10.1.0.1 192.168.146.130]

[certs] Generating "apiserver-kubelet-client" certificate and key

[certs] Generating "front-proxy-ca" certificate and key

[certs] Generating "front-proxy-client" certificate and key

[certs] Generating "etcd/ca" certificate and key

[certs] Generating "etcd/server" certificate and key

[certs] etcd/server serving cert is signed for DNS names [k8s-master localhost] and IPs [192.168.146.130 127.0.0.1 ::]

[certs] Generating "etcd/peer" certificate and key

[certs] etcd/peer serving cert is signed for DNS names [k8s-master localhost] and IPs [192.168.146.130 127.0.0.1 ::]

[certs] Generating "etcd/healthcheck-client" certificate and key

[certs] Generating "apiserver-etcd-client" certificate and key

[certs] Generating "sa" key and public key

[kubeconfig] Using kubeconfig folder "/etc/kubernetes"

[kubeconfig] Writing "admin.conf" kubeconfig file

[kubeconfig] Writing "kubelet.conf" kubeconfig file

[kubeconfig] Writing "controller-manager.conf" kubeconfig file

[kubeconfig] Writing "scheduler.conf" kubeconfig file

[control-plane] Using manifest folder "/etc/kubernetes/manifests"

[control-plane] Creating static Pod manifest for "kube-apiserver"

[control-plane] Creating static Pod manifest for "kube-controller-manager"

[control-plane] Creating static Pod manifest for "kube-scheduler"

[etcd] Creating static Pod manifest for local etcd in "/etc/kubernetes/manifests"

[wait-control-plane] Waiting for the kubelet to boot up the control plane as static Pods from directory "/etc/kubernetes/manifests". This can take up to 4m0s

[apiclient] All control plane components are healthy after 37.002058 seconds

[upload-config] Storing the configuration used in ConfigMap "kubeadm-config" in the "kube-system" Namespace

[kubelet] Creating a ConfigMap "kubelet-config-1.16" in namespace kube-system with the configuration for the kubelets in the cluster

[upload-certs] Skipping phase. Please see --upload-certs

[mark-control-plane] Marking the node k8s-master as control-plane by adding the label "node-role.kubernetes.io/master=''"

[mark-control-plane] Marking the node k8s-master as control-plane by adding the taints [node-role.kubernetes.io/master:NoSchedule]

[bootstrap-token] Using token: z5w3q8.oodwazhy81hs0guy

[bootstrap-token] Configuring bootstrap tokens, cluster-info ConfigMap, RBAC Roles

[bootstrap-token] configured RBAC rules to allow Node Bootstrap tokens to post CSRs in order for nodes to get long term certificate credentials

[bootstrap-token] configured RBAC rules to allow the csrapprover controller automatically approve CSRs from a Node Bootstrap Token

[bootstrap-token] configured RBAC rules to allow certificate rotation for all node client certificates in the cluster

[bootstrap-token] Creating the "cluster-info" ConfigMap in the "kube-public" namespace

[addons] Applied essential addon: CoreDNS

[addons] Applied essential addon: kube-proxy

Your Kubernetes control-plane has initialized successfully!

To start using your cluster, you need to run the following as a regular user:

  mkdir -p $HOME/.kube

  sudo cp -i /etc/kubernetes/admin.conf $HOME/.kube/config

  sudo chown $(id -u):$(id -g) $HOME/.kube/config

You should now deploy a pod network to the cluster.

Run "kubectl apply -f [podnetwork].yaml" with one of the options listed at:

  https://kubernetes.io/docs/concepts/cluster-administration/addons/

Then you can join any number of worker nodes by running the following on each as root:

kubeadm join 192.168.146.130: --token z5w3q8.oodwazhy81hs0guy \    #加入node需要验证的token

    --discovery-token-ca-cert-hash sha256:00573b2c69770af26f300158845535faf4fc4be4aab5470b245653a95e85ba0d
使用kubectl工具:
mkdir -p #HOME/.kube

sudo cp -i /etc/kubernetes/admin.conf #HOME/.kube/config

sudo chown #(id -u):#(id -g) #HOME/.kube/config
[root@k8s-master ~]# kubectl get node

NAME         STATUS   ROLES    AGE    VERSION

k8s-master   Ready    master   4m2s   v1.16.0
6. 安装Pod网络插件(CNI)
这个文件 kube-flannel.yaml 需要注意镜像地址、还有网络地址跟kubeadm init创建的地址要一致pod-network-cidr=10.244.0.0/16
文件预先已设置好,上传到master
https://pan.baidu.com/s/1kYIJXu5J2clmynXbsFZtpg提取码 bxhp
kubectl apply -f kube-flannel.yaml

kubectl get pods -n kube-system
[root@k8s-master ~]# kubectl get pods -n kube-system

NAME                                 READY   STATUS     RESTARTS   AGE

coredns-58cc8c89f4-2rplz             /     Pending              3m6s

coredns-58cc8c89f4-rqbpg             /     Pending              3m6s

etcd-k8s-master                      /     Running              2m26s

kube-apiserver-k8s-master            /     Running              2m13s

kube-controller-manager-k8s-master   /     Running              2m27s

kube-flannel-ds-amd64-l4gcz          /     Init:/             15s

kube-proxy-bhxc2                     /     Running              3m6s

kube-scheduler-k8s-master            /     Running              2m13s
7. 加入Kubernetes Node
在192.168.140.131/132(Node)执行。
向集群添加新节点,执行在kubeadm init输出的kubeadm join命令:
kubeadm join 192.168.140.130: --token esce21.q6hetwm8si29qxwn \

    --discovery-token-ca-cert-hash sha256:00603a05805807501d7181c3d60b478788408cfe6cedefedb1f97569708be9c5
[root@k8s-master ~]# kubectl get node

NAME         STATUS   ROLES    AGE     VERSION

k8s-master   Ready    master   8m53s   v1.16.0

k8s-node1    Ready    <none>   3m31s   v1.16.0

k8s-node2    Ready    <none>   91s     v1.16.0
默认token有效期为24小时,当过期之后,该token就不可用了。这时就需要重新创建token,操作如下:
kubeadm token create

kubeadm token list

openssl x509 -pubkey -in /etc/kubernetes/pki/ca.crt | openssl rsa -pubin -outform der >/dev/null | openssl dgst -sha256 -hex | sed 's/^.* //'

63bca849e0e01691ae14eab449570284f0c3ddeea590f8da988c07fe2729e924

kubeadm join 192.168.140.130: --discovery-token nuja6n.o3jrhsffiqs9swnu --discovery-token-ca-cert-hash 63bca849e0e01691ae14eab449570284f0c3ddeea590f8da988c07fe2729e924

```

<https://kubernetes.io/docs/reference/setup-tools/kubeadm/kubeadm-join/>
8. 测试kubernetes集群
在Kubernetes集群中创建一个pod,验证是否正常运行:
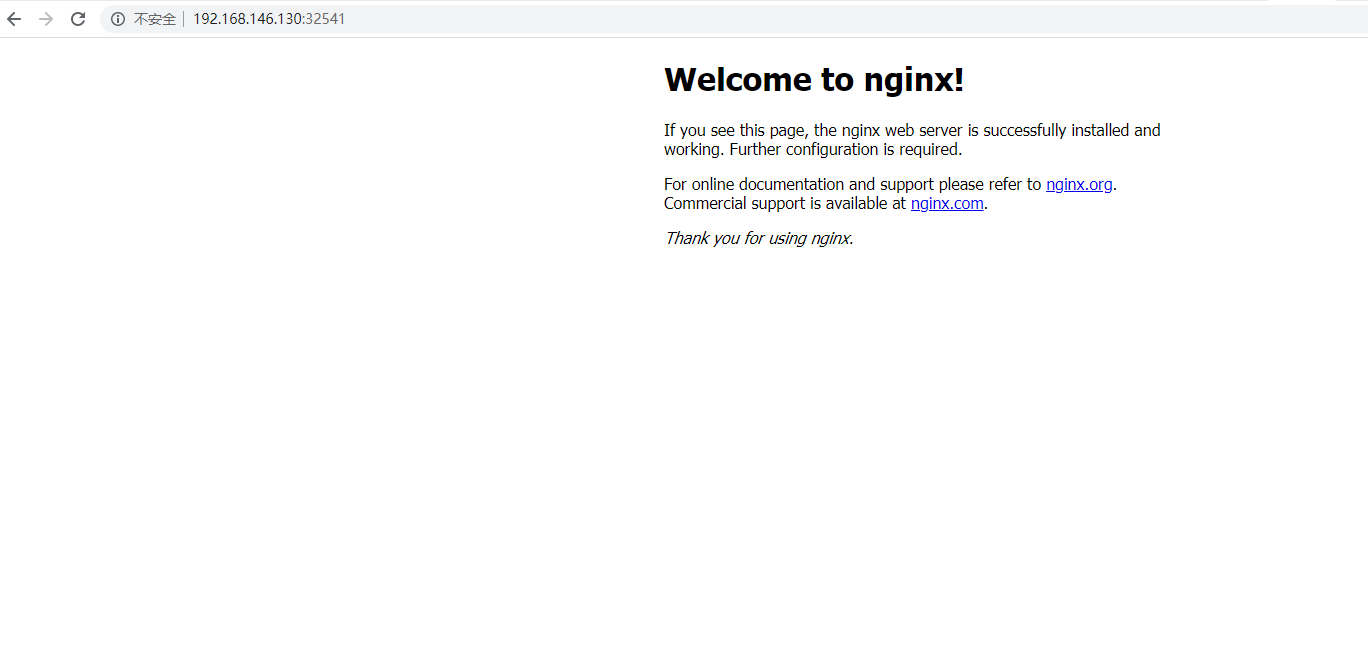
kubectl create deployment web --image=nginx

kubectl expose deployment web --port= --target-port= --type=NodePort
[root@k8s-master ~]# kubectl get pods,svc

NAME                      READY   STATUS              RESTARTS   AGE

pod/web-d86c95cc9-9ktfn   /     ContainerCreating             83s

NAME                 TYPE        CLUSTER-IP    EXTERNAL-IP   PORT(S)        AGE

service/kubernetes   ClusterIP   10.1.0.1      <none>        /TCP        11m

service/web          NodePort    10.1.87.160   <none>        :/TCP   19s
访问地址:http://NodeIP:Port
确保所有节点都能访问(master、node1、node2)
9. 部署 Dashboard
https://pan.baidu.com/s/1F4fHAas2fDPDgy8h-QS6KA提取码vb7o
  type: NodePort

  ports:

    - port:

      targetPort:

      nodePort:
这个yaml文件增加了一个类型NodePort,端口为30001,其它跟官方yaml一致
kubectl apply -f dashboard.yaml

kubectl get pods -n kubernetes-dashboard
访问地址:http://NodeIP:30001
创建service account并绑定默认cluster-admin管理员集群角色:
kubectl create serviceaccount dashboard-admin -n kubernetes-dashboard

kubectl create clusterrolebinding dashboard-admin --clusterrole=cluster-admin --serviceaccount=kubernetes-dashboard:dashboard-admin

kubectl describe secrets -n kubernetes-dashboard $(kubectl -n kubernetes-dashboard get secret | awk '/dashboard-admin/{print $1}')
使用输出的token登录Dashboard。

查看资源利用率
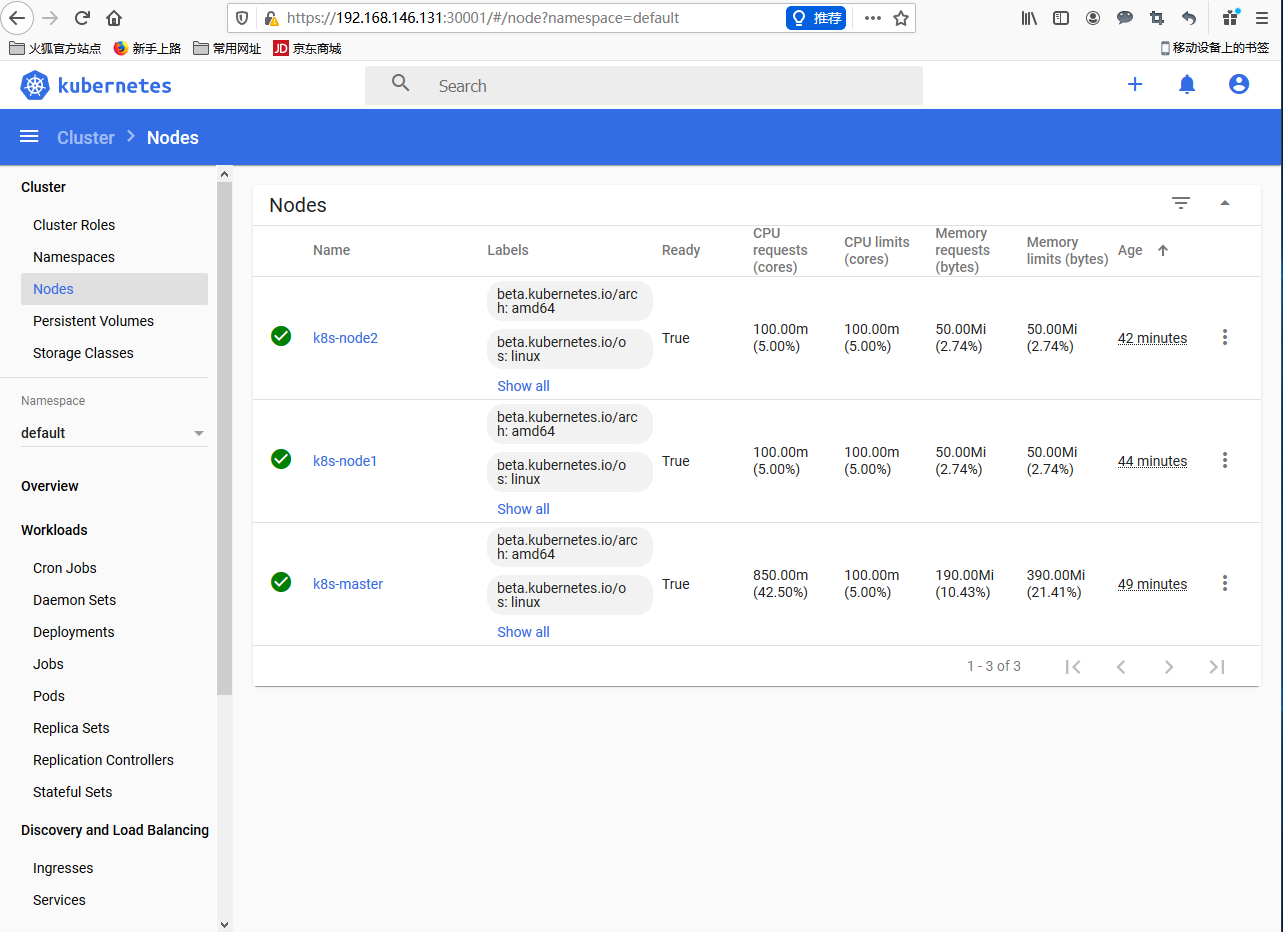
可以查看当前pod的日志,可以进入容器里边操作,还可以扩容副本

最新文章
- 探究javascript对象和数组的异同,及函数变量缓存技巧
- 2016.12.01 搭建dendroid备忘
- Date和Calendar时间操作常用方法及示例
- C#访问Azure的资源
- jquery check box
- Htmlt_Div+Css简介
- HDU 1688 Sightseeing
- Spring Mvc 返回机制
- 如何导入hadoop源码到eclipse
- Host绑定
- ASP.NET Boilerplate 工作单元
- js基础例子购物车升级版(未优化版)
- IOS基金会_ UICollectionView简单易用
- GROUP_CONCAT()多条数据.拼接字符串 最大长度1024
- Openjudge-计算概论(A)-字符串排序
- Java中Scanner的输入流的关闭问题
- Hadoop 伪分布式安装、运行测试例子
- Android的ANR详解(原因和方案)
- C#中任意类型数据转成JSON格式
- 【强连通分量】Bzoj1051 HAOI2006 受欢迎的牛