mongodb配置复制集replset
Mongodb的replication主要有两种:主从和副本集(replica set)。主从的原理和mysql类似,主节点记录在其上的所有操作oplog,从节点定期轮询主节点获取这些操作,然后对自己的数据副本执行这些操作,从而保证从节点的数据与主节点一致。
现在mongodb官方建议用副本集替代主从复制,现在我们来了解下如何配置复制集。
什么是oplog:
MongoDB 的Replication是通过一个日志来存储写操作的,这个日志就叫做oplog。 在默认情况下,oplog分配的是5%的空闲磁盘空间。通常而言,这是一种合理的设置。可以通过mongod --oplogSize来改变oplog的日志大小。 oplog是capped collection,因为oplog的特点(不能太多把磁盘填满了,固定大小)需要,MongoDB才发明了capped collection(the oplog is actually the reason capped collections were invented)。
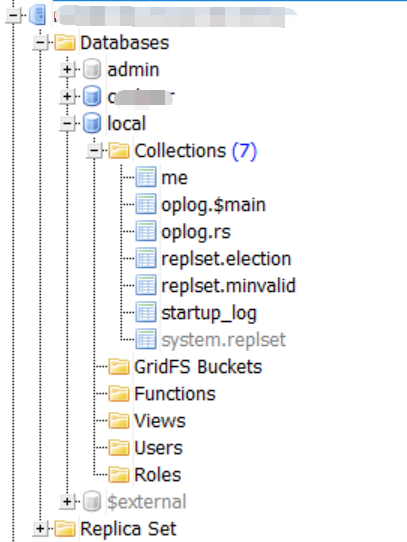
oplog的位置 oplog在local库: replica sets 架构下: local.oplog.rs。
现在来用两台服务器来配置一个复制集,两个数据节点+一个仲裁节点
db1配置(mongodb.conf )(数据节点)
# 数据库文件存储位置

dbpath  = /data/db/mongodb

# log文件存储位置

logpath = /data/log/mongodb/mongodb.log

# 使用追加的方式写日志

logappend = true

# 是否以守护进程方式运行

fork    = true

# 端口号

port    =

# 是否启用认证

auth  = true

# 集群的私钥的完整路径,只对于Replica Set 架构有效(noauth = true时不用配置此项)

keyFile = /usr/local/mongodb/mongodb-keyfile

# diaglog选项 =off =W =R =both =W+some reads

#diaglog        =

# 设置oplog的大小(MB)

oplogSize=

# 启用日志选项,MongoDB的数据操作将会写入到journal文件夹的文件里

journal=true

# 设置副本集名称

replSet=COOL
db2配置(standard.conf )(数据节点)
# 数据库文件存储位置

dbpath  = /data/db/mongodb/standard

# log文件存储位置

logpath = /data/log/mongodb/standard/mongodb.log

# 使用追加的方式写日志

logappend = true

# 是否以守护进程方式运行

fork    = true

# 端口号

port    =

# 是否启用认证

auth  = true

# 集群的私钥的完整路径,只对于Replica Set 架构有效(noauth = true时不用配置此项)

keyFile = /usr/local/mongodb/mongodb-keyfile

# diaglog选项 =off =W =R =both =W+some reads

#diaglog        =

# 设置oplog的大小(MB)

oplogSize=

# 启用日志选项,MongoDB的数据操作将会写入到journal文件夹的文件里

journal=true

# 设置副本集名称

replSet=COOL
db3配置(arbiter.conf )(arbiter节点)
# 数据库文件存储位置

dbpath  = /data/db/mongodb/arbiter

# log文件存储位置

logpath = /data/log/mongodb/arbiter/mongodb.log

# 使用追加的方式写日志

logappend = true

# 是否以守护进程方式运行

fork    = true

# 端口号

port    =

# 是否启用认证

auth  = true

# 集群的私钥的完整路径,只对于Replica Set 架构有效(noauth = true时不用配置此项)

keyFile = /usr/local/mongodb/mongodb-keyfile

# diaglog选项 =off =W =R =both =W+some reads

#diaglog        =

# 设置oplog的大小(MB)

oplogSize=

# 启用日志选项,MongoDB的数据操作将会写入到journal文件夹的文件里

journal=true

# 设置副本集名称

replSet=COOL
注意:
如果使用认证的方式启动服务(auth = true),那么要在主从服务器配置私钥。
//    在一台服务器上生成私钥

openssl rand -base64 745 > mongodb-keyfile

//    修改私钥的权限为可读写

chmod 600 mongodb-keyfile

//    将私钥拷贝到其余的服务器上

scp mongodb-keyfile root@xxx.xxx.xxx.xxx:/usr/local/mongodb/
然后配置私钥路径,启动服务。
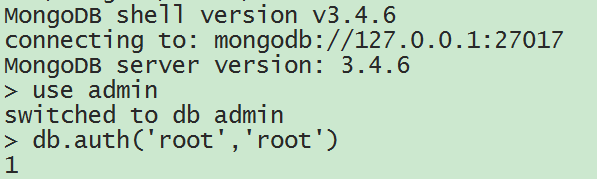
配置root管理员成员,用于权限验证和管理数据库和执行副本集初始化命令(只需要在primary上配置就行,副本集会同步用户)
先以非验证模式启动数据库:
/usr/local/mongodb/bin/mongod --fork --dbpath=/data/db/mongodb --logpath=/data/log/mongodb/mongodb.log
配置管理员:
use admin;

db.createUser({ user: "root", pwd: "root", roles: [ { role: "root", db: "admin" } ] });

然后以权限验证模式(config模式)重启数据库服务。
启动数据库:
//    第一台主机:

/usr/local/mongodb/bin/mongod --config /usr/local/mongodb/master.conf

//    第二台主机:

/usr/local/mongodb/bin/mongod --config /usr/local/mongodb/standard.conf

/usr/local/mongodb/bin/mongod --config /usr/local/mongodb/arbiter.conf
初始化副本集(连接任意一个服务器。初始化命令只执行一次即可,如果是已有数据的数据库,请在有数据的数据库执行此命令)
以刚刚创建的root用户登录:
查看副本集状态( rs.status() ):
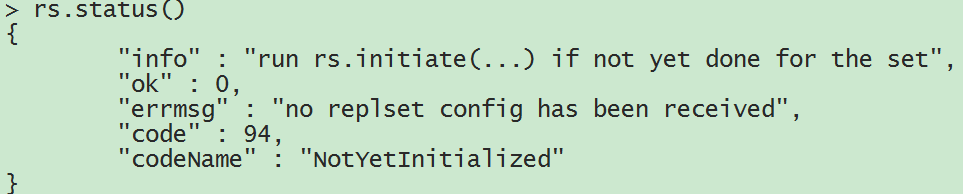
发现副本集还未初始化,现在开始初始化:
config = {"_id" : "COOL",    "members" : [   {"_id" : 0, "host" : "xxx.xxx.xxx.xxx:27017"},   {"_id" : 1, "host" : "xxx.xxx.xxx.xxx:27017"}  ]}

rs.initiate(config);
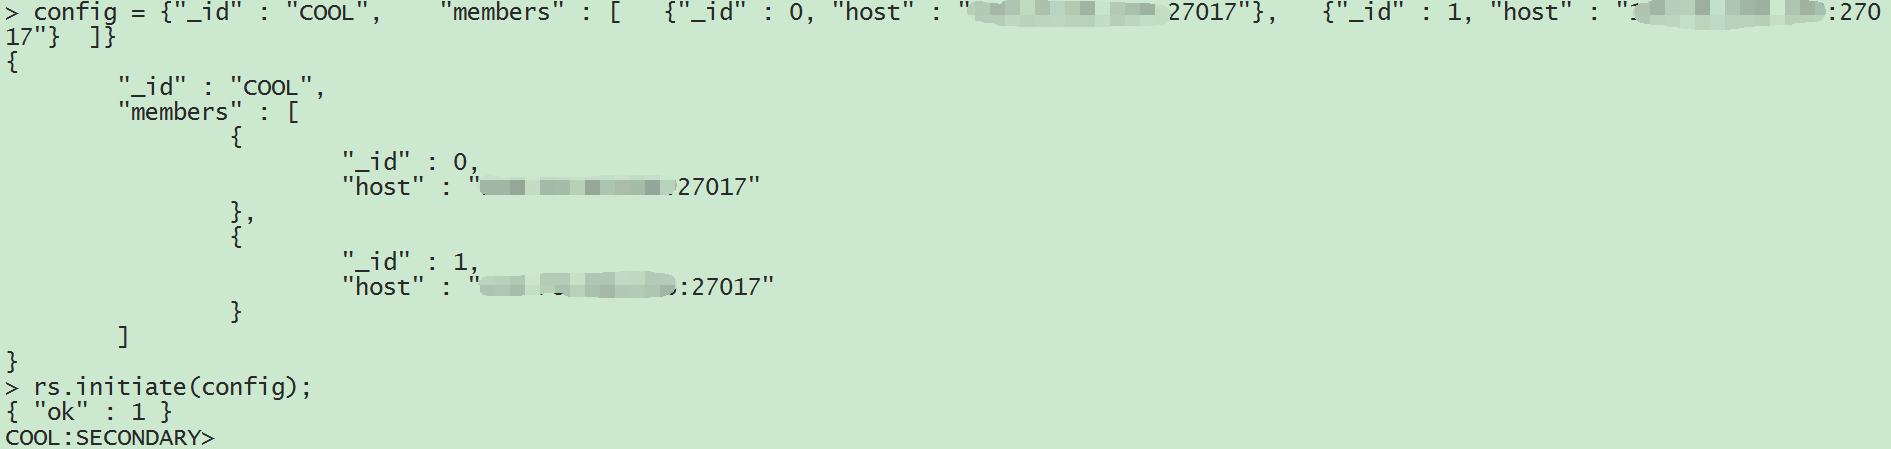
初始化副本集成功,再次查看副本集状态:
COOL:SECONDARY> rs.status()

{

    "set" : "COOL",

    "date" : ISODate("2018-01-10T13:13:01.988Z"),

    "myState" : 2,

    "term" : NumberLong(0),

    "heartbeatIntervalMillis" : NumberLong(2000),

    "optimes" : {

        "lastCommittedOpTime" : {

            "ts" : Timestamp(0, 0),

            "t" : NumberLong(-1)

        },

        "appliedOpTime" : {

            "ts" : Timestamp(1515589972, 1),

            "t" : NumberLong(-1)

        },

        "durableOpTime" : {

            "ts" : Timestamp(1515589972, 1),

            "t" : NumberLong(-1)

        }

    },

    "members" : [

        {

            "_id" : 0,

            "name" : "xxx.xxx.xxx.xxx:27017",

            "health" : 1,

            "state" : 2,

            "stateStr" : "SECONDARY",

            "uptime" : 82,

            "optime" : {

                "ts" : Timestamp(1515589972, 1),

                "t" : NumberLong(-1)

            },

            "optimeDate" : ISODate("2018-01-10T13:12:52Z"),

            "infoMessage" : "could not find member to sync from",

            "configVersion" : 1,

            "self" : true

        },

        {

            "_id" : 1,

            "name" : "xxx.xxx.xxx.xxx:27017",

            "health" : 1,

            "state" : 5,

            "stateStr" : "STARTUP2",

            "uptime" : 9,

            "optime" : {

                "ts" : Timestamp(0, 0),

                "t" : NumberLong(-1)

            },

            "optimeDurable" : {

                "ts" : Timestamp(0, 0),

                "t" : NumberLong(-1)

            },

            "optimeDate" : ISODate("1970-01-01T00:00:00Z"),

            "optimeDurableDate" : ISODate("1970-01-01T00:00:00Z"),

            "lastHeartbeat" : ISODate("2018-01-10T13:12:57.888Z"),

            "lastHeartbeatRecv" : ISODate("2018-01-10T13:13:01.911Z"),

            "pingMs" : NumberLong(32),

            "syncingTo" : "xxx.xxx.xxx.xxx:27017",

            "configVersion" : 1

        }

    ],

    "ok" : 1

}
发现自己变成了secondary节点,另一个数据库变成了startup2状态,没关系,等下自己会变成primary节点,等另一个数据库同步数据完成,会自动变成secondary节点。
COOL:SECONDARY> rs.status()

{

    "set" : "COOL",

    "date" : ISODate("2018-01-10T13:35:59.935Z"),

    "myState" : 2,

    "term" : NumberLong(1),

    "syncingTo" : "xxx.xxx.xxx.xxx:27017",

    "heartbeatIntervalMillis" : NumberLong(2000),

    "optimes" : {

        "lastCommittedOpTime" : {

            "ts" : Timestamp(1515591358, 6),

            "t" : NumberLong(1)

        },

        "appliedOpTime" : {

            "ts" : Timestamp(1515591358, 6),

            "t" : NumberLong(1)

        },

        "durableOpTime" : {

            "ts" : Timestamp(1515591358, 6),

            "t" : NumberLong(1)

        }

    },

    "members" : [

        {

            "_id" : 0,

            "name" : "xxx.xxx.xxx.xxx:27017",

            "health" : 1,

            "state" : 1,

            "stateStr" : "PRIMARY",

            "uptime" : 1385,

            "optime" : {

                "ts" : Timestamp(1515591358, 6),

                "t" : NumberLong(1)

            },

            "optimeDurable" : {

                "ts" : Timestamp(1515591358, 4),

                "t" : NumberLong(1)

            },

            "optimeDate" : ISODate("2018-01-10T13:35:58Z"),

            "optimeDurableDate" : ISODate("2018-01-10T13:35:58Z"),

            "lastHeartbeat" : ISODate("2018-01-10T13:35:58.921Z"),

            "lastHeartbeatRecv" : ISODate("2018-01-10T13:35:59.545Z"),

            "pingMs" : NumberLong(2),

            "electionTime" : Timestamp(1515589983, 1),

            "electionDate" : ISODate("2018-01-10T13:13:03Z"),

            "configVersion" : 1

        },

        {

            "_id" : 1,

            "name" : "xxx.xxx.xxx.xxx:27017",

            "health" : 1,

            "state" : 2,

            "stateStr" : "SECONDARY",

            "uptime" : 3603,

            "optime" : {

                "ts" : Timestamp(1515591358, 6),

                "t" : NumberLong(1)

            },

            "optimeDate" : ISODate("2018-01-10T13:35:58Z"),

            "syncingTo" : "xxx.xxx.xxx.xxx:27017",

            "configVersion" : 1,

            "self" : true

        }

    ],

    "ok" : 1

}
这时我们可以到secondary所在的服务器查看日志,可以在日志查看到同步信息:
--10T21::57.124+ I REPL     [repl writer worker ] CollectionCloner::start called, on ns:cocheer.9_users

--10T21::57.148+ I INDEX    [InitialSyncInserters-cocheer.9_users0] build index on: cocheer.9_users properties: { v: , unique: true, key: { openid:  }, name: "openid_1", ns: "cocheer.9_users", background: true }

--10T21::57.148+ I INDEX    [InitialSyncInserters-cocheer.9_users0]      building index using bulk method; build may temporarily use up to  megabytes of RAM
增加第三个节点,arbiter节点:
rs.addArb("xxx.xxx.xxx.xxx:27018")

COOL:PRIMARY> rs.status()

{

    "set" : "COOL",

    "date" : ISODate("2018-01-10T14:09:29.751Z"),

    "myState" : 1,

    "term" : NumberLong(1),

    "heartbeatIntervalMillis" : NumberLong(2000),

    "optimes" : {

        "lastCommittedOpTime" : {

            "ts" : Timestamp(1515593366, 2),

            "t" : NumberLong(1)

        },

        "appliedOpTime" : {

            "ts" : Timestamp(1515593366, 2),

            "t" : NumberLong(1)

        },

        "durableOpTime" : {

            "ts" : Timestamp(1515593366, 2),

            "t" : NumberLong(1)

        }

    },

    "members" : [

        {

            "_id" : 0,

            "name" : "xxx.xxx.xxx.xxx:27017",

            "health" : 1,

            "state" : 1,

            "stateStr" : "PRIMARY",

            "uptime" : 3470,

            "optime" : {

                "ts" : Timestamp(1515593366, 2),

                "t" : NumberLong(1)

            },

            "optimeDate" : ISODate("2018-01-10T14:09:26Z"),

            "electionTime" : Timestamp(1515589983, 1),

            "electionDate" : ISODate("2018-01-10T13:13:03Z"),

            "configVersion" : 2,

            "self" : true

        },

        {

            "_id" : 1,

            "name" : "xxx.xxx.xxx.xxx:27017",

            "health" : 1,

            "state" : 2,

            "stateStr" : "SECONDARY",

            "uptime" : 3396,

            "optime" : {

                "ts" : Timestamp(1515593366, 2),

                "t" : NumberLong(1)

            },

            "optimeDurable" : {

                "ts" : Timestamp(1515593366, 2),

                "t" : NumberLong(1)

            },

            "optimeDate" : ISODate("2018-01-10T14:09:26Z"),

            "optimeDurableDate" : ISODate("2018-01-10T14:09:26Z"),

            "lastHeartbeat" : ISODate("2018-01-10T14:09:27.797Z"),

            "lastHeartbeatRecv" : ISODate("2018-01-10T14:09:27.876Z"),

            "pingMs" : NumberLong(3),

            "syncingTo" : "xxx.xxx.xxx.xxx:27017",

            "configVersion" : 2

        },

        {

            "_id" : 2,

            "name" : "xxx.xxx.xxx.xxx:27018",

            "health" : 1,

            "state" : 7,

            "stateStr" : "ARBITER",

            "uptime" : 68,

            "lastHeartbeat" : ISODate("2018-01-10T14:09:27.803Z"),

            "lastHeartbeatRecv" : ISODate("2018-01-10T14:09:26.860Z"),

            "pingMs" : NumberLong(2),

            "configVersion" : 2

        }

    ],

    "ok" : 1

}
如果想修改复制集的配置,也可以使用rs.reconfig(config,{"force":true})强制更新配置。
var config = rs.config()

config.members[0].host = '172.18.169.230:27017'

config.members[1].host = '172.18.169.232:27017'

config.members[2].host = '172.18.169.232:27018'

rs.reconfig(config,{"force":true})
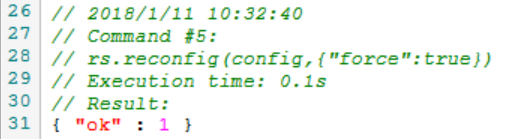
再次通过rs.status()命令查看复制集的状态,可以看到配置已经修改并生效。
secondary节点默认是不可读的,如果需要读secondary节点,需要在secondary节点上输入命令:
db.getMongo().setSlaveOk()

//    或者

rs.slaveOk()
只是每次重新登录secondary节点都需要输入此命令。
顺便贴一下mongoose连接复制集的option:
options = {

    autoReconnect: true,

    poolSize: 8,

    promiseLibrary: global.Promise,

    useMongoClient: true,

    keepAlive: 1,

    connectTimeoutMS: 30000,

    reconnectTries: 100,

    replicaSet: 'COOL',

    readPreference: 'secondaryPreferred',

}
没有问题,大功告成!
最新文章
- Javascript实现页面跳转的几种方式
- Ocrad.js – JS 实现 OCR 光学字符识别
- Python标准库01 正则表达式(re包)
- 【转】运行java -version命令时出现错误及解决
- 省市区县镇级联数据JS版
- Oracle查询字符集
- TortoiseSvn
- ViewGroup源码部分解析
- Windows Azure 微软公有云体验(一) 网站、SQL数据库、虚拟机
- JAVA基础知识点(转载的)
- 有利于SEO的DIV+CSS规范小结
- iOS开发之Autolayout
- reduce 方法 (Array) (JavaScript)
- windows驱动之WDF---CharSample
- Linux下的磁盘分区和逻辑卷
- 阿里云-CDN
- P4147 玉蟾宫
- tomcat中gzip压缩
- 【CF706D】Vasiliy's Multiset Trie+贪心
- 【基础练习】【拓扑排序】codevs3294 车站分级题解