canvas基础学习(三)
2024-09-01 09:53:16
一、图片加载控件
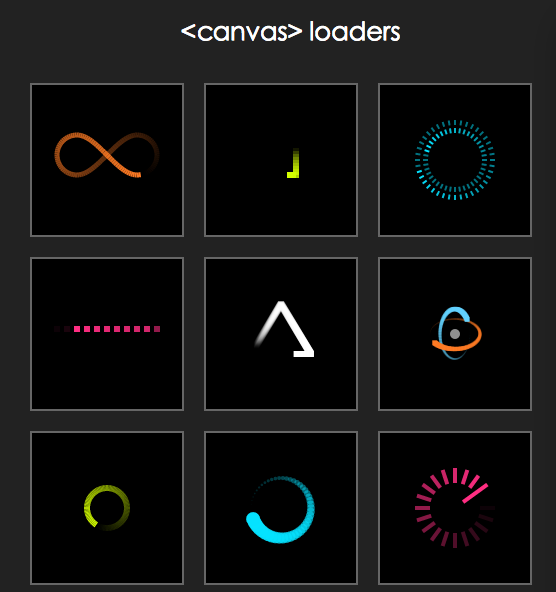
在canvas效果制作中常常要使用多张图片,为了提高用户体验,需要给用户提供一个图片加载中的过度页面效果。过度效果,我在项目中使用的是Sonic.js,它在git上的地址为https://github.com/padolsey/Sonic,个人认为它的样式和扩展性都还不错,使用方式也比较简单。效果图为:
调用代码也比较简单
<script type="text/javascript" src="js/sonic.js"></script>

<script>

            var loading = new Sonic({

                width: 100,

                height: 100,

                stepsPerFrame: 1,

                trailLength: 1,

                pointDistance: .1,

                fps: 15,

                padding: 10,

                fillColor: '#fff',

                setup: function() {

                    this._.lineWidth = 20;

                },

                path: [

                    ['line', 0, 20, 100, 20],

                    ['line', 100, 20, 0, 20]

                ]

            });

            loading.play();

            document.body.appendChild(loading.canvas);

        </script>
下面是自己写的一个图片加载的工具方法
(function(window,undefind){    //图片加载控件

    function imgLoad(options){

        var defaults = {

            imgArr : [] ,        //图片数组

            loadOverCallback : null        //加载完成的回调函数

        };

        var opts = $.extend(true , defaults , options || {}) ,

            imgSize = opts.imgArr.length , //需要加载图片的个数

            completeSize = 0;

        function beginLoad() {

            for (var index in opts.imgArr) {

                var src = opts.imgArr[index];

                src && loadImg(src);

            }

        }

        function loadImg(src) {        //加载图片

            var image = new Image(),

                handleLoadOver = function() {

                    completeSize++;

                    checkLoadOver();

                };

            image.src = src;

            if (image.complete) { //图片有缓存

                handleLoadOver();

            } else {

                image.onload = function() { //图片获取成功

                    handleLoadOver();

                };

            }

        }

        function checkLoadOver() {    //查询是否已经加载完毕

            if (completeSize != imgSize) return;

            if(opts.loadOverCallback && typeof opts.loadOverCallback === "function"){

                opts.loadOverCallback();

            }

        }

        beginLoad()//开始执行

    }

    window.imgLoad = imgLoad;

})(window);
代码的逻辑就是把需要加载的图片url,以数组的形式传入,然后通过new Image()对象进行加载,每加载完毕一个执行一次检查是否完毕的函数,当所有图片全部加载完则执行结束的回调函数。调用方法为:
window.imgLoad({

        imgArr : [

            "img/1.jpg", "img/2.jpg", "img/3.jpg", "img/4.jpg", "img/5.jpg"

        ],

        loadOverCallback : function(){

            //结束操作....

        }

    });
二、指定元素上飘雪、彩带、星星的效果
(function(window , document , undefind){        //canvas特效

    function canvasEffect(options) {

        var defaults = {

            ele :  document.getElementById("body"),  //覆盖元素

            type : "snow" ,  //snow为雪花,band为彩带,star为星星

            particleMax : 200 ,     //元素最大数

            particleCount : 100 , //使用元素数目

            bandColorArr : ["#82F269", "#F61326", "#F6F313", "#518DF6"] , //彩带颜色数组

            vy : 1 ,    //Y轴上的运动速度

            vyFloat : 1.5 ,        //Y轴速度浮动的系数

            vx : 0.5 ,    //X轴上的运动速度

            vxFloat : 1 ,        //X轴速度浮动的系数

            w : 8 , //元素的宽度

            wFloat : 2 ,     //宽度的浮动系数

            h : 12 , //元素的高度

            hFloat : 4 , //高度的浮动系数

            o : 0.4 , //元素的透明度

            oFloat : 0.5 ,    //透明度的浮动系数

            r : 1 ,    //半径

            rFloat : 2    ,//半径的浮动值

            snowColor : "#FFF"    //雪花的颜色

        }

        var opts = $.extend(true, defaults, options || {});

        var canvas = document.createElement('canvas'),

            ctx = canvas.getContext('2d'),

            width = opts.ele.clientWidth,

            height = opts.ele.clientHeight,

            i = 0 , active = false , objFlakes = [] , objFlake,

            lastDate = 0 , dateDel = 0 ,  isChange = false;

        var starPic = new Image();

        starPic.src = "img/star.png";

        canvas.style.position = 'absolute';

        canvas.style.left = canvas.style.top = '0';

        var Objflake = function() {

            this.reset();    //初始化

        };

        Objflake.prototype.reset = function() {

            this.x = Math.random() * width;

            this.y = Math.random() * -height;

            this.vy = opts.vy + Math.random()*opts.vyFloat;

            this.vx = opts.vx - Math.random()*opts.vxFloat;

            this.w = opts.w + Math.random()*opts.wFloat;

            this.h = opts.h + Math.random()*opts.hFloat;

            this.o = opts.o + Math.random()*opts.oFloat;

            this.color = opts.bandColorArr[parseInt(Math.random() * opts.bandColorArr.length)];

            this.c = Math.random() > 0.5 ? 1 : -1;

            this.r = opts.r + Math.random()*opts.rFloat;

            this.picNo = Math.floor(Math.random() * 7);

        };

        function generatebandFlakes() {    //初始化元素个数

            objFlakes = [];

            for (i = 0; i < opts.particleMax; i++) {

                objFlake = new Objflake();

                objFlake.reset();

                objFlakes.push(objFlake);

            }

        }

        function update() {    //更新

            ctx.clearRect(0, 0, width, height);

            if (!active) {

                return;

            }

            if(opts.type == "star"){

                var nowDate = Date.now();

                dateDel += nowDate - lastDate;

                lastDate = nowDate;

                isChange = (dateDel > 60);

                if(isChange){

                    dateDel = 0;

                }

            }

            for (i = 0; i < opts.particleCount; i++) {

                objFlake = objFlakes[i];

                objFlake.y += objFlake.vy;

                objFlake.x += objFlake.vx;

                if(opts.type == "snow"){

                    drawSnow(objFlake.x, objFlake.y, objFlake.r , objFlake.o);

                }else if(opts.type == "band"){

                    drawBand(objFlake.x, objFlake.y, objFlake.color, objFlake.w,

                        objFlake.h, objFlake.c, objFlake.o);

                }else if(opts.type == "star"){

                    if(isChange){

                        objFlake.picNo += 1;

                        objFlake.picNo = objFlake.picNo%7;

                    }

                    ctx.drawImage(starPic, objFlake.picNo * 7, 0, 7, 7, objFlake.x, objFlake.y, 7, 7);

                }

                if (objFlake.y > height) {

                    objFlake.reset();

                }

            }

            requestAnimFrame(update);

        }

        //画彩带

        function drawBand(x, y, color, w, h, c, alpha, isRotate, rotatePI) {

            var leakdep = h < 10 ? 2 : 8;

            var leak = c > 0 ? leakdep : -(leakdep);

            ctx.save();

            ctx.fillStyle = color;

            ctx.globalAlpha = alpha;

            ctx.beginPath();

            ctx.moveTo(x, y - h);

            ctx.lineTo(x + w, y - h);

            ctx.quadraticCurveTo(x + w + c, y - h / 2, x + w + leak, y);

            ctx.lineTo(x + leak, y);

            ctx.quadraticCurveTo(x + c, y - h / 2, x, y - h);

            ctx.fill();

            ctx.closePath();

            ctx.restore();

        }

        //画雪花

        function drawSnow(x  , y  , r , o){

            ctx.save();

            ctx.fillStyle = opts.snowColor;

            ctx.globalAlpha = o;

            ctx.beginPath();

            ctx.arc(x , y , r , 0, Math.PI * 2, false);

            ctx.fill();

            ctx.closePath();

            ctx.restore();

        }

        function onResize() {

            width = opts.ele.clientWidth;

            height = opts.ele.clientHeight;

            canvas.width = width;

            canvas.height = height;

            lastDate = Date.now();

            var wasActive = active;

            active = width > 300;

            if (!wasActive && active) {

                requestAnimFrame(update);

            }

        }

        window.requestAnimFrame = (function() {

            return window.requestAnimationFrame ||

                window.webkitRequestAnimationFrame ||

                window.mozRequestAnimationFrame ||

                function(callback) {

                    window.setTimeout(callback, 1000 / 60);

                };

        })();

        generatebandFlakes();

        onResize();

        opts.ele.appendChild(canvas);

        window.addEventListener('resize', onResize, false);

    }

    window.canvasEffect = canvasEffect;

})(window,document);
代码如上,逻辑就是在指定的ele元素上,创建一个canvas标签,高宽同ele元素,在这个画布上绘制雪花、彩带或者星星图片,根据动画函数requestAnimationFrame函数以及预先定义好的x,y轴方向的速度,进行一帧一帧的绘制,每一帧的x,y坐标发生变化,进行产生动画效果。星星的图片为
调用方式如下:
1、星星
window.canvasEffect({

            ele : document.getElementsByTagName("body")[0] ,

            type : "star" ,

            particleMax : 300 ,

            particleCount : 150 ,

            vy : 0.3 ,

            vyFloat : 0.3 ,

            vx : 0.3 ,

            vxFloat : 0.6 ,

            o : 0.3 ,

            oFloat : 0.3 ,

        });
效果图为:
2、彩带
window.canvasEffect({

            ele : $("body")[0] ,

            type : "band" ,

            particleMax : 200 ,

            particleCount : 100 ,

            bandColorArr : ["#82F269", "#F61326", "#F6F313", "#518DF6"] ,

            w : 8 ,

            wFloat : 2 ,

            h : 12 ,

            hFloat : 4 ,

            o : 0.4 ,

            oFloat : 0.5 ,

            r : 1 ,

            rFloat : 2

        });
效果图为:
3、雪花
window.canvasEffect({

            ele : $("body")[0] ,

            type : "snow" ,

            particleMax : 200 ,

            particleCount : 100 ,

            o : 0.4 ,

            oFloat : 0.5 ,

            r : 1 ,

            rFloat : 2

        });
效果图为:
demo的下载放到csdn上去了,地址为
http://download.csdn.net/detail/hufengsky123/9337827
最新文章
- ubuntu下rhythmbox歌名显示乱码问题解决
- JS动态引入js,CSS——动态创建script/link/style标签
- activitydialog
- break和continue的区别以及标签label的使用
- logstash5.x改变
- 贴代码—CF230 DIV1 B
- ROW_NUMBER () 与 PARTITION组合拳
- jquery实现简单鼠标经过图片预览效果
- The method setOnClickListener(View.OnClickListener) in the type View is not applicable
- 物理卷操作命令:pvcreate,pvscan,pvdisplay.卷组操作命令:vgcreate,vgdisplay. (转)
- npm 不是内部命令
- SQL Server 的常见约束
- 【Swift】iOS裁剪或者压缩后出现的白边问题
- 用C# (.NET Core) 实现迭代器设计模式
- Python并发编程之线程池&进程池
- 小程序开发--template模板
- 20165315 2017-2018-2《Java程序设计》课程总结
- 宝塔Linux面板 5.1正式版永久免费
- folly无锁队列正确性说明
- 利用Angular.js从PHP读取后台数据