Vue学习记录-画页面
2024-09-04 06:19:21
webstorm
因为之前开发ReactNative的时候,选择了webstorm,这回转战Vue,自然还是用它。如果什么也不做的话,打开Vue工程,编辑区域基本上没有语法高亮。怎么办呢?
安装插件(以mac版本为例,window下面应该大同小异)
1. 打开偏好设置,从左边找到Plugins
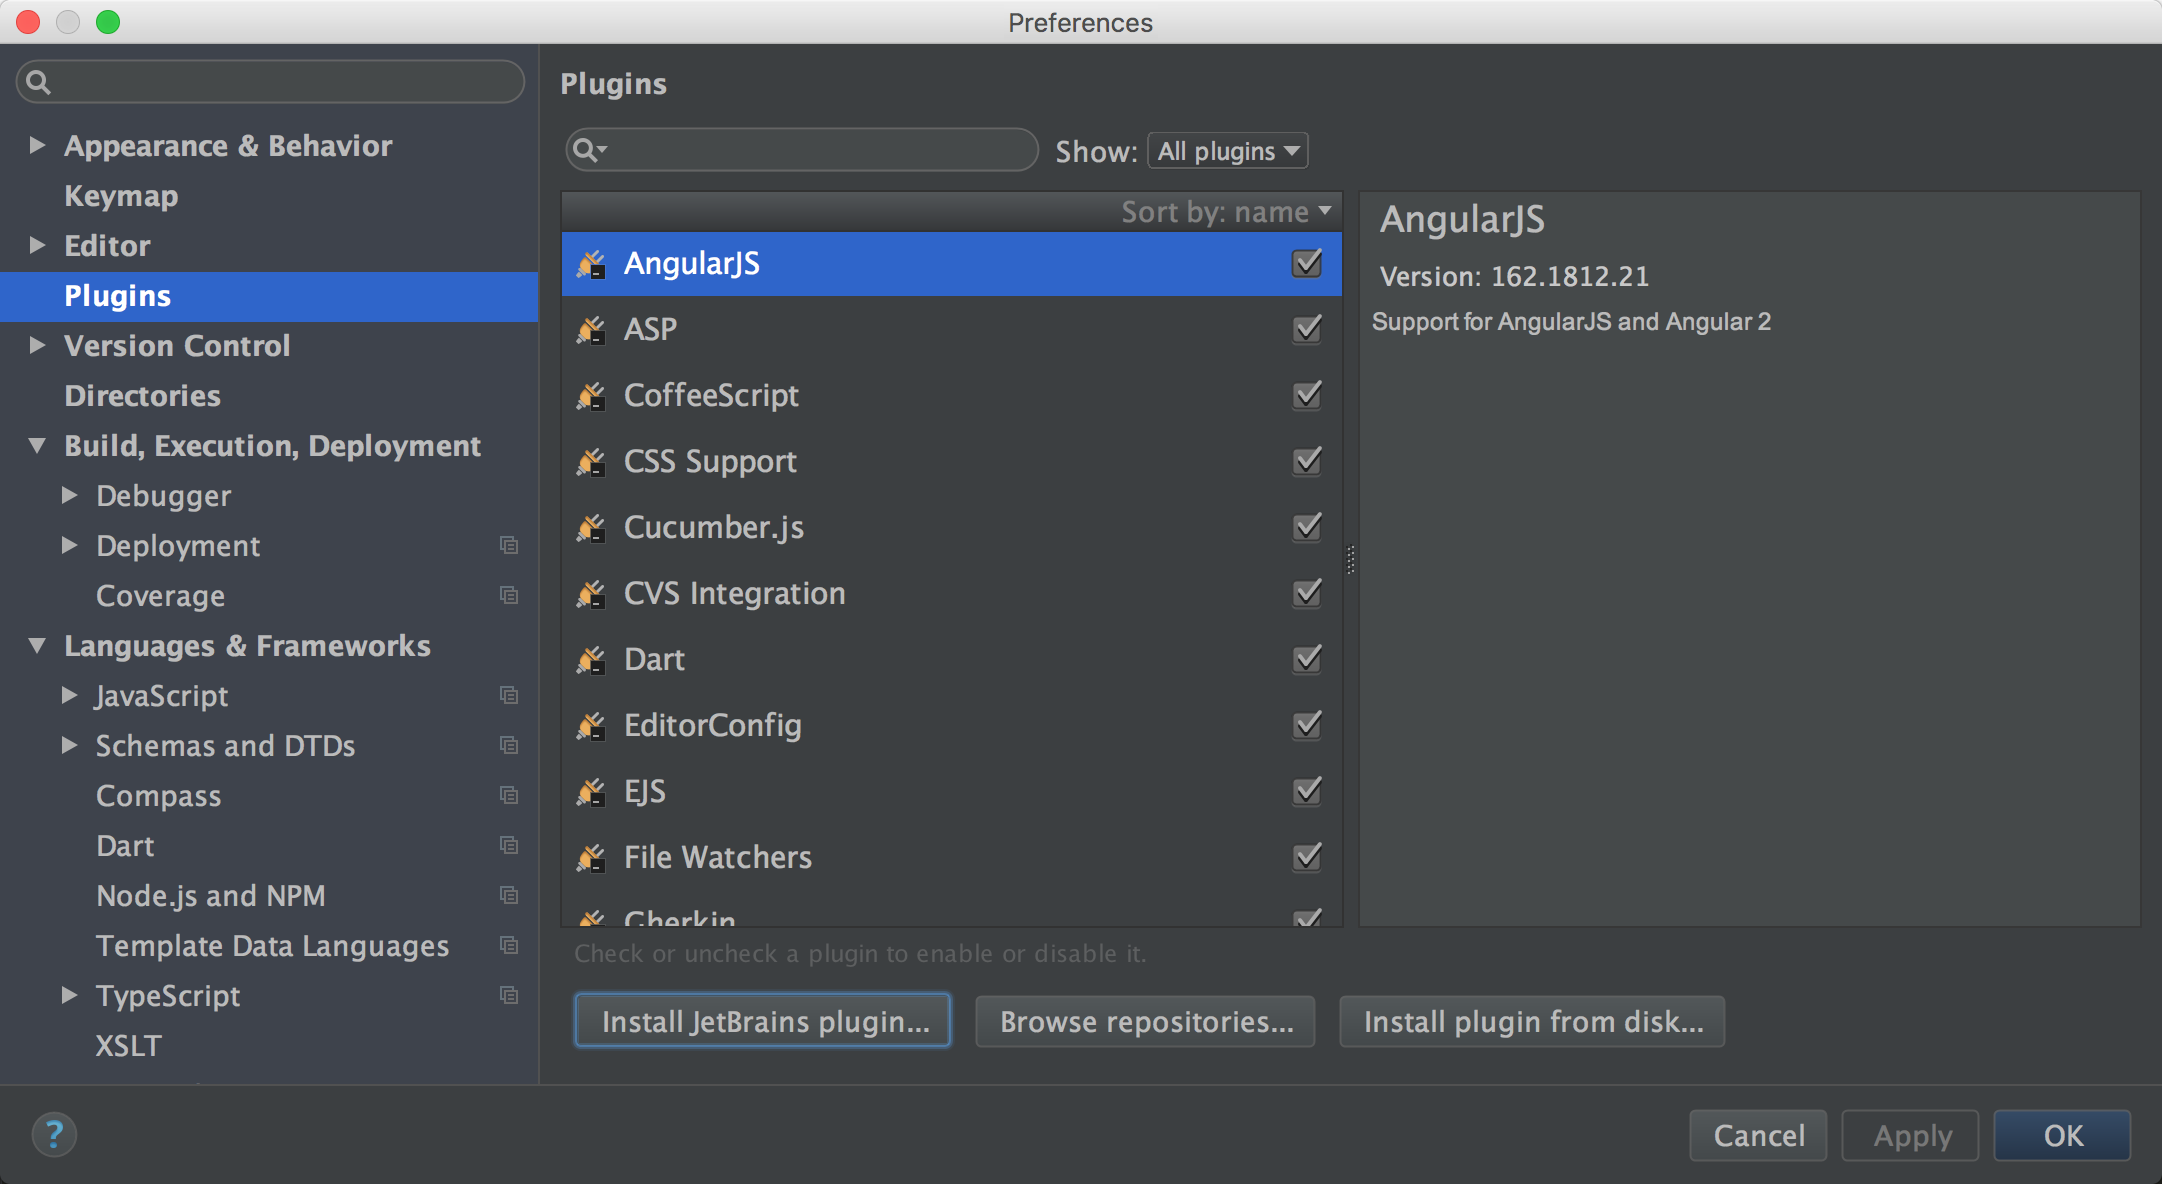
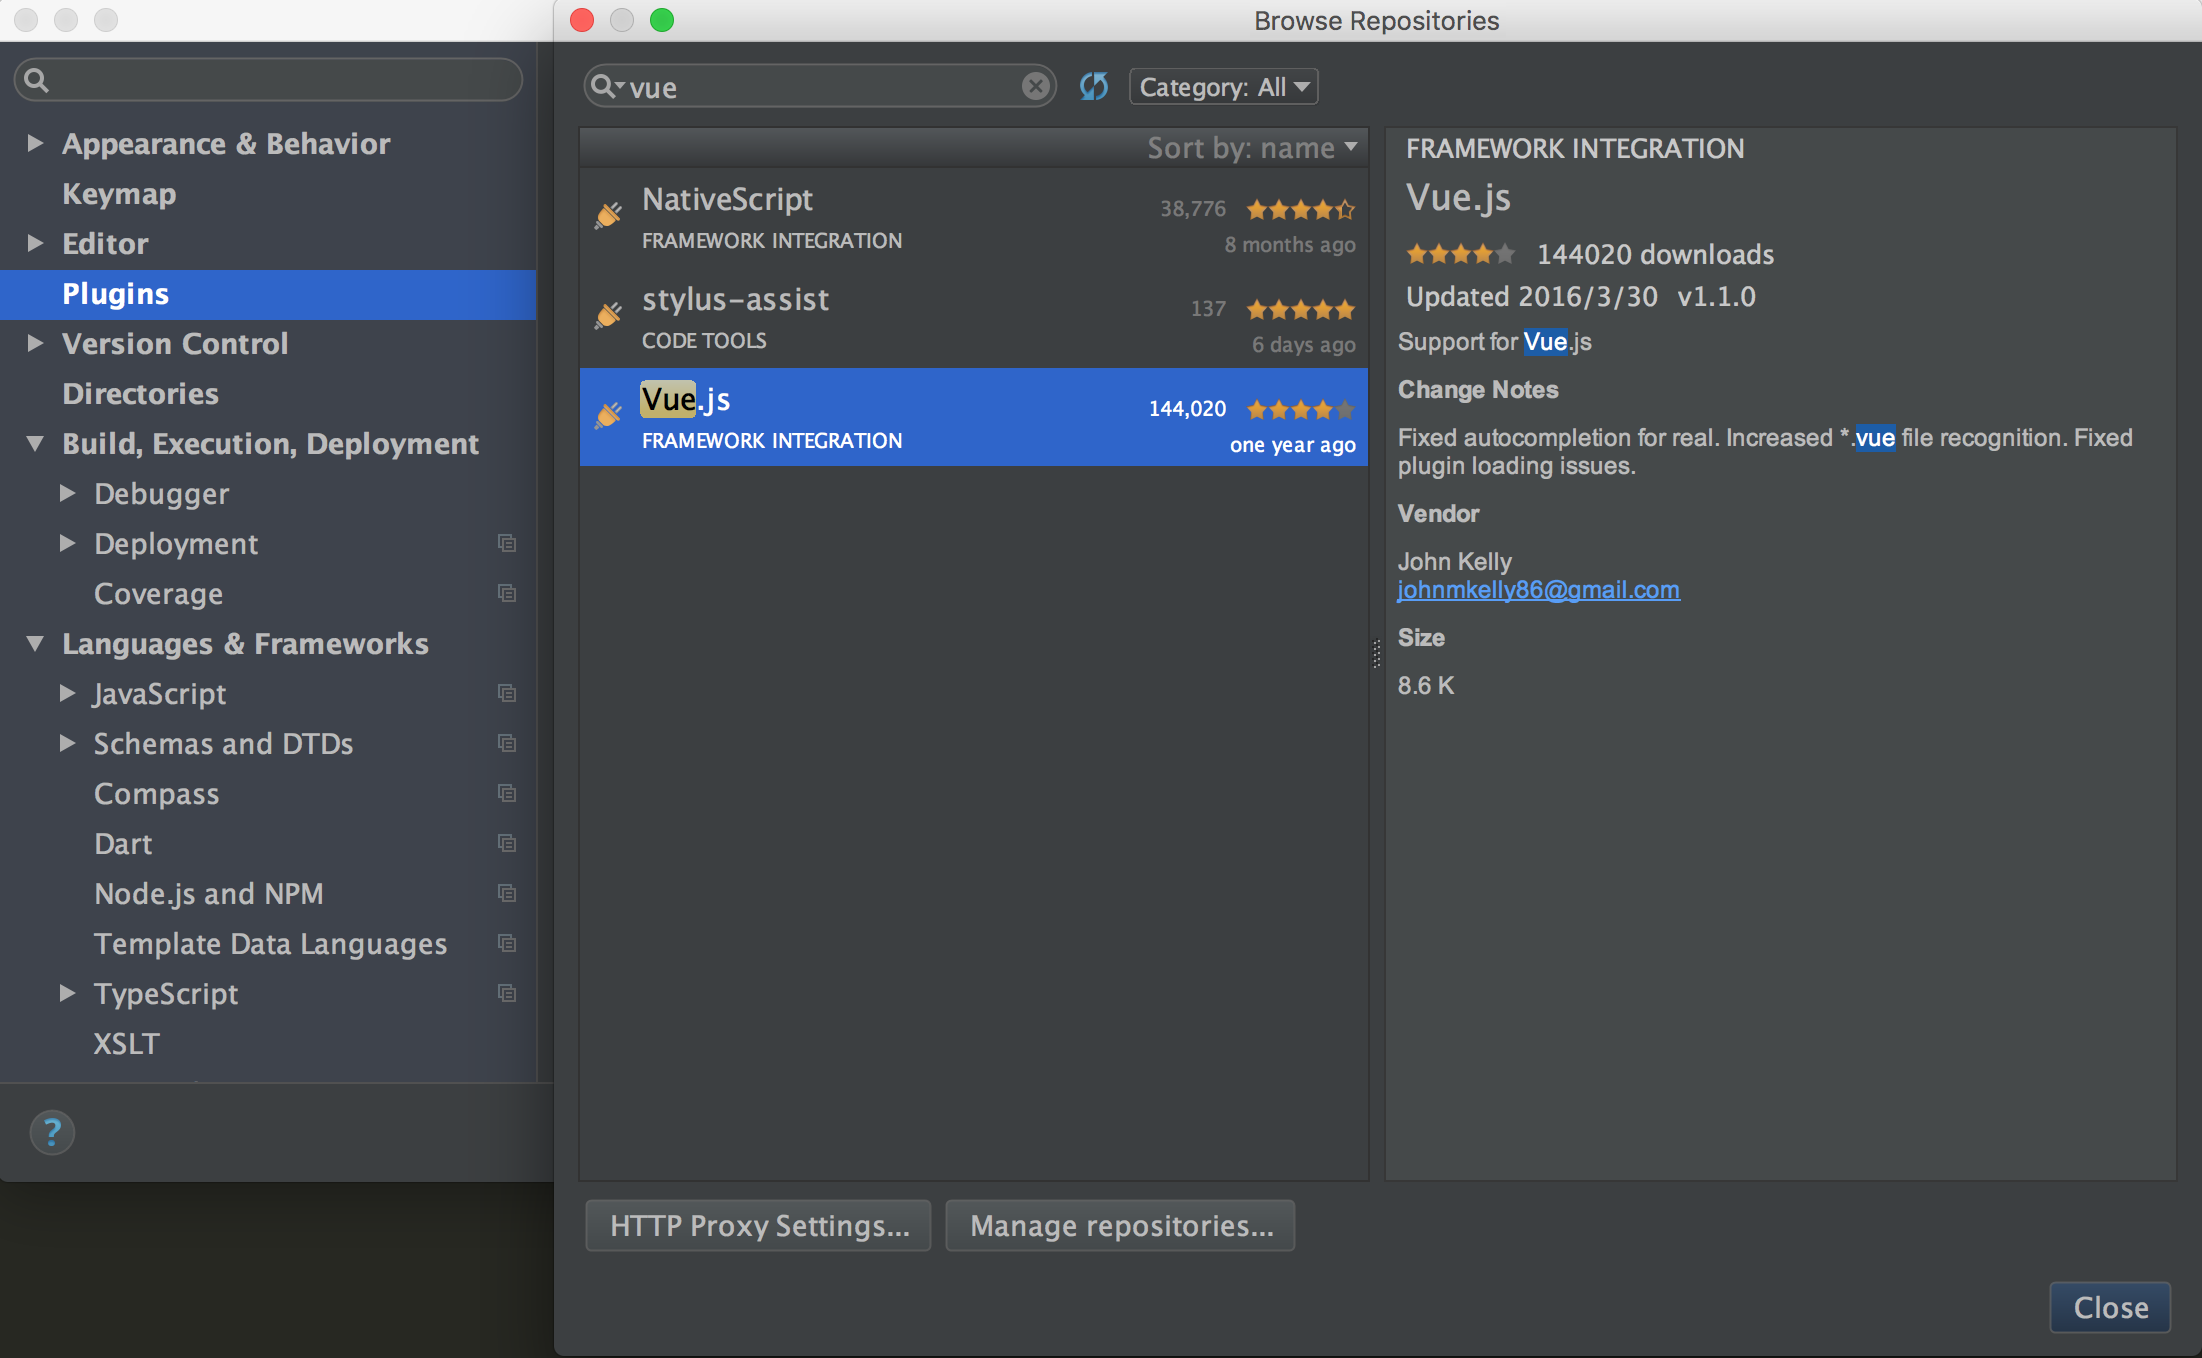
2. 点击Browse repositories...,然后搜索Vue,进行安装
3. 添加Vue模板

<template>

</template>

<script>

export default {

  name: ''

}

</script>

<style>

</style>
4. 重启webstorm,准备工作到此结束
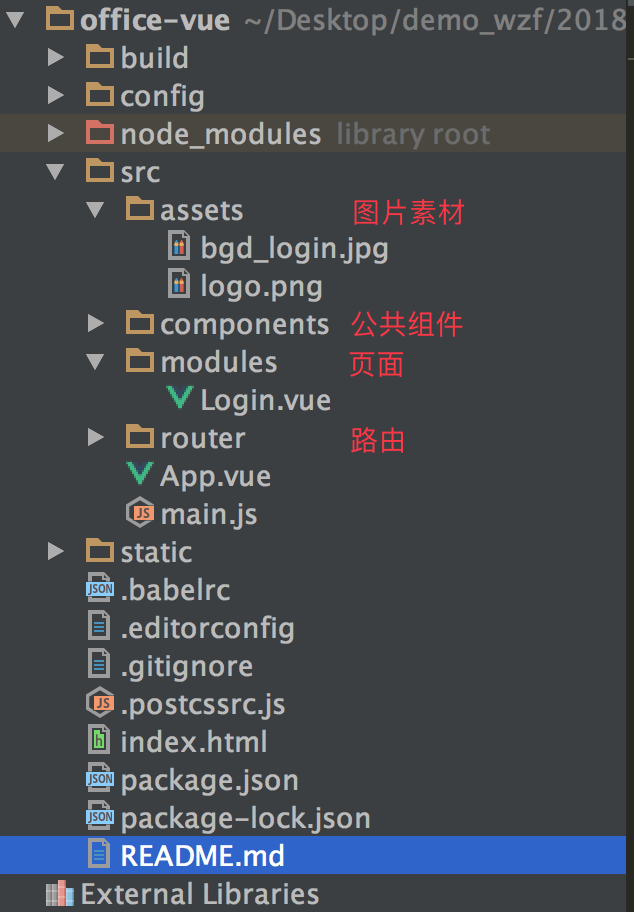
项目结构
配置路由,根路径显示Login
import Vue from 'vue'

import Router from 'vue-router'

import Login from '@/modules/Login'

Vue.use(Router)

export default new Router({

  routes: [

    {

      path: '/',

      name: 'Login',

      component: Login

    }

  ]

})
编写Login.vue
先把代码贴一下,过程慢慢看
<template> <div id="container">
<div id="background-container">
<img src="../assets/bgd_login.jpg" id="background-image"/>
</div> <div id="main">
<div id="logo">
<img id="logo-img" src="../assets/logo.png">
</div> <div id="login">
<div class="form-input">
<span>
<i class="icon input-icon"></i>
</span>
<input class="input" placeholder="请输入用户名"/>
</div> <div class="form-input form-input-password">
<span>
<i class="icon input-icon"></i>
</span>
<input class="input" placeholder="请输入密码" type="password"/>
</div> <div id="setting">
<checkbox title="记住密码" :checked="remember_password" v-on:press="onPressRememberPassword"></checkbox>
</div> <div id="login-button">
<Button type="primary" size="large">登 录</Button>
</div> </div>
</div>
</div>
</template> <script>
import {Field, Button, Radio} from 'mint-ui';
import checkbox from '../components/checkbox.vue' export default {
name: 'login',
components: {
'v-input': Field,
Button,
checkbox,
},
data: function () {
return {
remember_password: false,
}
},
methods:{
onPressRememberPassword: function () {
this.remember_password = !this.remember_password;
}
}
}
</script> <style>
#container {
width: 100%;
height: 100%;
/*background-image: url("../assets/bgd_login.jpg") ;*/
} #background-container {
position: absolute;
top: 0px;
left: 0px;
width: 100%;
height: 100%;
z-index: 0;
} #main {
position: absolute;
top: 0px;
left: 0px;
width: 100%;
height: 100%;
z-index: 1;
background-color: transparent;
} #background-image {
width: 100%;
height: 100%;
z-index: 1; } #logo {
text-align: center;
vertical-align: center;
margin-top: 50px;
} #logo-img {
width: 100px;
height: 100px;
} .form-input {
background-color: white;
margin-top: 20px;
} .input-icon {
margin-left: 15px;
color: gray;
} .input {
background-color: transparent;
line-height: 60px;
border: none;
outline: none;
font-size: 16px;
color: white;
margin-left: 5px;
width: 70%;
} .form-input-password {
margin-top: 1px;
} #setting {
margin-top: 20px;
margin-left: 10px;
} #login-button {
margin-top: 55px;
padding: 0px 15px;
} </style>
过程1:怎么让一个图片作为背景颜色
iOS原生开发:
方案1:图片作为view的backgroundcolor;
方案2:一个UIImageView同时位于.subviews[0];
ReactNative开发:
方案1:<Image>作为容器,将其他部分作为childrens;
方案2:通过positon、zIndex将图片压到最底层;
Vue方案:
方案1:作为div的背景图片,但是最后我没有解决图片的拉伸问题;
方案2:将背景图单独一个div,其他内容单独一个div,然后通过zIndex压到最后
#main { /* 其他内容所在的div,包括输入框、忘记密码、登录按钮 */

    position: absolute;

    top: 0px;

    left: 0px;

    width: 100%;

    height: 100%;

    z-index:;

    background-color: transparent;

  }

  #background-image { /*背景图所在的div*/

    width: 100%;

    height: 100%;

    z-index:;

  }
过程2:输入框,怎么让input撑满剩余部分呢
在ReactNative里面,可以通过flex:1,让一个组件撑满,放到div/css里面,我就不知道怎么处理了。因为暂时不影响使用,只是简单的做了处理
<div class="form-input">
<span>
<i class="icon input-icon"></i>
</span>
<input class="input" placeholder="请输入用户名"/>
</div>
.input {

    background-color: transparent;

    line-height: 60px;

    border: none;

    outline: none;

    font-size: 16px;

    color: white;

    margin-left: 5px;

    width: 70%;

  }
过程3:“记住密码”,能不能做个单独的组件,方便以后复用
<template>

  <div @click="press">

    <img class="comp-checkbox-icon" :src="iconImage">

    <label class="comp-checkbox-title">{{title}}</label>

  </div>

</template>

<script>

  export default {

    name: 'checkbox',

    props: ['title', 'checked'],

    data: function () {

      return {

      }

    },

    computed: {

      iconImage: function () {

        const icon = this.checked

          ? require('../components/images/checkbox_on.png')

          : require('../components/images/checkbox_no.png');

        return icon;

      }

    },

    methods: {

      press: function () {

        this.$emit('press');

      },

    }

  }

</script>

<style>

  .comp-checkbox-icon {

    width: 20px;

    height: 20px;

    float: left;

  }

  .comp-checkbox-title {

    margin-left: 10px;

  }

</style>
问题a. 如何让显示的文本,从父组件传过来显示呢?
(参照Vue:使用Prop传递数据)
问题b. 如何将点击事件交给父组件处理呢?
(参照Vue:使用v-on绑定自定义事件)
问题c. 如何判断显示的图片(选中/非选中)呢?
(答案:通过computed计算返回,同时对于img这种特殊的标签,应该用require进行返回)
问题d. 组件写好了,应该怎么用呢?
(答案:父组件里面,import引入,注册到components里,然后就可以使用了)


OK,UI部分到此结束,下面的“接口通信”,预知后事如何,待我娓娓道来
最新文章
- 移动端接口:java写get方式访问数据(springmvc+spring。。。)
- 【WEB】初探Spring MVC框架
- 【faster-rcnn】训练自己的数据集时的坑
- sqlserver08评估期已过的解决方法
- SimpleDateFormat()简单了解
- 剑指offer系列35----序列化二叉树
- 百度分享如何自定义分享url和内容?
- 内存管理、ARC
- nutch 二次开发
- Selenium IDE整理
- 函数式C代码
- 科尔尼咨询公司 - MBA智库百科
- 开源协议介绍(GPL,LGPL,BSD,MIT,Apache)
- jquery的相关用法
- IdentityServer4 中文文档 -5- (简介)支持和咨询选项
- requests+beautifulsoup爬取豆瓣图书
- C#定义只能处理枚举类型的泛型类型
- Java基本功—Reference
- url拼接
- 用python给图片添加文字(水印)