Spring IOC 一——容器装配Bean的简单使用
下文:SpringIOC 二—— 容器 和 Bean的深入理解
写在前面
这篇文章去年写的,缘起于去年某段时间被领导临时“抓壮丁”般的叫过去做java开发,然后在网上找了一个 SpringMVC 的 demo,学习一下,然后依葫芦画瓢,开始了自己的项目开发,也还顺利完成了任务。在使用 SpringMVC 的过程中,我被这个被称作“最优秀”的 java 框架 —— Spring 深深地吸引了,那些曾经掌握的多种设计模式的思想在其中都有实现,比如工厂模式、单例模式、观察者模式等等,于是在工作之余认真地学习了这个框架。
学习新东西总是令人兴奋的,然而大多数学过的知识很容易又会忘记,所以便想整理一下,写点笔记,方便自己以后复习查看。
部分参考资料:
《Spring实战(第4版)》
《轻量级 JavaEE 企业应用实战(第四版)》
Spring 官方文档
W3CSchool Spring教程
易百教程 Spring教程
一、Spring简介
Spring是一个开源框架,Spring是于2003年兴起的一个轻量级的Java开发框架,由Rod Johnson在其著作Expert One-On-One J2EE Development and Design中阐述的部分理念和原型衍生而来。它是为了解决企业应用开发的复杂性而创建的。框架的主要优势之一就是其分层架构,分层架构允许使用者选择使用哪一个组件。Spring提供了约20多个组件,开发者可以根据自己需要选择组件。Spring的核心是控制反转(IoC)和面向切面编程(AOP)
- IoC:控制反转。
控制反转(Inversion of Control),又叫依赖注入(Dependency Injection)。举例来说,在之前的操作中,比方说有一个类,我们想要调用类里面的方法(不是静态方法),就要创建类的对象,使用对象调用方法实现。对于Spring来说,Spring创建对象的过程,不是在代码里面实现的,而是交给Spring来进行配置实现的。 - AOP:面向切面编程。
面向切面编程(Aspect Orient Programming)支持允许将一些通用的任务入安全、事物、日志、缓存等进行集中式处理,从而提供了更好的复用,AOP通常用来处理一些具有横切性质的系统级服务。
二、Hello Spring 实例
从最简单的 Hello,Spring 例子来体会一下使用 Spring 框架。首先看看不使用 Spring 框架的代码:
HelloSpring.java 类:
package com.sharpcj;

public class HelloSpring {

    private String name;

    public void sayHello() {

        System.out.println("Hello," + name + "!");

    }

    public String getName() {

        return name;

    }

    public void setName(String name) {

        this.name = name;

    }

}
Test.java 类:
package com.sharpcj;

public class Test {

    public static void main(String[] args) {

        HelloSpring hs = new HelloSpring();

        hs.setName("Spring");

        hs.sayHello();

    }

}
输出结果:
Hello,Spring!
下面我们用 Spring 框架来实现这个例子。
Spring 框架官方下载地址: http://repo.springsource.org/libs-release-local/
Spring 框架阿里云下载地址:http://maven.aliyun.com/nexus/content/groups/public/springframework/
添加从 Spring 框架核心 JAR 文件:
- commons-logging-1.1.1
- spring-aop-5.0.6.RELEASE
- spring-aspects-5.0.6.RELEASE
- spring-beans-5.0.6.RELEASE
- spring-context-5.0.6.RELEASE
- spring-context-support-5.0.6.RELEASE
- spring-core-5.0.6.RELEASE
- spring-expression-5.0.6.RELEASE
- spring-instrument-5.0.6.RELEASE
- spring-instrument-tomcat-5.0.6.RELEASE
- spring-jdbc-5.0.6.RELEASE
- spring-jms-5.0.6.RELEASE
- spring-messaging-5.0.6.RELEASE
- spring-orm-5.0.6.RELEASE
- spring-oxm-5.0.6.RELEASE
- spring-test-5.0.6.RELEASE
- spring-tx-5.0.6.RELEASE
- spring-web-5.0.6.RELEASE
- spring-webmvc-5.0.6.RELEASE
- spring-webmvc-portlet-5.0.6.RELEASE
- spring-websocket-5.0.6.RELEASE
这里只是使用Spring的基本功能,所以需要使用到下面的这几个Jar包:
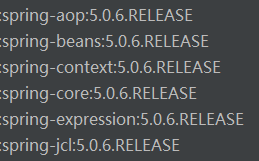
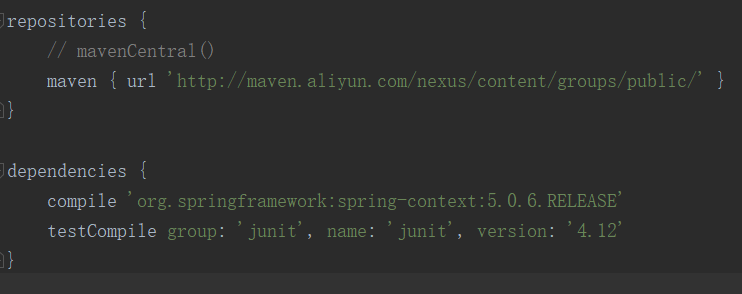
这里我使用的 idea,用 gradle 编译的(用 maven 过程类似)。为了提高下载速度,我使用了阿里云的 maven 仓库,然后添加依赖,最新稳定版本是 5.0.6 , build.gradle文件部分截图:
代码更改如下:
HelloSpring.java 类
package com.sharpcj;

public class HelloSpring {

    private String name;

    public void sayHello() {

        System.out.println("Hello," + name + "!");

    }

    public String getName() {

        return name;

    }

    public void setName(String name) {

        this.name = name;

    }

}
Test.java 类
package com.sharpcj;

import org.springframework.context.ApplicationContext;

import org.springframework.context.support.FileSystemXmlApplicationContext;

public class Test {

    public static void main(String[] args) {

        ApplicationContext context = new FileSystemXmlApplicationContext("src/beans.xml");

        HelloSpring hs = context.getBean("helloSpring", HelloSpring.class);

        hs.sayHello();

    }

}
此时在 src 目录下新建了一个文件 beans.xml :
<?xml version="1.0" encoding="UTF-8"?>

<beans xmlns="http://www.springframework.org/schema/beans"

       xmlns:xsi="http://www.w3.org/2001/XMLSchema-instance"

       xsi:schemaLocation="http://www.springframework.org/schema/beans

    http://www.springframework.org/schema/beans/spring-beans-3.0.xsd">

    <bean id="helloSpring" class="com.sharpcj.HelloSpring">

        <property name="name" value="Spring"/>

    </bean>

</beans>
此时运行 Test.java 的 main 方法,打印结果如下:
Hello,Spring!
这样我们就用 Spring 框架实现了最简单的 Hello Spring 程序。
三、认识 spring 容器和 Bean
上面用 Spring 框架实现的代码中,我们在 Test.java 类中,并没有通过 “new HelloSpring()” 这样的调用 Spring 构造方法去创建 HelloSpring 的对象,而是使用 Spring 核心容器创建的。
第一步是我们使用框架 API FileSystemXmlApplicationContext() 来创建应用程序的上下文。这个 API 加载 beans 的配置文件并最终基于所提供的 API,它处理创建并初始化所有的对象,即在配置文件中提到的 beans。
第二步是使用已创建的上下文的 getBean() 方法来获得所需的 bean。这个方法使用 bean 的 ID 返回一个最终可以转换为实际对象的通用对象。一旦有了对象,你就可以使用这个对象调用任何类的方法。能通过这种方式创建的对象,一定是在 beans.xml 文件中配置的。
Spring 核心容器就好像是一个超级大的工厂,在配置文件中配置过的对象都会被当成 Spring 容器管理的对象。Spring 把容器中的一切对象统称为 Bean 。 Spring 中的 Bean 与传统的 java Bean 不同,对 Spring 而言,任何一个 java 类,都可以当成是 Bean 来处理。
四、Spring容器装配Bean的三种方式
- 在XML中进行装配
- 自动装配 bean
- 在Java中进行装配
还是用上面 HelloSpring 的例子,该例子实在过于简单,只有一个 bean, 没有涉及到两个 bean 之间的依赖关系,不过还是可以用它来理解Spring容器装配Bean的三种装配方式。为了说明依赖注入的场景,举个其它例子:
人用笔写字。伪代码如下:
Pen 类:
public class Pen {

    // property 暂不关心

}
Person 类:
public class Person {

    private Pen pen;

    public Person(Pen pen) {

        this.pen = pen;

    }

    public Pen getPen() {

        return this.pen;

    }

    public void setPen(Pen pen) {

        this.pen = pen;

    }

    // 这里我们暂不关心该方法

    public void write() {

    }

}
下面对于这种依赖关系,将分别用伪代码来说明构造注入和设置注入。
在 XML 中进行装配
基本使用
上面例子即是,不再赘述。
依赖注入
如果存在多个Bean, 之间有依赖关系:
构造注入:
<?xml version="1.0" encoding="UTF-8"?>

<beans xmlns="http://www.springframework.org/schema/beans"

       xmlns:xsi="http://www.w3.org/2001/XMLSchema-instance"

       xsi:schemaLocation="http://www.springframework.org/schema/beans

    http://www.springframework.org/schema/beans/spring-beans-3.0.xsd">

    <bean id="pen" class="com.sharpcj.Pen"> </bean>

    <bean id="person" class="com.sharpcj.Person">

        <constructor-arg name = "pen", ref = "pen">

    </bean>

</beans>
设值注入:
<?xml version="1.0" encoding="UTF-8"?>

<beans xmlns="http://www.springframework.org/schema/beans"

       xmlns:xsi="http://www.w3.org/2001/XMLSchema-instance"

       xsi:schemaLocation="http://www.springframework.org/schema/beans

    http://www.springframework.org/schema/beans/spring-beans-3.0.xsd">

    <bean id="pen" class="com.sharpcj.Pen"> </bean>

    <bean id="person" class="com.sharpcj.Person">

        <property name = "pen",  ref = "pen">

    </bean>

</beans>
4.2 自动装配 bean
基本使用
com.sharpcj.HelloSpring.java 代码如下:
package com.sharpcj;

import org.springframework.beans.factory.annotation.Value;

import org.springframework.stereotype.Component;

@Component

public class HelloSpring {

    private String name;

    public void sayHello() {

        System.out.println("Hello," + name + "!");

    }

    public String getName() {

        return name;

    }

    @Value("Spring")

    public void setName(String name) {

        this.name = name;

    }

}
创建类 com.sharpcj.HelloConfig.java用来开启组件扫描:
package com.sharpcj;

import org.springframework.context.annotation.ComponentScan;

import org.springframework.context.annotation.Configuration;

@Configuration

@ComponentScan

public class HelloConfig {

}
修改com.sharpcj.Test.java
package com.sharpcj;

import org.springframework.context.ApplicationContext;

import org.springframework.context.annotation.AnnotationConfigApplicationContext;

public class Test {

    public static void main(String[] args) {

        ApplicationContext context = new AnnotationConfigApplicationContext(com.sharpcj.HelloConfig.class);

        HelloSpring hello = context.getBean("helloSpring", HelloSpring.class);

        hello.sayHello();

    }

}
@Component 注解的类即为 Bean 。 @Configuration 注解的即为配置文件,@ComponentScan 注解表示开启自动扫描,默认扫描该配置类所在的包,如果扫描其它包,多个包,形式如下:
@Configuration

@ComponentScan(basePackageClasses = {com.a.A.class, com.b.B.class})
也可以每个包内配置之后,再配置一个总的配置文件:
@Configuration

@Import({com.a.AConfig.class, com.b.BConfig.class})

public class TotalConfig {

}
依赖注入
如果存在多个Bean, 之间有依赖关系:
// pen 类:
@Component

public class Pen {

    // property 暂不关心

}
构造注入:
@Component

public class Person {

    private Pen pen;

    @Autowired

    public Person(Pen pen) {

        this.pen = pen;

    }

    public Pen getPen() {

        return this.pen;

    }

    public void setPen(Pen pen) {

        this.pen = pen;

    }

    // 这里我们暂不关心该方法

    public void write() {

    }

}
设值注入:
@Component

public class Person {

    private Pen pen;

    public Pen getPen() {

        return this.pen;

    }

    @Autowired

    public void setPen(Pen pen) {

        this.pen = pen;

    }

    // 这里我们暂不关心该方法

    public void write() {

    }

}
通过 java 代码进行装配
基本使用
此时 java 类无需使用注解。
同样创建一个类,com.sharpcj.HelloConfig.java来进行装配 Bean。
package com.sharpcj;

import org.springframework.context.annotation.Bean;

import org.springframework.context.annotation.Configuration;

@Configuration

public class HelloConfig {

    @Bean

    public HelloSpring helloSpring(){

        return new HelloSpring();

    }

}
被 @Bean 标注的方法返回的即为唯一 Bean(默认单例模式),方法名随便取。
Test:
ApplicationContext context=new AnnotationConfigApplicationContext(com.sharpcj.HelloConfig.class);

Person person = context.getBean(Person.class);

person.write();
依赖注入
如果存在多个Bean, 之间有依赖关系:
构造注入:
@Configuration

public class PConfig {

    @Bean

    public GPen hehe() {

        return new GPen();

    }

    @Bean

    public QPen haha() {

        return new QPen();

    }

    @Bean

    public Person xixi() {

        Person person = new Person(hehe());

        return person;

    }

}
设值注入:
@Configuration

public class PConfig {

    @Bean

    public GPen hehe() {

        return new GPen();

    }

    @Bean

    public QPen haha() {

        return new QPen();

    }

    @Bean

    public Person xixi() {

        Person person = new Person();

        person.setPen(hehe());

        return person;

    }

}
写在后面
这篇文章记录了Spring容器和Bean的概念,Spring 的基本使用,以及Spring容器装配Bean的三种方式。关于Spring 容器的知识点比较多,下篇文章接着写点 Spring 容器装配 Bean 的高级知识点。
最新文章
- 300ms延时
- (C#) 使用Nullable类型
- Css Study - 横向MENU
- android通知栏总结
- http://www.iis.net/downloads/microsoft/url-rewrite
- ArduinoYun的电源插座
- hdu 4762 Cut the Cake概率公式
- C#中yield用法
- 实用C51编程的高级技巧(C51编程)
- (转)NoSQL——Redis在win7下安装配置的学习一
- 基于react的简单TODOList
- PHP 批量获取指定目录下的文件列表(递归,穿透所有子目录)
- 洛谷 P2904 [USACO08MAR]跨河River Crossing
- 关于Vue修改默认的build文件存放的dist路径
- 前端开发:一个开源、简单易用的jQuery表格插件(DataTables)
- java框架之Struts2(1)-简介及入门
- rqalpha探究 2 接入mod
- LeetCode 637. Average of Levels in Binary Tree二叉树的层平均值 (C++)
- 使用idea 在springboot添加本地jar包的方法 部署的时候本地jar没有包含的解决方法
- UML图与软件开发过程那点关系
热门文章
- 10.1——pair,map,set,multimap,multiset
- Bootstrap3 为何无法显示Glyphicons 图标
- django学习之- 信号
- java数据结构和算法09(哈希表)
- Maven使用tomcat7-maven-plugin插件run时出现错误: A child container failed during start java.util.concurrent.ExecutionException: org.apache.catalina.LifecycleException: Failed to start component
- httpclient失败重连机制
- sublime text 3(Build 3103)最新注冊码
- Java 8中的时间
- android 多进程 Binder AIDL Service
- 我的package.json清单