二进制mariadb多实例
2024-08-31 09:02:30
实验环境:
centos7.6 :IP: 192.168.99.110
1、首先下载二进制的压缩包,解压到一个指定的目录/hx/下
[root@centos7 hx]#tar xf mariadb-10.2.23-linux-x86_64.tar.gz

[root@centos7 hx]#ls

mariadb-10.2.23-linux-x86_64  mariadb-10.2.23-linux-x86_64.tar.gz  mysqld

[root@centos7 hx]#mv mariadb-10.2.23-linux-x86_64 mysql
2、在/usr/local/mysql/目录内新建多实例数据库的几个目录:这里3个实例的端口号为:3344,3355,3366
[root@centos7 local]#mkdir -p ./mysql/{,,}/{etc,bin,log,socket,data,pid}
3、先创建一个系统用户mysql,然后使用二进制目录里的脚本生成各自的数据目录
[root@centos7 hx]#useradd -r -s /sbin/nolgoin -d /data/mysql  mysql

[root@centos7 hx]#getent passwd mysql

mysql:x::::/data/mysql:/sbin/nolgoin
报错:提示缺少一个依赖的库文件,我们使用yum安装一下这个libaio

[root@centos7 hx]#/hx/mysql/scripts/mysql_install_db --user=mysql --datadir=/usr/local/mysql//data/  #第一个实例:指定用户和生成数据库的目录

Installing MariaDB/MySQL system tables in '/usr/local/mysql/3344/data/' ...

OK   #有提示ok就说明成功了,也可以到/data/目录看一下

To start mysqld at boot time you have to copy

support-files/mysql.server to the right place for your system
[root@centos7 hx]#/hx/mysql/scripts/mysql_install_db --user=mysql --datadir=/usr/local/mysql/3344/data/   #第二个实例

Installing MariaDB/MySQL system tables in '/usr/local/mysql/3344/data/' ...

OK

To start mysqld at boot time you have to copy

support-files/mysql.server to the right place for your system
[root@centos7 hx]#/hx/mysql/scripts/mysql_install_db --user=mysql --datadir=/usr/local/mysql/3344/data/  #第三个实例

Installing MariaDB/MySQL system tables in '/usr/local/mysql/3344/data/' ...

OK

To start mysqld at boot time you have to copy

support-files/mysql.server to the right place for your system
4、拷贝/etc/my.cnf配置文件到3个实例下的etc目录
cp /etc/my.cnf /usr/local/mysql//etc/
vim /usr/local/mysql/3344/etc/   #添加一下几行,修改完后再拷贝到其他几个实例的etc目录内

5、准备个简单的启动脚本,修改相应的参数拷贝到实例的bin目录内,并赋予执行权限
#!/bin/bash

#chkconfig:

port=

mysql_user="root"

mysql_pwd="xu"

cmd_path="/hx/mysql/bin/"     #此处设置为二进制mariadb目录的路径

mysql_basedir="/usr/local/mysql/"   #设置三个实例的路径

mysql_sock="${mysql_basedir}/${port}/socket/mysql.sock"    #指定socket文件路径

function_start_mysql()

{

    if [ ! -e "$mysql_sock" ];then

      printf "Starting MySQL...\n"

      ${cmd_path}/mysqld_safe --defaults-file=${mysql_basedir}/${port}/etc/my.cnf  &> /dev/null  &

    else

      printf "MySQL is running...\n"

      exit

    fi

}

function_stop_mysql()

       printf "MySQL is stopped...\n"

       exit

    else

       printf "Stoping MySQL...\n"

       ${cmd_path}/mysqladmin -u ${mysql_user}  -S ${mysql_sock} shutdown

   fi

}

function_restart_mysql()

{

    printf "Restarting MySQL...\n"

    function_stop_mysql

    sleep

    function_start_mysql

}

case $ in

start)

    function_start_mysql

;;

stop)

    function_stop_mysql

;;

restart)

    function_restart_mysql

;;

*)

    printf "Usage: ${mysql_basedir}/${port}/bin/mysqld {start|stop|restart}\n"

esac
6、最后设置一下权限:二进制目录和mysql多实例的目录属主和数组都设置为mysql
通过脚本启动数据库,然后查看端口,3344,3355,3366三个实例都已经启动
[root@centos7 ]#ss -ntl

State       Recv-Q Send-Q         Local Address:Port                        Peer Address:Port

LISTEN                                    *:                                     *:*

LISTEN                            127.0.0.1:                                     *:*

LISTEN                                    :::    ###                           :::*

LISTEN                                   :::                                    :::*

LISTEN                                  :::                                    :::*

LISTEN                                    :::    ###                           :::*

LISTEN                                    :::    ###                           :::*
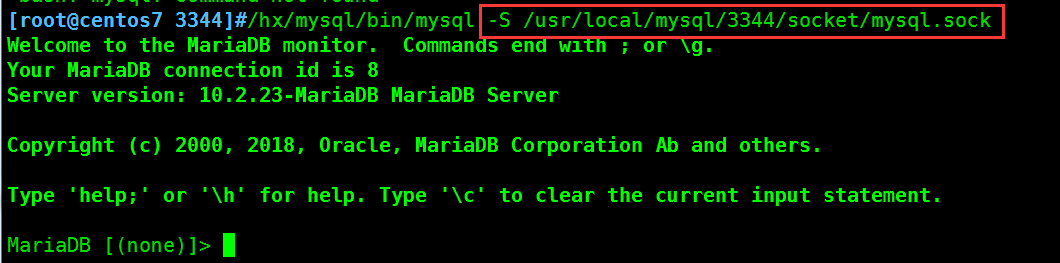
可以把二进制目录下的bin目录加入环境变量里,然后直接使用mysql -S 。 登录数据库时需要加 -S 指定socket文件进行登录,
最新文章
- mui框架中底部导航的跳转1
- Java WebService 简单实例
- 【emWin】例程五:显示数值
- Miller_Rabin素数测试
- aspxshell下突破无可写可执行目录执行cmd
- HDU 3775 Chain Code ——(Pick定理)
- x-forwarded-for的深度挖掘
- Linux数据管理——文件锁定
- javascript实现继承的6种方式
- 初涉JavaScript模式系列 阶段总结及规划
- ionic中修改图标的问题
- oracle11g dataguard 完全手册(转)
- RelativeLayout的一些感想
- tableView等滚动视图滚动时收缩上下导航栏与标签栏
- Html和Css学习笔记-html进阶-div与span
- node中间层转发请求
- django使用ckeditor上传图片
- IntelliJ IDEA LicenseServer激活及使用
- 对 String 字符串的理解
- MySQL行列转换拼接