CSS样式3
1.positon:fixed
可以实现网页浏览器上的返回顶部的功能。
positon:fixed 表示将当前div块固定在页面的某一个位置(默认为左上角)。
 <!DOCTYPE html>

 <html lang="en">

 <head>

     <meta charset="UTF-8">

     <title>Title</title>

 </head>

 <body style="margin:0 auto;">

     <div onclick='GoTop();' style="height:50px;width:50px;background-color: black;color:white;

     position:fixed;

     bottom:20px;

     right:20px;

     ">返回顶部</div>

     <div style="height: 5000px;background-color: #dddddd;">

     </div>

     <script>

         function GoTop(){

             document.body.scrollTop=0;

         }

     </script>

 </body>

 </html>
2.positon实现 网页头部在网页上面固定
 <!DOCTYPE html>

 <html lang="en">

 <head>

     <meta charset="UTF-8">

     <title>Title</title>

     <style>

         .pg-header{

             height:48px;

             background-color: black;

             color:#dddddd;

             positon:fixed;

             top:0;

             left:0;

             right:0;

         }

         .pg-body{

             height:500px;

             backgound-color:blue;

             margin-top:50px;

         }

     </style>

 </head>

 <body>

     <div class="pg-header">头部内容</div>

     <div class="pg-body">内容部分</div>

 </body>

 </html>
3.position:absolute 绝对定位,一锤子买卖;自身的应用场景不多;
当其与relative+absolute一起结合着用,应用场景就会增加;
如下:
在一个div块中,将内部的div块固定在这个div块的某个位置。
<div style="width:500px;height:200px;background-color:black;position:relative;margin:0 auto;">
<div style="position:absolute;left:0;bottom:0;width:50px;height:50px;background-color: white;border:1px;"></div>
</div>
拓展:
<div style="width:500px;height:200px;background-color:black;position:relative;margin:0 auto;">
<div style="position:absolute;left:0;bottom:0;width:50px;height:50px;background-color: white;border:1px;line-height: 50px;text-align:center;">笑脸</div>
<div style="position:absolute;left:80px;bottom:0;width:50px;height:50px;background-color: white;border:1px;line-height: 50px;text-align:center;">哭脸</div>
</div>
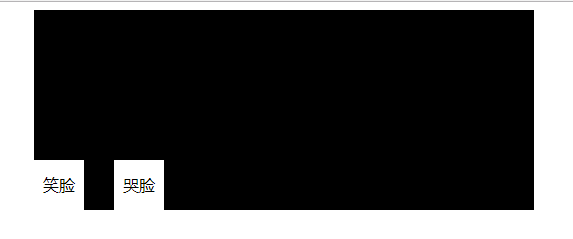
解析:
在外层div中设置positon:relative,该div标签是不会发生任何变化的;但是内部的div里面的position:absolute可以指定放在父类标签的固定位置。
实例:用户登陆窗口的输入框右侧放置图片。
 <!DOCTYPE html>

 <html lang="en">

 <head>

     <meta charset="UTF-8">

     <title>Title</title>

 </head>

 <body>

  <div style="height:50px;width:400px;position:relative;">

         <input type="text" style="height:50px;width:360px;padding-right:40px;"/>

         <span style="position:absolute;top:8px;right:0;

                 background-image: url(userpic.jpg);

                 height:40px;width:40px;

                 display:inline-block"></span>

  </div>

 </body>

 </html>
4.opacity透明度,z-index层级顺序;
实例:设计三层的页面,最上层为输入层,第二层为遮罩层(透明度),第三层为正常页面;
 <!DOCTYPE html>

 <html lang="en">

 <head>

     <meta charset="UTF-8">

     <title>Title</title>

 </head>

 <body>

     <div style="z-index:10;

     position:fixed;

     top:50%;

     left:50%;

     background-color: white;

     width:50px;height:100px;

     ">

         <form>

             用户名:<input type="text" name="用户名" value="admin"/>

             密码:<input type="password" name="密码" value="admin"/>

             <input type="submit" name="提交"/>

         </form>

     </div>

     <div style="z-index:9;

     position:fixed;

     bottom:0;

     top:0;

     left:0;

     right:0;

     opacity:0.5;

     background-color: #6e6568;

     "><br/>

         <br/>遮罩层</div>

     <div style="background-color: #c81623;height:5000px;">正文内容</div>

 </body>

 </html>
解析:z-index属性用来设置div的层级顺序;
opacity属性用来设置透明度,0-1(完全透明-完全不透明)
5.overflow
问题:当img标签内的图片大小超过外层div时,会将div设置的边界冲开,为了避免这个问题可以使用overflow属性设置。(或设置img大小)
overflow:hidden; 如果图片大小超过外层div设置,则隐藏大于部分,仅显示div设置的大小
overflow:auto; 如果图片大小超过外层div设置,则自动出线滚动条可以查看整个图片内容;
 <div style="height:220px;width:300px;overflow:hidden">

     <img src="1.jpg"/>

 </div>
6.hover
当鼠标移动到当前标签上时,指定的css属性才会生效;
 .pg-header .menu:hover{

   background-color: red;

   }
实例:
 <!DOCTYPE html>

 <html lang="en">

 <head>

     <meta charset="UTF-8">

     <title>Title</title>

     <style>

         .pg-header{

             position:fixed;

             right:0;

             top:0;

             left:0;

             height:48px;

             background-color: #2459a2;

             line-height:48px;

         }

         .pg-body{

             margin-top:50px;

         }

         .w{

             width:980px;

             margin:0 auto;

         }

         .pg-header .menu {

             display: inline-block;

             padding:0 10px;

         }

         .pg-header .menu:hover{

             background-color: red;

         }

     </style>

 </head>

 <body>

     <div class="pg-header">

         <div class="w">

             <a class="logo">logo</a>

             <a class="all">全部</a>

             <a class="menu">首页</a>

             <a class="news">新闻</a>

             <a class="regarding">关于</a>

         </div>

     </div>

     <div class="pg-body">

         <div class="w">content</div>

     </div>

 </body>

 </html>
7.background-image background-repeat
background-image:url('grey.png') 指定背景图片
background-repeat: no-repeat 指定当背景图片小于div大小时,是否自动堆叠填充;
no-repeat 不堆叠;
repeat-X 水平方向堆叠;
repeat-Y 竖直方向堆叠;
repeat 水平和竖直方向自动堆叠;
space
inherit
round
例:<div style="background-image:url('grey.png');height:5000px; width:250px;background-repeat: no-repeat"></div>
应用场景1:图片堆叠:指定的背景图片非常小,要堆满整个大块div,使用这种方法能够实现。
应用场景2:dig.chouti.com的点赞爱心小图片的获取。
 <div style="background-image:url('chouti.png');

     height:20px; width:20px;

     background-repeat:no-repeat;

     background-position-x:0px;

     background-position-y:-20px;

 "></div>
简要写法:
 <div style="background:url(chouti.png) no-repeat 0 0;

         width:20px;height:20px;

 "></div>
作用:网页上加载这种小logo图示,使用一张图,用backgound-position和div的大小设置,调整在div中显示的图片的指定位置和内容,实现一次请求调用图片资源就可以实现相关的图示的加载。几乎所有的网站都用这种方式实现该功能。
最新文章
- 第五课 CSS3 and H5 知识点
- fwrite写入文件不成功bug
- 云巴:基于MQTT协议的实时通信编程模型
- DropDownList 添加一个"请选择"或"全部"之类的项
- wampserver-----------如何设置wampserver在windows下开机自动启动。
- 使用Eclipse自带的Axis1插件生成WSDL文件
- struts中的数据校验
- stm32启动文件 startup_stm32f10x_hd.s
- CAAnimation解读
- iOS开发——UI篇&九宫格算法
- 两台windows服务器----SVN的迁移
- validform 怎么验证小数。
- MYSQL 表左连接 ON AND 和ON WHERE 的区别
- 微软改名部又出动啦!微软宣布VSTS改名为Azure DevOps
- Runtime之成员变量&属性&关联对象
- Qt中窗口退出事件
- 解决IE下select option不支持display none样式
- MT【79】任意和存在并存
- 微服务系列实践 .NET CORE
- python安装mysql-python1.2.5