001-web基本程序搭建
一、IDEA创建项目
1、基本项目创建
1.1、基本步骤
1、Create New Project 【File→New→Project】→New Project
2、maven→group、artifactId、version即可
1.2、调整maven配置
1、统一源代码编码方式
在pom中添加
    <properties>

        <project.build.sourceEncoding>UTF-8</project.build.sourceEncoding>

    </properties>
2、统一源代码与编译输出JDK版本
    <build>

        <plugins>

            <plugin>

                <groupId>org.apache.maven.plugins</groupId>

                <artifactId>maven-compiler-plugin</artifactId>

                <version>3.3</version>

                <configuration>

                    <source>1.8</source>

                    <target>1.8</target>

                </configuration>

            </plugin>

        </plugins>

    </build>
maven中心仓库地址:http://search.maven.org/
3、打包时忽略测试
            <!-- Test -->

            <plugin>

                <groupId>org.apache.maven.plugins</groupId>

                <artifactId>maven-surefire-plugin</artifactId>

                <version>2.18.1</version>

                <configuration>

                    <skipTests>true</skipTests>

                </configuration>

            </plugin>
基本项目创建完毕
2、转为java web项目
2.1、转化步骤
a.在main下添加webapp目录
b.在webapp下添加WEB-INF目录
c.在WEB-INF下添加web.xml文件
此时IDEA会出现
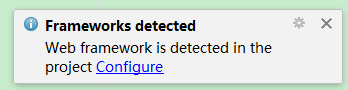
自动识别项目为web【即Servlet框架】项目,点击Configure,在点击ok即可
在web.xml中添加如下,使用servlet 3.0
<?xml version="1.0" encoding="UTF-8"?>

<web-app xmlns="http://java.sun.com/xml/ns/javaee"

         xmlns:xsi="http://www.w3.org/2001/XMLSchema-instance"

         xsi:schemaLocation="http://java.sun.com/xml/ns/javaee http://java.sun.com/xml/ns/javaee/web-app_3_0.xsd"

         version="3.0">

</web-app>
2.2、添加javaweb的maven依赖
1、打包设置【pom中】
<packaging>war</packaging>
2、添加java web 所需依赖Servlet 、JSP、JSTL等
    <dependencies>

        <!-- Servlet -->

        <dependency>

            <groupId>javax.servlet</groupId>

            <artifactId>javax.servlet-api</artifactId>

            <version>3.1.0</version>

            <scope>provided</scope>

        </dependency>

        <!-- JSP -->

        <dependency>

            <groupId>javax.servlet.jsp</groupId>

            <artifactId>jsp-api</artifactId>

            <version>2.2</version>

            <scope>provided</scope>

        </dependency>

        <!-- JSTL -->

        <dependency>

            <groupId>javax.servlet</groupId>

            <artifactId>jstl</artifactId>

            <version>1.2</version>

            <scope>runtime</scope>

        </dependency>

    </dependencies>
3、增加tomcat插件
            <!-- Tomcat -->

            <plugin>

                <groupId>org.apache.tomcat.maven</groupId>

                <artifactId>tomcat7-maven-plugin</artifactId>

                <version>2.2</version>

                <configuration>

                    <path>/${project.artifactId}</path>

                </configuration>

            </plugin>
至此java web搭建完毕
3、简单web应用【原生】
需求:写一个HelloServlet,接收Get类型的/hello请求,转发到/WEB-INF/jsp/hello.jsp页面,在hello.jsp页面上显示当前时间。
3.1、编写Servlet类
package com.lhx.chapter1;

import javax.servlet.ServletException;

import javax.servlet.annotation.WebServlet;

import javax.servlet.http.HttpServlet;

import javax.servlet.http.HttpServletRequest;

import javax.servlet.http.HttpServletResponse;

import java.io.IOException;

import java.text.DateFormat;

import java.text.SimpleDateFormat;

import java.util.Date;

/**

 * @author lihongxu6

 * @since 2017/10/9 14:07

 */

@WebServlet("/hello")

public class HelloServlet extends HttpServlet {

    @Override

    protected void doGet(HttpServletRequest req, HttpServletResponse resp)

            throws ServletException, IOException {

        DateFormat dateFormat = new SimpleDateFormat("yyyy-MM-dd HH:mm:ss");

        String currentTime = dateFormat.format(new Date());

        req.setAttribute("currentTime", currentTime);

        req.getRequestDispatcher("/WEB-INF/jsp/hello.jsp").forward(req, resp);

    }

}
说明:使用WebServlet注解并配置请求路径,对外发布Servlet服务。
Servlet 3.0增加WebServlet配置后,在web.xml不用配置即可
3.2、编写jsp页面
在WEB-INF下建立jsp文件夹,下建立hello.jsp
<%@ page contentType="text/html;charset=UTF-8" language="java" %>

<html>

<head>

    <title>Title</title>

</head>

<body>

<h1>Hello!</h1>

<h2>当前时间是:${currentTime}</h2>

</body>

</html>
至此以编写完成
4、web启动
方式一、使用集成的tomcat
http://www.cnblogs.com/bjlhx/p/7059671.html
方式二、使用tomcat的maven插件
在pom中增加如下
            <!-- Tomcat -->

            <plugin>

                <groupId>org.apache.tomcat.maven</groupId>

                <artifactId>tomcat7-maven-plugin</artifactId>

                <version>2.2</version>

                <configuration>

                    <path>/${project.artifactId}</path>

                </configuration>

            </plugin>
打开IDEA的maven面板,双击tomcat7:run命令即可。
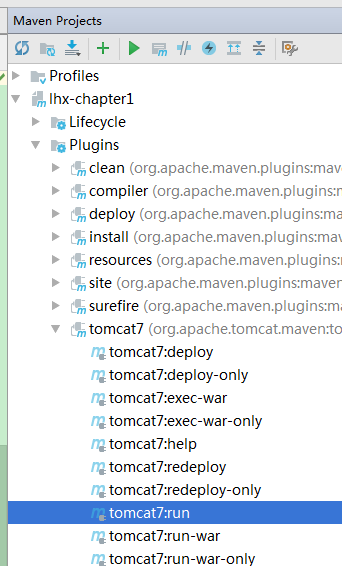
访问此地址Running war on http://localhost:8080/lhx-chapter1/hello即可
以Debug方式访问

添加一个maven方式的Configuration配置
1、打开 Edit Configuration配置,找到maven
2、名称输入tomcat,Command Line输入:tomcat7:run即可
5、git的使用
5.1、编写.gitignore文件
在根目录下增加.gitignore文件
# Maven #

target/

# IDEA #

.idea/

*.iml

# Eclipse #

.settings/

.metadata/

.classpath

.project

Servers/
5.2、提交本地git
在VCS中”Import into Version Control/Create Git Repository... “,点击ok,即创建本地仓库完成。
选中项目,右键→git→add将添加至本地仓库
选中项目,右键→git→Commit Directory...将添加至本地仓库
git add负责将文件内容存入blob对象,并更新index,git commit负责根据index生成tree对象,然后生成commit对象指向这个tree对象。
5.3、推送至远程git
可以使用开源的Github或者开源中国http://git.oschina.net,建立项目
本地使用
git remote add origin < Git仓库地址>

git push -u origin master
最新文章
- 基础知识(05) -- Java中的类
- 【Android测试】UI自动化代码优化之路(临时发布, 随时删除)
- RASPBERRY PI wifi配置
- Delphi Mac App 名称支持国际化多语显示
- MyEclipse10整合Axis2插件
- chem02-- ajax登录
- android动画学习
- 【python调用windows CLI】调用adb统计Android app的流量消耗
- 学习笔记2:前端PS切图
- java createSQLQuery().list()返回日期格式没有时分秒的解决方法
- jquery hide() show()
- 研究一下FBrush,它是从TWinControl才有的属性(可能是因为需要句柄)——发现{$R *.dfm}在运行期执行,而且很有深意,读到属性后赋值还会触发事件,这些无法在VCL代码里直接看到
- 通过 pxe(网络安装)完成centos 系统的网络安装
- python urllib、urlparse、urllib2、cookielib
- Linux 句柄是什么 ?
- “崩溃了?不可能,我全 Catch 住了” | Java 异常处理
- web服务器初识
- 【shell脚本】shell脚本实现的 函数差集查找
- odoo11 访问web/database/manager管理数据库页面布局混乱问题
- oracle表分区创建
热门文章
- Error: [vuex] vuex requires a Promise polyfill in this browser. 与 babel-polyfill 的问题
- Javascript 与 SPA单页Web富应用
- 如何将webbrowser控件的Cookie倒入CookieContainer供WebRequest使用
- C#协变与逆变
- python 学习方法
- Redis提供商配置ASP.NET会话状态
- gulpfile.js(编译sass,压缩图片,自动刷新浏览器)
- NetBeans 设置界面语言
- 自定义注解日志功能与shrio框架冲突的问题
- 【LeetCode】 Rotate List 循环链表