angular4 富文本编辑器
2024-10-18 18:29:40
使用quill富文本编辑器实现,angular项目中用到了ngx-quill插件。
quill的GitHub地址:https://github.com/quilljs/quill
ngx-quill的GitHub地址:https://github.com/KillerCodeMonkey/ngx-quill
ngx-quill适用于版本号在2以及以上的angular。
具体操作如下:
1、ngx-quill的安装
angular >= 5时ngx-quill的安装
npm install ngx-quill
angular < 5时
npm install ngx-quill@1.6.0
2、quill的配置
引入(ngx-quill的)QuillModule :
import { QuillModule } from 'ngx-quill'
在你的NgModule中添加 QuillModule :
@NgModule({
imports: [
...,
QuillModule
],
...
})
在index.html中添加quill的样式 :
<link href="https://cdn.quilljs.com/1.0.0/quill.snow.css" rel="stylesheet">
3、使用
在页面使用标签<quill-editor></quill-editor>进行使用,效果如下:
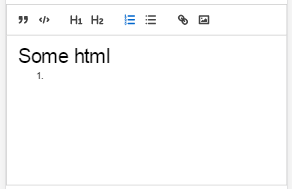
上图中的工具类是配置后的工具类,代码如下:
<quill-editor [modules]="config" [style]="{height: '200px'}" [(ngModel)]="data.content"></quill-editor>


config的内容如下:

{

  toolbar: [

    //['bold', 'italic', 'underline', 'strike'],        // toggled buttons

    ['blockquote', 'code-block'],

    [{ 'header': 1 }, { 'header': 2 }],               // custom button values

    [{ 'list': 'ordered'}, { 'list': 'bullet' }],

    //[{ 'script': 'sub'}, { 'script': 'super' }],      // superscript/subscript

    //[{ 'indent': '-1'}, { 'indent': '+1' }],          // outdent/indent

    //[{ 'direction': 'rtl' }],                         // text direction

    //[{ 'size': ['small', false, 'large', 'huge'] }],  // custom dropdown

    //[{ 'header': [1, 2, 3, 4, 5, 6, false] }],

    //[{ 'color': [] }, { 'background': [] }],          // dropdown with defaults from theme

    //[{ 'font': [] }],

    //[{ 'align': [] }],

    //['clean'],                                         // remove formatting button

    ['link', 'image', 'video']                         // link and image, video

  ]

};
-------------------------------------------------
2018-05-13 16:13:20
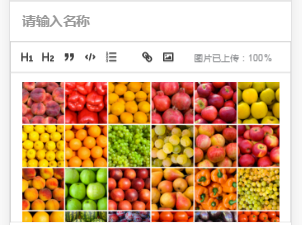
自定义工具栏
<quill-editor [style]="{height: '200px'}" [(ngModel)]="data.content" placeholder="在这里详细描述一个推荐原因,\n">

            <div quill-editor-toolbar>

              <span class="ql-formats">

                <button type="button" class="ql-header" value=""></button>

                <button type="button" class="ql-header" value=""></button>

                <button type="button" class="ql-blockquote"></button>

                <button type="button" class="ql-code-block ql-active"></button>

                <button type="button" class="ql-list" value="ordered"></button>

              </span>

              <span class="ql-formats">

                  <button type="button" class="ql-link"></button>

                  <button type="button" style="outline:none">

                    <div class="upload_img">

                        <svg class="camera" viewBox="0 0 18 18"> <rect class="ql-stroke" height="" width="" x="" y=""></rect> <circle class="ql-fill" cx="" cy="" r=""></circle> <polyline class="ql-even ql-fill" points="5 12 5 11 7 9 8 10 11 7 13 9 13 12 5 12"></polyline> </svg>

                        <input type="file" class="file_input" ng2FileSelect [uploader]="uploader2" />

                    </div>

                </button>

              </span>

              <span class="ql-formats">

                  <p style="font-size: 9px;" *ngIf="uploader2?.queue.length > 0">图片已上传:{{ uploader2?.queue.length >  ? uploader2?.queue[uploader2?.queue.length-]?.progress :  }}%</p>

              </span>

            </div>

          </quill-editor>
上传图片代码(使用了ng2-file-upload插件)
public uploader2: FileUploader;

this.uploader2 = new FileUploader({

      url: this.URL

      , method: "POST"

      , itemAlias: "upfile"

      , autoUpload: true

    });

    this.uploader2.onSuccessItem = function (item, response, status, headers) {

      if(status == ){

        let rsp = JSON.parse(response);

        let img = '<img class="camera" src="'+"http://您的域名"+  rsp.url+'" alt="">';

        that.data.content += img;

      }

    };
最新文章
- Robot Framework用户手册 (版本:3.0)
- javascript之循环保存数值
- phpcms V9 常用函数 及 代码整理
- JS表单验证
- IIS 301 重定向 带参数链接
- Ionic2学习笔记(2):自定义Component
- WebApp开发之--"rem"单位(转)
- 10个免费的PHP编辑器/开发工具
- UESTC 250 windy数(数位DP)
- 使用事件CreateEvent注意事项
- VMware下ubuntu与Windows实现文件共享的方法
- android通过代码获取华为手机的EMUI系统版本号
- OOAD-设计模式(一)概述
- IE 11 flex布局兼容性问题 ---- 不支持min-height 和flex:1
- 转://oracle Wallet在expdp/impdp中使用场景
- PythonStudy——函数的使用 Use of functions
- #10 Python字符串
- 生成springboot docker镜像 并上传到阿里云镜像厂库
- 通过图片获取gps地理位置
- “CMD /C”的特殊应用