vue学习(四)插槽
2024-10-08 17:13:20
一 匿名插槽
   // 语法
  Vue.component('MBtn', {

        template: `

        <button>

            <slot></slot>

        </button>

       `,

    });
使用
<!DOCTYPE html>

<html lang="zh-CN">

<head>

    <meta charset="UTF-8">

    <title>Title</title>

    <meta name="viewport" content="width=device-width ,initial-scale=1">

    <script src="https://cdn.jsdelivr.net/npm/vue"></script>

</head>

<body>

<div id="app">

    <App></App>

</div>

<script>

    Vue.component('MBtn', {

        template: `

        <button>

            <slot></slot>

        </button>

       `,

    });

    const App = {

        data() {

            return {

                msg: '数据'

            }

        },
我们可以使用匿名插槽的名字 也可以像下面那样 但是必须要有 —

        template: `

            <div>

                <MBtn>登陆</MBtn>

                <m-btn>注册</m-btn>

            </div>`

    };

    let app = new Vue({

        el: '#app',

        components: {

            App

        }

    })

</script>

</body>

</html>
二 具名插槽
   // 语法
  Vue.component('MBtn', {

        template: `

            <button>

                <slot name="login"></slot>

                <slot name="register"></slot>

                <slot name="submit"></slot>

            </button>

       `

    });
用
  <MBtn>

      <template slot="login">

           <a href="#">登陆</a>
      </template>

  </MBtn>
具体使用
<!DOCTYPE html>

<html lang="zh-CN">

<head>

    <meta charset="UTF-8">

    <title>Title</title>

    <meta name="viewport" content="width=device-width ,initial-scale=1">

    <script src="https://cdn.jsdelivr.net/npm/vue"></script>

</head>

<body>

<div id="app">

    <App></App>

</div>

<script>

    Vue.component('MBtn', {

        template: `

            <button>

                <slot name="login"></slot>

                <slot name="register"></slot>

                <slot name="submit"></slot>

            </button>

       `

    });

    const App = {

        template: `

        <div>

            <MBtn>

                <template slot="login">

                    <a href="#">登陆</a>

                </template>

            </MBtn>

            <MBtn>

                <template slot="register">

                    <a href="#">注册</a>

                </template>

            </MBtn>

            <MBtn>

                <template slot="submit">

                    <a href="#">提交</a>

                </template>

            </MBtn>

        </div>

        `

    };

    let app = new Vue({

        el: '#app',

        components: {

            App

        }

    })

</script>

</body>

</html>
三 作用域插槽
有时候让插槽内容能够访问子组件中才有的数据是很有用的。(来自官网)
首先我们有一段代码
<!DOCTYPE html>

<html lang="zh-CN">

<head>

    <meta charset="UTF-8">

    <title>Title</title>

    <meta name="viewport" content="width=device-width ,initial-scale=1">

    <script src="https://cdn.jsdelivr.net/npm/vue"></script>

</head>

<body>

<div id="app">

    <App></App>

</div>

<script>

    const todoList={

      data(){

      },

      props:{

          todos:Array,

          defaultValue:[]

      },

      template:`

      <ul>

         <li v-for="item in todos" :key="item.id">

            {{item.title}}

         </li>

      </ul>

      `

    };

    const App={

        data(){

           return{

                todoList:[

                    {

                        title:'大哥你好吗',

                        isComplate:true,

                        id:1

                    },

                    {

                        title:'小弟我还行啊',

                        isComplate:false,

                        id:2

                    },

                     {

                        title:'你在干什么',

                        isComplate:false,

                        id:3

                    },

                     {

                        title:'抽烟喝酒烫头',

                        isComplate:true,

                        id:4

                    }

                ]

           }

        },

        components:{

            todoList

        },

        template:`

        <todoList :todos="todoList"></todoList>

        `

    };

    let app = new Vue({

        el:'#app',

        components:{

            App

        }

    })

</script>

</body>

</html>
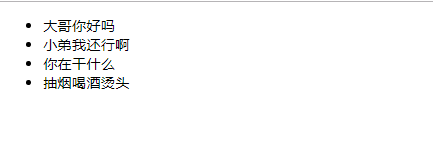
效果如下:
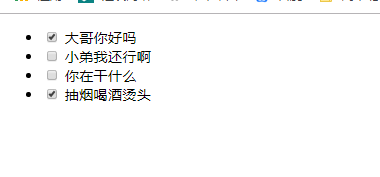
好了 产品经理来 说 要给完成的打对勾
你肯定会说简单来看----加有一个 input就可以啦
    const todoList={

      data(){

      },

      props:{

          todos:Array,

          defaultValue:[]

      },

      template:`

      <ul>

         <li v-for="item in todos" :key="item.id">

            <input type="checkbox" v-model="item.isComplate">

            {{item.title}}

         </li>

      </ul>

      `

    };
但是我们的数据要在好几个组件上用 不能写死咯
具体步骤:
1 需要我们在子组件中放一个插槽
2.父组件中使用
子组件:放插槽

      template:`

      <ul>

         <li v-for="item in todos" :key="item.id">

            <slot :itemValue="item"></slot>

            {{item.title}}

         </li>

      </ul>

      `
父组件:使用

        template:`

        <todoList :todos="todoList">

            <template v-slot="data">

              <input type="checkbox" v-model="data.itemValue.isComplate">

            </template>

        </todoList>

        `
总代码
<!DOCTYPE html>

<html lang="zh-CN">

<head>

    <meta charset="UTF-8">

    <title>Title</title>

    <meta name="viewport" content="width=device-width ,initial-scale=1">

    <script src="https://cdn.jsdelivr.net/npm/vue"></script>

</head>

<body>

<div id="app">

    <App></App>

</div>

<script>

    const todoList={

      data(){

      },

      props:{

          todos:Array,

          defaultValue:[]

      },

      template:`

      <ul>

         <li v-for="item in todos" :key="item.id">

            <slot :itemValue="item"></slot>

            {{item.title}}

         </li>

      </ul>

      `

    };

    const App={

        data(){

           return{

                todoList:[

                    {

                        title:'大哥你好吗',

                        isComplate:true,

                        id:1

                    },

                    {

                        title:'小弟我还行啊',

                        isComplate:false,

                        id:2

                    },

                     {

                        title:'你在干什么',

                        isComplate:false,

                        id:3

                    },

                     {

                        title:'抽烟喝酒烫头',

                        isComplate:true,

                        id:4

                    }

                ]

           }

        },

        components:{

            todoList

        },

        template:`

        <todoList :todos="todoList">

            <template v-slot="data">    # data自己定义

              <input type="checkbox" v-model="data.itemValue.isComplate">

            </template>

        </todoList>

        `

    };

    let app = new Vue({

        el:'#app',

        components:{

            App

        }

    })

</script>

</body>

</html>
最新文章
- mybatis.xml文件中#与$符号的区别以及数学符号的处理
- JDBC总结(含DbUtils组件)
- 2016 - 1 - 25 第三方网络框架 AFN的简单使用
- 如何在Chrome下Debug Mocha的测试
- HTML表单入门基础
- AIX碎碎念
- QT笔记
- 大数据之Ganglia
- BZOJ 1004
- eclipse加速之禁用JS、jsp等文件的语法验证,eclipsejs
- mysqli 操作数据库
- 物联网操作系统HelloX已成功移植到MinnowBoard MAX开发板上
- sigaction
- mysql外键设置选项
- Error: Your project contains C++ files but it is not using a supported native build system
- .Net IOC框架入门之一 Unity
- js操作文章、字符串换行
- 如何优雅的使用 Angular 表单验证
- 题解 P1601 【A+B Problem(高精)】
- Linux 目录结构和常用命令