VUE3 之 render 函数的使用 - 这个系列的教程通俗易懂,适合新手
1. 概述
老话说的好:不用想的太多、太远,做好当天的事,知道明天要做什么就可以了。
言归正传,今天我们来聊聊 VUE 中 render 函数的使用。
2. render 函数
2.1 一个简单的例子
<body>

    <div id="myDiv"></div>

</body>

<script>

   const app = Vue.createApp({

       template:`

            <my-h>

                追风人

            </my-h>

       `

   });

   app.component('my-h', {

        template:`

            <h1>

                <slot />

            </h1>

        `

   });

   const vm = app.mount("#myDiv");

</script>
这个例子中,我们用到了之前学的 子组件 和 插槽,实现了对主组件中的文字加 h 标签的功能。
2.2 依据数据,改变 h 标签
    const app = Vue.createApp({

        data() {

            return {

                myLevel: 2

            }

        },

        template:`

            <my-h :level="myLevel">

                追风人

            </my-h>

        `

    });

    app.component('my-h', {

        props: ['level'],

        template:`

            <h1 v-if="level===1">

                <slot />

            </h1>

            <h2 v-if="level===2">

                <slot />

            </h2>

        `

    });
这个例子中,我们希望依据数据 myLevel 的值,改变主组件中文字的 h 标签,1 对应 h1,2 对应 h2。
2.3 更多的 h 标签
    const app = Vue.createApp({

        data() {

            return {

                myLevel: 3

            }

        },

        template:`

            <my-h :level="myLevel">

                追风人

            </my-h>

        `

    });

    app.component('my-h', {

        props: ['level'],

        template:`

            <h1 v-if="level===1">

                <slot />

            </h1>

            <h2 v-if="level===2">

                <slot />

            </h2>

            <h3 v-if="level===3">

                <slot />

            </h3>

            <h4 v-if="level===4">

                <slot />

            </h4>

            <h5 v-if="level===5">

                <slot />

            </h5>

        `

    });
我们希望可以有更多的 h 标签供选择,但显然这么写,非常的不优雅。
2.4 使用 render 函数 简化代码
    const app = Vue.createApp({

        data() {

            return {

                myLevel: 6

            }

        },

        template:`

            <my-h :level="myLevel">

                追风人

            </my-h>

        `

    });

    app.component('my-h', {

        props: ['level'],

        render() {

            const { h } = Vue;

            return h('h' + this.level, {name:"myh", id:"myh"}, this.$slots.default())

        }

    });
这个例子中,我们使用 render 函数 代替 template。
const { h } = Vue; 这句是固定写法。
return h('h' + this.level, {name:"myh", id:"myh"}, this.$slots.default())
这句中,第一个参数 'h' + this.level 是标签,第二个参数 {name:"myh", id:"myh"} 是标签的属性,第三个参数 this.$slots.default() 是标签包裹的内容
生成的标签结果如下:<h6 name="myh" id="myh"> 追风人 </h6>
2.5 render 函数包裹更多的内容
    const app = Vue.createApp({

        data() {

            return {

                myLevel: 1

            }

        },

        template:`

            <my-h :level="myLevel">

                追风人

            </my-h>

        `

    });

    app.component('my-h', {

        props: ['level'],

        render() {

            const { h } = Vue;

            return h('h' + this.level, {name:"myh", id:"myh"}, [

                this.$slots.default(),

                h('br', {}),

                h('button', {onclick:"alert(123)"}, '按钮')

            ])

        }

    });
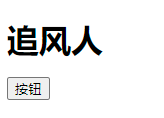
render 函数中 h 函数的第三个参数,可以是数组,例如上面的例子,生成的结果如下:
<h1 name="myh" id="myh"> 追风人 <br><button onclick="alert(123)">按钮</button></h1>
3. 综述
今天聊了一下 VUE 中 render 函数的使用,希望可以对大家的工作有所帮助,下一节我们继续讲 Vue 中的高级语法,敬请期待
欢迎帮忙点赞、评论、转发、加关注 :)
关注追风人聊Java,这里干货满满,都是实战类技术文章,通俗易懂,轻松上手。
4. 个人公众号
微信搜索公众号:追风人聊Java,欢迎大家关注

最新文章
- C#经典笔试题-获取字符串中相同的字符以及其个数
- ajax异步提交的两种方法
- YisouSpider你想搞死我的服务器吗?
- php 5.5.1 编译安装过程
- VMM服务模板(虚机、APP)部署排错
- SSL与TLS的区别以及介绍
- python sklearn模型的保存
- (我国的省—市—区)三级联动数据库.sql
- Linq 查询基本操作
- C++中实现 time_t, tm 相互转换
- .NET反射
- hive 压缩全解读(hive表存储格式以及外部表直接加载压缩格式数据);HADOOP存储数据压缩方案对比(LZO,gz,ORC)
- python3下的twistedPOST请求网页
- 解决win10 蓝牙设备只能配对无法连接 ,并且删除设备无效的问题
- 【Leecode】两数相加
- Docker hv-sock proxy (vsudd) is not reachable
- c和c++main函数的参数
- Python 入门基础11 --函数基础4 迭代器、生成器、枚举类型
- ASP入门(五)- VBScript过程和函数
- hdu-4023-博弈(模拟)