Visual Studio Code C / C++ 语言环境配置的历程
前言
从大一开始学习c++用的dev-c++,后来看到老师用的是vs code,实在是馋它的颜值便去下了vs 2017。至于为什么下载vs 2017呢?是因为下载的时候我以为他们是一样的,便下了vs 2017,好家伙下了我好几个G。体积大我还是可以接受的,但是每次写题的时候都要去建个项目,一建就是一个文件夹,而且写main函数的时候前面还要引用头标。实在是太麻烦了,写的代码还不好管理。以至于我在后来我改用vs code。vs code比起vs 2017来说是轻便得多,写单个的代码方便了,比起dev-c++它的调试功能更加的优秀。再加上它的颜值,我开始了vs code第一次的配置环境。作为一名小白,我开始配置环境的时候遇到了很多坑,我这篇博客主要写的就是我遇到的一些坑,希望可以给一些像我一样的同学一些帮助。如果是只想看如何配置的环境同学可以看这个链接https://www.jianshu.com/p/1b8062a36376
开始配置环境的准备工作
1. 安装Visual Studio Code 及安装 C/C++
最开始的时候我们需要下载Visual Studio Code,这是最最基础的部分。建议大家到官网上下载。
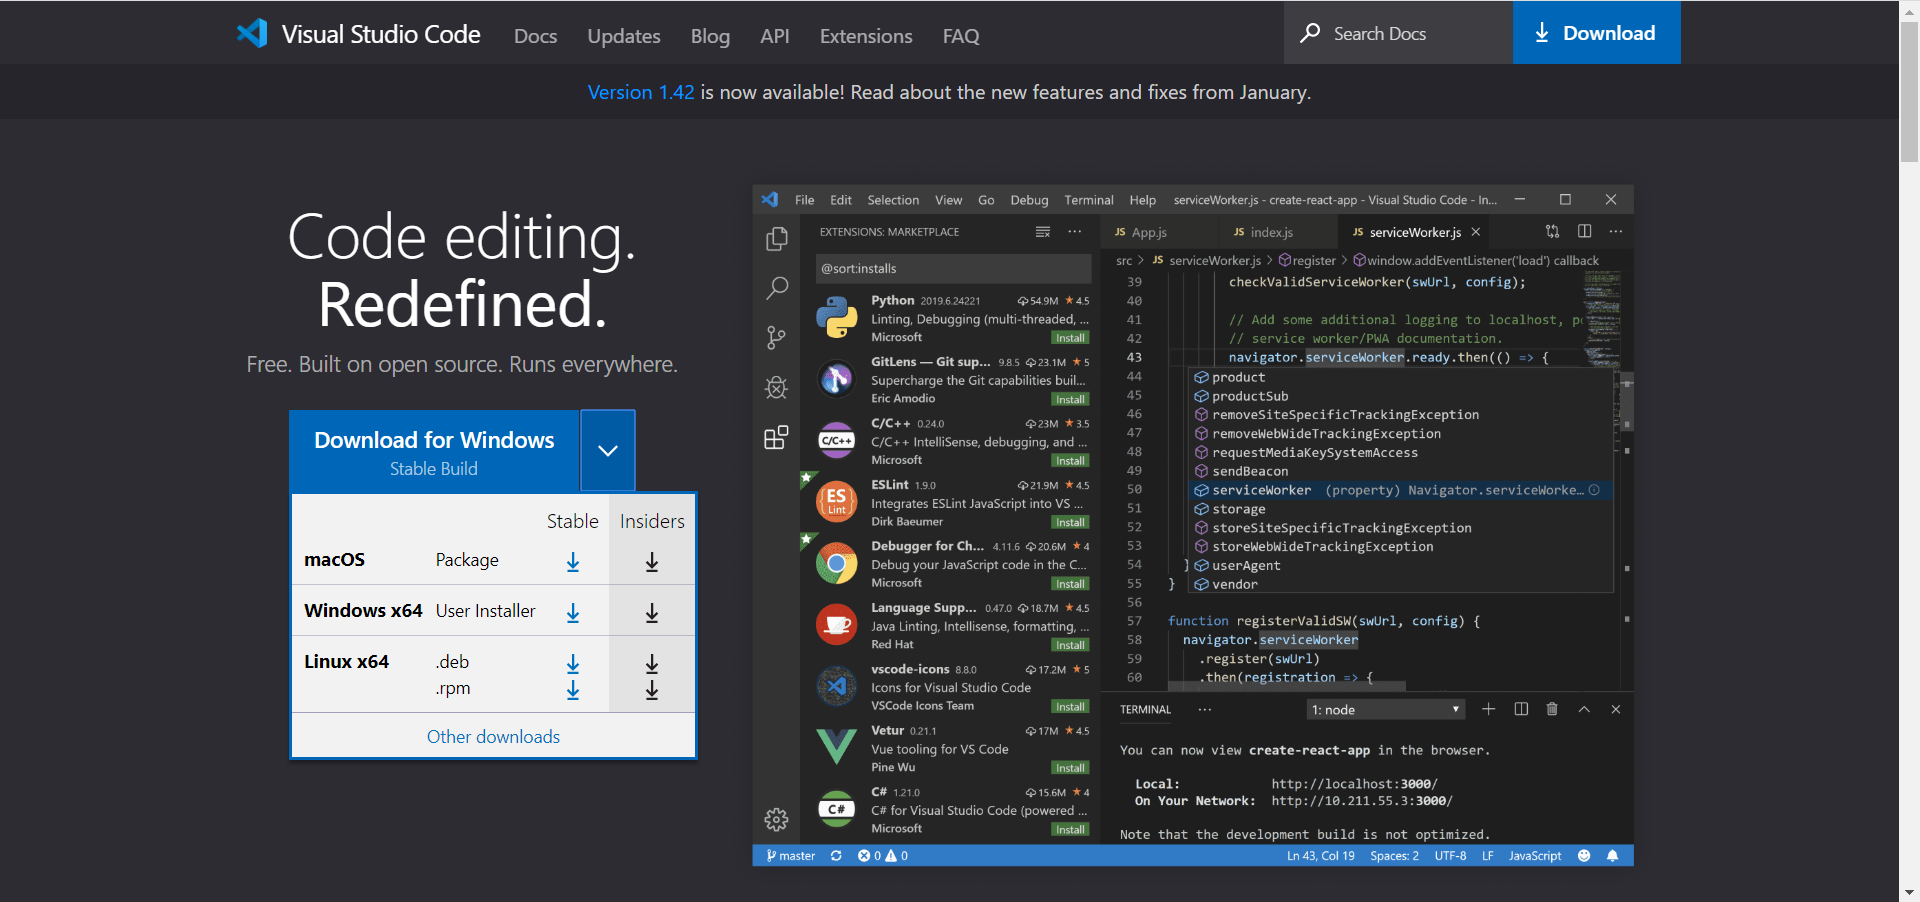
根据自己的电脑选择适合自己的版本进行安装
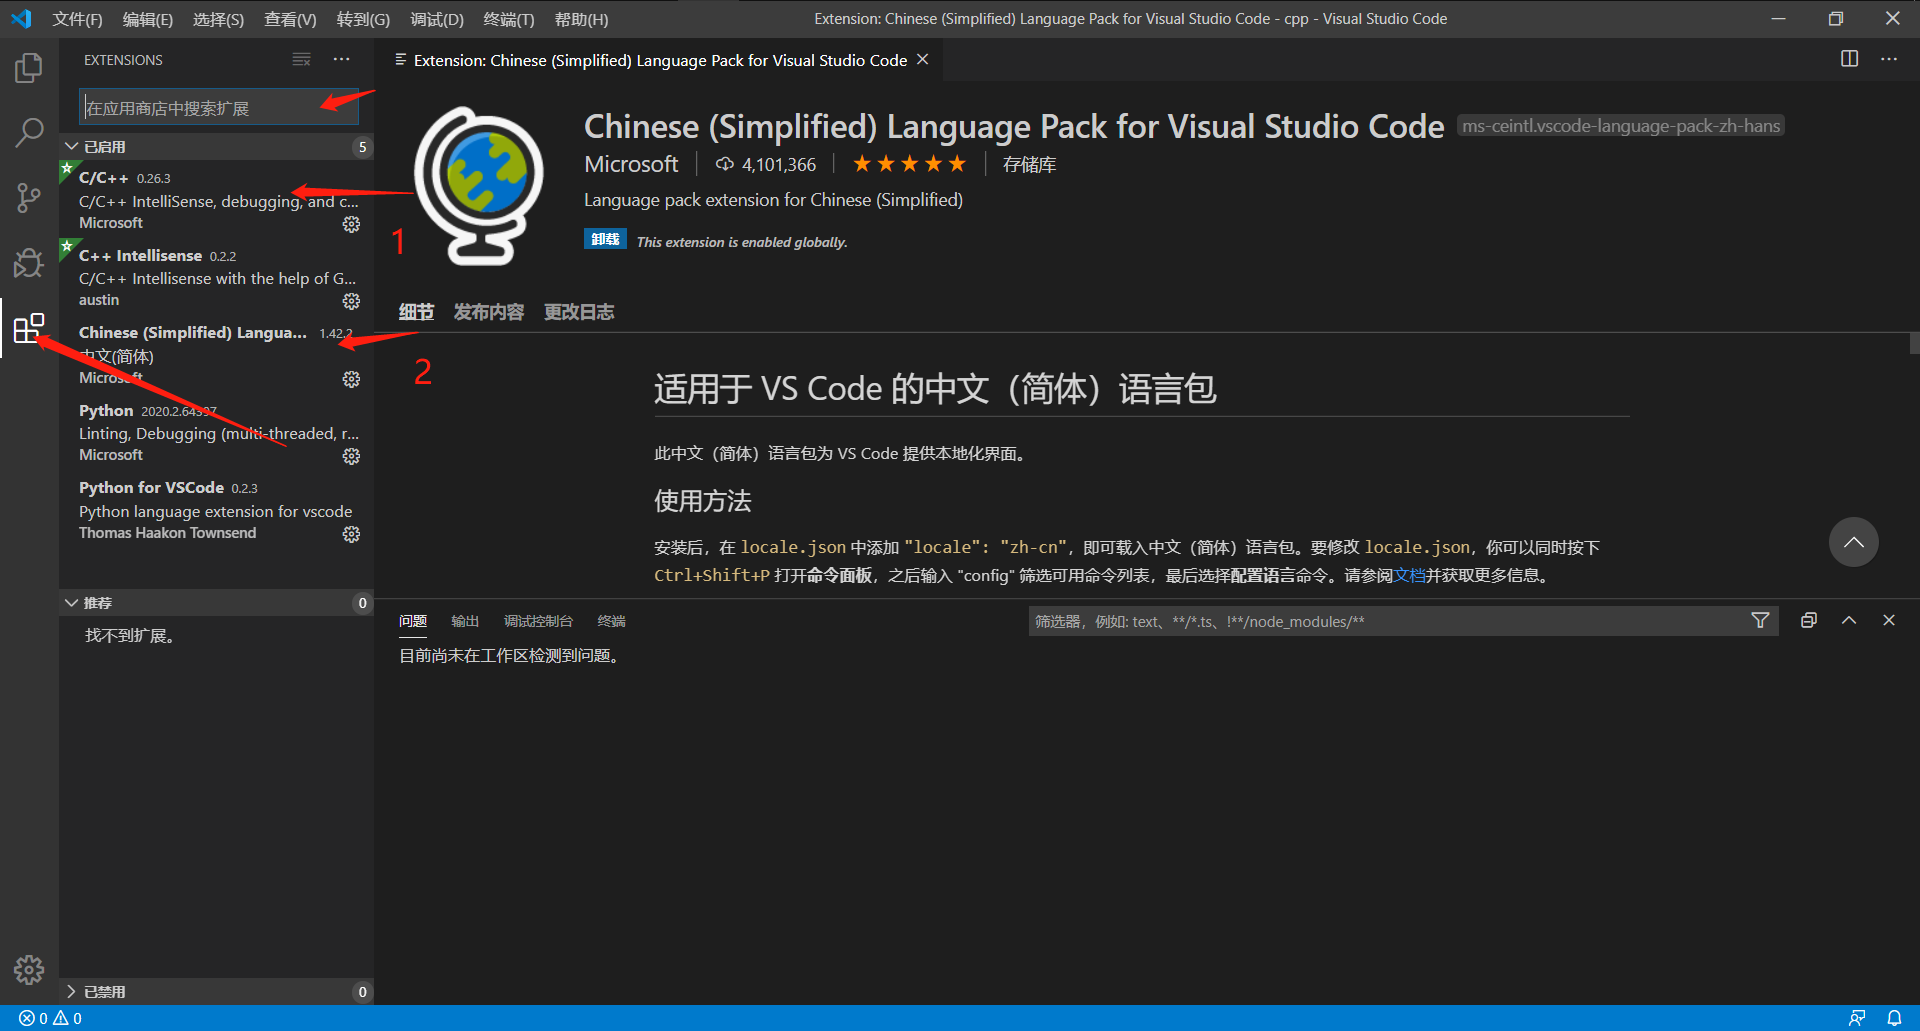
安装好后在扩展目录中选择“C/C++”进行安装 p.s. 2处是汉化自行选择安装
2. 安装和配置MinGW
下载安装:
方法1:官网下载
链接: http://mingw-w64.org/doku.php/download
方法2:云盘下载
链接: https://pan.baidu.com/s/1ZmjQUf5QcBbeHCi7mIrYxg 提取码: edc5
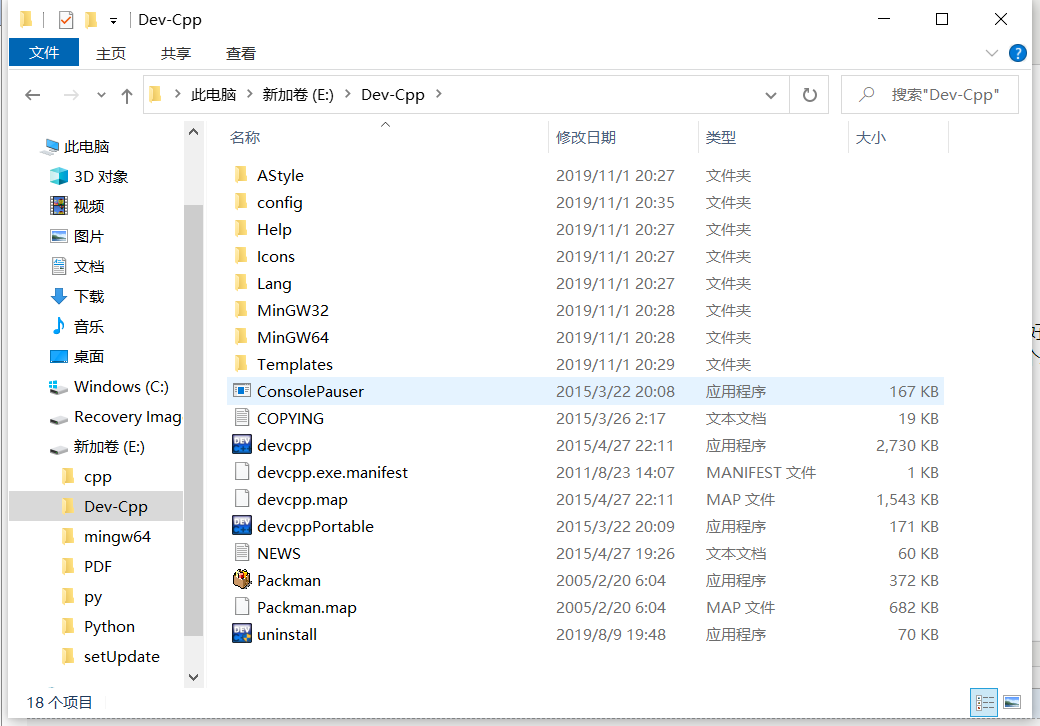
有下载dev-c++的同学可以不用下载MinGW
开始我是在b站上看教程,介于本人当时没有找到资源就只能去官网上下载。下载速度实在感人。最让人感动的是安装包下好了,居然安装不了。(好像是被封了的原因)我TM要疯。由于c++需要用到MinGW环境下的gcc等编译器,我再次开始找MinGW的资源。由于本人找资源的能力实在有限,浪费了很多时间。只是我的第一个坑。后来我突然想到之前用的dev-c++,想着为什么dev-c++不用安装MinGW,会不会它把所有都打包好了?果然最后我在dev-cpp的目录下找到了它。
之所以会有这个坑说到底还是自己查找相关资源的能力欠缺,有待加强。同时对百度的排序算法我也是醉了,找到的教程对我这种小白太不友好了。
3.配置mingw-w64环境变量
找到 bin 目录
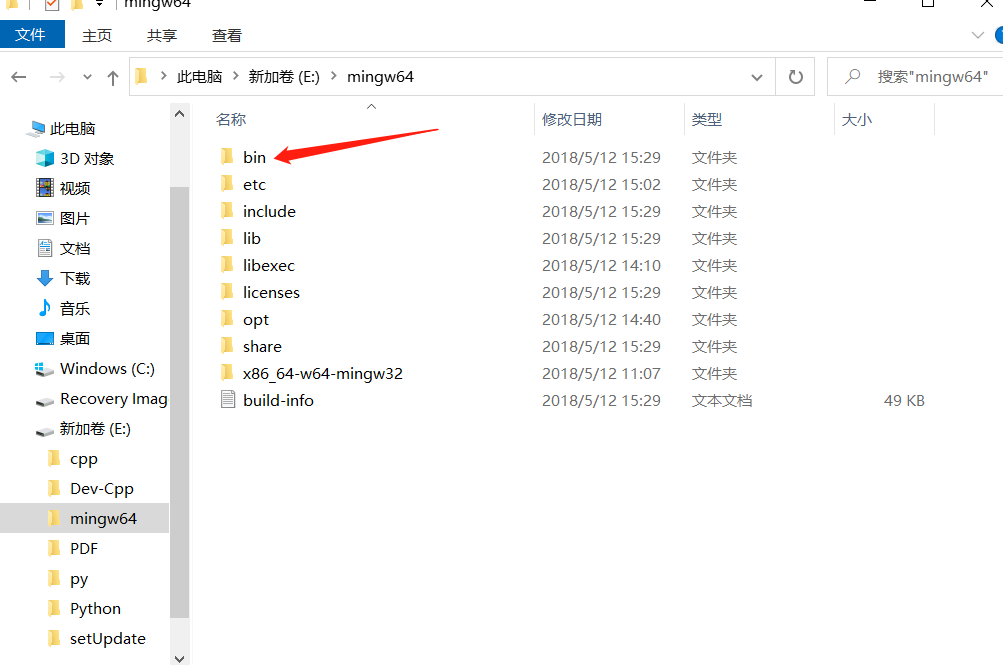
bin目录
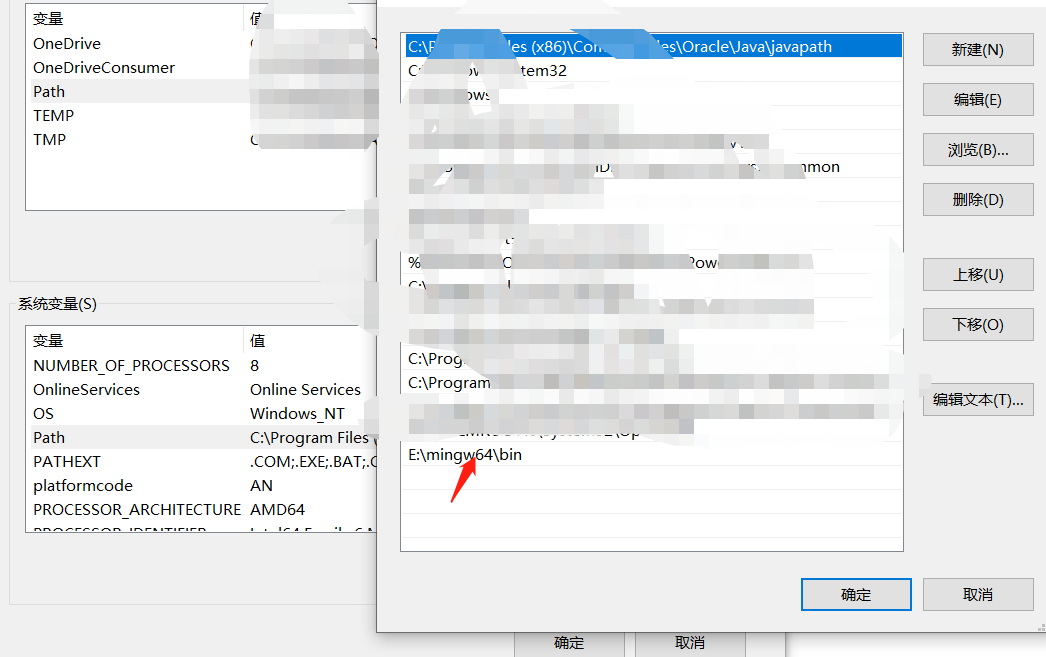
在桌面找到我的电脑图标->右键->属性->高级系统设置->选择“高级”选项->选择下面“环境变量”->在系统变量,在path中新增安装mingw-w64的路径:盘符:你的安装路径\mingw64\bin;
4. 修改VSCode调试配置文件
vs code需要建立一个文件夹作为工作台,以后写的代码都保存在该文件夹下
1.建立文件夹作为工作台 如cpp 文件夹
2. 在cpp文件夹下建立 .vscode 文件夹
3. 在cpp文件夹下建立 build 文件夹
4. 在.vscode 文件夹下新建三个配置文件
c_cpp_properties.json
launch.json
// Available variables which can be used inside of strings.

// ${workspaceRoot}: the root folder of the team

// ${file}: the current opened file

// ${fileBasename}: the current opened file's basename

// ${fileDirname}: the current opened file's dirname

// ${fileExtname}: the current opened file's extension

// ${cwd}: the current working directory of the spawned process

{

    "version": "0.2.0",

    "configurations": [

        {

            "name": "(gdb) Launch",

            "preLaunchTask": "build",

            "type": "cppdbg",

            "request": "launch",

            "program": "${fileDirname}/build/${fileBasenameNoExtension}.exe",//将进行调试的项目

            "args": [],

            "stopAtEntry": false,

            "cwd": "${workspaceFolder}",

            "environment": [],

            "externalConsole": true,

            "MIMode": "gdb",

            "miDebuggerPath": "E:/MinGW64/bin/gdb.exe", // GDB的路径,注意替换成自己的路径

            "setupCommands": [

                {

                    "description": "Enable pretty-printing for gdb",

                    "text": "-enable-pretty-printing",

                    "ignoreFailures": true

                }

            ]

        }]

}
tasks.json
// Available variables which can be used inside of strings.

// ${workspaceRoot}: the root folder of the team

// ${file}: the current opened file

// ${fileBasename}: the current opened file's basename

// ${fileDirname}: the current opened file's dirname

// ${fileExtname}: the current opened file's extension

// ${cwd}: the current working directory of the spawned process

{

    "version": "2.0.0",

    "tasks": [

        {

            "label": "build",

            "type": "shell",

            "group": {

                "kind": "build",

                "isDefault": true

            },

            "presentation": {

                "echo": true,

                "reveal": "always",

                "focus": false,

                "panel": "shared"

            },

            "windows": {

                "command": "g++",

                "args": [

                    "-ggdb",

                    "\"${file}\"",

                    "--std=c++11",

                    "-o",

                    "${fileDirname}/build/${fileBasenameNoExtension}.exe\"",

                ]

            }

        }

    ]

}
注意记得将上边的路径改成自己MinGW的路径
tasks.json文件中”args"中的参数"-o"是输出exe文件,接下来的参数是输出的位置和文件名,如果该参数为空将输出 a.exe到cpp文件夹中
- ${workspaceRoot} VS Code中打开的文件夹的路径
${file} 当前打开的文件路径
${fileDirname} 当前打开的文件的文件夹名
如果是对这三个文件有感兴趣的同学可以参考vs code 的官方文档 这里提供vs code的中文文档 的链接
当初就是没有找到好的教程,不了解这三个文件的功能,还找不到现用的文件,导致对着官方文档一通乱打,一直配置不成功。心态崩了,但是倔强的我最后在b站上找到了配置好的三个文件
希望可以给某些同学提供一些帮助
最新文章
- 【msql】关于redo 和 undo log
- 从topcoder赚钱的方法
- Caused by: 元素类型为 "package" 的内容必须匹配 "(result-types?,interceptors?,default-interceptor-ref?,default-action-ref?,default-class-ref?,global-results?,global-exception-mappings?,action*)"
- js获取jsp中的变量值
- 鼠标到哪tl到哪
- C语言学习_C如何在一个文件里调用另一个源文件中的函数
- [工具]web开发时自动刷新网页:liveReload
- Maven中有三大模块
- docker installation on ubuntu
- HDU 1824 Let's go home
- Python 3从入门到精通01-环境搭建
- Win下安装虚拟机(Linux)
- SAN LUN Mapping出错导致文件系统共享冲突,数据恢复成功
- Java异常处理-----自行处理
- Java CAS 原理分析
- MySQL并行复制的一个坑
- JDK8源码之Arrays
- 【个人博客作业II】有关代码规范问题的讨论
- Bootloader的结构和启动过程
- Java 中的extends 和 implements