在iOS项目中嵌入RN代码
2024-08-31 23:57:40
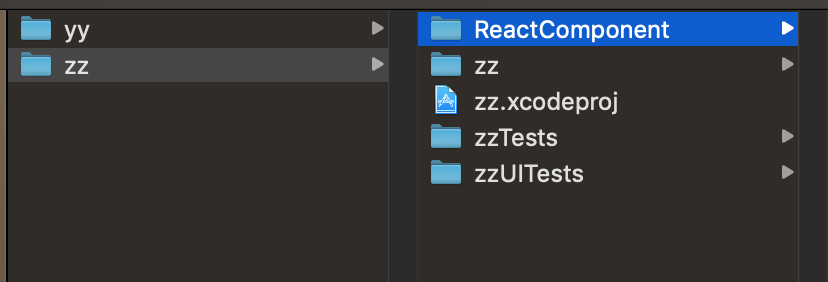
1:在项目跟目录下创建一个ReactComponent文件夹。目录结构如下:
2: 在ReactComponent文件夹下新建一个 package.json 文件
{

  "name": "yy", // 项目名称

  "version": "0.0.1",

  "private": true,

  "scripts": {

    "start": "node node_modules/react-native/local-cli/cli.js start",

    "test": "jest"

  },

  "dependencies": {

    "react": "16.8.3",

    "react-native": "0.59.9"

  },

  "devDependencies": {

    "@babel/core": "7.4.5",

    "@babel/runtime": "7.4.5",

    "babel-jest": "24.8.0",

    "jest": "24.8.0",

    "metro-react-native-babel-preset": "0.54.1",

    "react-test-renderer": "16.8.3"

  },

  "jest": {

    "preset": "react-native"

  }

}
3:到ReactComponent目录下,初始化package.json文件,会生成需要的 node_modules 目录结构如下
// 到对应的目录中

cd xxx/ReactComponent

// 初始化 package.json

npm install

4:在ReactComponent文件夹下生成 index.ios.js 文件
/*

*

* Sample React Native App

* jff

*

*/

import React, {Component} from 'react';

import {

    AppRegistry,

    StyleSheet,

    Text,

    View,

} from 'react-native';

class NativeRnApp extends Component {

    render(){

        return (

            <View style={styles.container}>

                <Text style={styles.welcome}> Welcome react-native </Text>

                <Text style={styles.instructions}> To get started, edit index.ios.js </Text>

                <Text style={styles.instructions}> Press Cmd+R to reload,{'\n'} Cmd+D or shake for dev menu </Text>

            </View>

        );

    }

}

const styles = StyleSheet.create({

    container:{

        flex:1,

        justifyContent:'center',

        alignItems:'center',

        backgroundColor:'#F5FCFF',

    },

    welcome:{

        fontSize:20,

        textAlign:'center',

        margin:10,

    },

    instructions:{

        textAlign:'center',

        marginBottom:10,

        color:'#333333'

    }

})

// 注册组件

AppRegistry.registerComponent('rn', ()=>NativeRnApp);
5:常见Podfile 文件导入yoga,react框架,Podfile文件内容
# 如果导入react-navigation 和 react-native-gesture-handler 需要在Podfile中导入RNGestureHandler 否则会报 null is not an object (evaluating '_rngeasturhandlemodule.default.direction'
# RCTLinkingIOS 用于链接原生module 否则会报 Native Moudle is NULL
# RCTAnimation 导入动画,否则会有警告
# DevSupport 用于调试支持
platform :ios, '9.0'

target 'iOSRN' do
    pod 'yoga', :path => './ReactComponent/node_modules/react-native/ReactCommon/yoga'
    pod 'React', :path => './ReactComponent/node_modules/react-native', :subspecs => [
        'Core',
        'DevSupport',
        'CxxBridge',
        'RCTActionSheet',
        'RCTGeolocation',
        'RCTImage',
        'RCTNetwork',
        'RCTPushNotification',
        'RCTSettings',
        'RCTText',
        'RCTVibration',
        'RCTWebSocket',
        'RCTLinkingIOS',
        'RCTAnimation'
    ]
    pod 'RNGestureHandler', :path => './ReactComponent/node_modules/react-native-gesture-handler'
    pod 'DoubleConversion', :podspec => './ReactComponent/node_modules/react-native/third-party-podspecs/DoubleConversion.podspec'
    pod 'glog', :podspec => './ReactComponent/node_modules/react-native/third-party-podspecs/glog.podspec'
    pod 'Folly', :podspec => './ReactComponent/node_modules/react-native/third-party-podspecs/Folly.podspec'
end
在第一次 pod install 的时候,要打开VPN不然下载不下来 ‘boost-for-react-native’会报错:RPC failed; curl 56 LibreSSL SSL_read: SSL_ERROR_SYSCALL, errno 60 fatal:
如果报‘ios folly/portability.h' file not found’ 需要导入上面的‘:podspec’对应的依赖库,同时为了正常的链接好需要有 'CxxBridge'
6: 在pod install 成功之后,打开 xx.xcworkspace, 之后 file -> Workspace Settings -> 更改“new Build System(Default)”为“legacy Build System”,如下

在info.plist文件中添加"App Transport Security Settings"
<key>NSAppTransportSecurity</key>

<dict>

    <key>NSAllowsArbitraryLoads</key>

    <true/>

</dict>
7:生成需要使用的RN文件。让ReactViewController继承自UIVIewController
//

//  ReactViewController.h

//  yy

//

//  Created by jisa on 2019/6/24.

//  Copyright © 2019 jff. All rights reserved.

//

#import <UIKit/UIKit.h>

NS_ASSUME_NONNULL_BEGIN

@interface ReactViewController : UIViewController

@end

NS_ASSUME_NONNULL_END
//

//  ReactViewController.m

//  yy

//

//  Created by jisa on 2019/6/24.

//  Copyright © 2019 jff. All rights reserved.

//

#import "ReactViewController.h"

// 导入需要的组件

#import <React/RCTRootView.h>

@interface ReactViewController ()

@end

@implementation ReactViewController

- (void)viewDidLoad {

    [super viewDidLoad];

    // Do any additional setup after loading the view. local

    NSString * strUrl = @"http://localhost:8081/index.ios.bundle?platform=ios&dev=true";

    NSURL * jsCodeLocation = [NSURL URLWithString:strUrl];

    RCTRootView * rootView = [[RCTRootView alloc] initWithBundleURL:jsCodeLocation

                                                         moduleName:@"rn"

                                                  initialProperties:nil

                                                      launchOptions:nil];

    self.view = rootView;

}

@end
在进行真机调试是要把localhost换成电脑上的IP地址,同事要保证电脑和手机处于同一网段下。
最新文章
- 微信小程序开发教程
- solr4.3 java.lang.NumberFormatException
- Java Filter过滤器的简单总结
- 如何调节datagridview中字体
- 汉化Eclipse+配色方法(官方语言包)
- HTML.ActionLink 和Html.Action和 Url.Action 的区别
- 关于Eclipse中的快捷键占用的解决.
- iptables 问题
- Css3 常见鼠标滑过效果集合
- xilinx FPGA普通IO作PLL时钟输入
- Java学习之Iterator(迭代器)的一般用法
- baidu-fex 精彩文章
- iOS10 相册权限
- log4j:ERROR Category option " 1 " not a decimal integer.错误解决
- 201621123043 《Java程序设计》第3周学习总结
- Python内置函数(55)——globals
- PS跑马灯效果和更换图标
- 解决CPC撰写文档报错问题“无法获取“AxforApplication”控件的窗口句柄。不支持无窗口的 ActiveX 控件”
- Java 常用对象-String类
- oracle常用数据类型说明