Python_tkinter(5)_GUI工具
2024-08-29 06:53:17
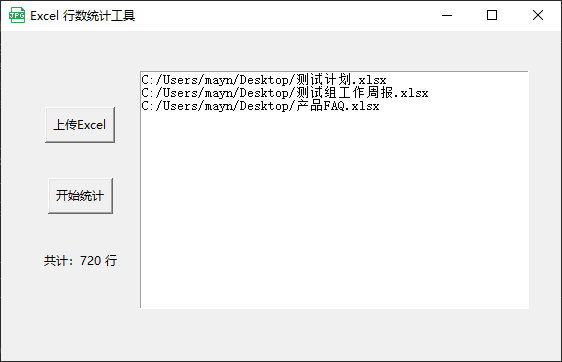
1、Excel行数统计工具
源代码
import xlrd

import tkinter as tk

import tkinter.filedialog

# 计算一个工作簿中所有Sheet表的行数

def count_book(work_book):

    workbook = xlrd.open_workbook(work_book)  # 打开excel

    sheets = workbook.sheet_names()  # 读取所有sheet表,组成list列表

    count = 0

    for sheet in sheets:

        sheet_name = workbook.sheet_by_name(sheet)  # 实例化电子表对象sheet_name

        count = count + sheet_name.nrows  # sheet_name.nrows 单个sheet表的行数

    return count

class ExcelCountPad:

    def __init__(self, root):

        root.title("Excel 行数统计工具")

#        root.iconbitmap('myicon.jpg') # 根窗口icon

        root_width = 560

        root_height = 330

        xscreen = root.winfo_screenwidth()

        yscreen = root.winfo_screenheight()

        xstart = (xscreen-root_width)/2

        ystart = (yscreen-root_height)/2

        root.geometry('%dx%d+%d+%d' % (root_width, root_height, xstart, ystart))

        self.frm = tk.Frame(root)

        self.frm.grid(row=0, column=0, padx='', pady='')

        self.frm_left = tk.Frame(self.frm)

        self.frm_left.pack(side='left', padx='')

        self.frm_right = tk.Frame(self.frm)

        self.frm_right.pack(side='right', padx='')

        self.btn_top = tk.Button(self.frm_left, text='上传Excel', command=self.upload_files)

        self.btn_top.grid(row=0, column=0, ipadx='', ipady='')

        self.btn_bottom = tk.Button(self.frm_left, text='开始统计', command=self.count_rows)

        self.btn_bottom.grid(row=1, column=0, pady='', ipadx='', ipady='')

        self.label1 = tk.Label(self.frm_left, text='')

        self.label1.grid(row=2, column=0)

        self.text1 = tk.Text(self.frm_right, width='', height='')

        self.text1.grid(row=0, column=0)

    def upload_files(self):

        selectFileNames = tk.filedialog.askopenfilenames(title='可选择1个或多个文件')#askopenfilename 1次上传1个;askopenfilenames1次上传多个

        for selectFile in selectFileNames:

            self.text1.insert(tk.END, selectFile+'\n')

            self.text1.update()

    def count_rows(self):

        all_count = 0

        text_lines = self.text1.get(1.0, tk.END)  # text.get方法

        for line in text_lines.splitlines():  # splitlines分隔行

            if line == '':  # 空行处理

                break

            a_count = count_book(line)

            all_count += a_count

        self.label1['text'] = '共计:'+str(all_count)+' 行' # 1.改写label值:label1['text']='xx'; 2.str(int)int转str类型

root = tk.Tk()

excelCountPad = ExcelCountPad(root)

root.mainloop()
运行效果
2.手机号加密解密工具
import tkinter as tk

from jpype import *

import os

root = tk.Tk()

class App:

    def __init__(self,root):

        root.title("手机号加密解密工具")

        root_width = 660

        root_height = 430

        xscreen = root.winfo_screenwidth()

        yscreen = root.winfo_screenheight()

        xstart = (xscreen-root_width)/2

        ystart = (yscreen-root_height)/2

        root.geometry('%dx%d+%d+%d' % (root_width, root_height, xstart, ystart))

        self.frm_left = tk.Frame(root)

        self.frm_left.grid(row=0, column=0, padx='', pady='', sticky=tk.E)

        self.frm_middle = tk.Frame(root)

        self.frm_middle.grid(row=0, column=1, sticky=tk.E)

        self.frm_right = tk.Frame(root)

        self.frm_right.grid(row=0, column=2, padx='', pady='', sticky=tk.E)

        self.label1 = tk.Label(self.frm_left, text='请输入手机号:', fg='blue', font=('微软雅黑', 11))

        self.label1.grid(row=0, column=0, sticky=tk.W)

        self.text_left = tk.Text(self.frm_left, width='', height='')

        self.text_left.grid(row=2, column=0, padx='')

        self.btn1 = tk.Button(self.frm_middle, text='加密>>', fg='red', font=('微软雅黑', 10), command=self.phone_encode)

        self.btn1.grid(row=0, column=0)

        self.btn2 = tk.Button(self.frm_middle, text='<<解密', fg='green', font=('微软雅黑', 10), command=self.phone_decode)

        self.btn2.grid(row=1, column=0, pady='')

        self.btn3 = tk.Button(self.frm_middle, text='清  空', font=('微软雅黑', 10), command=self.phone_clear)

        self.btn3.grid(row=2, column=0,)

        self.label3 = tk.Label(self.frm_right, text='请输入加密后字符串:', fg='blue', font=('微软雅黑', 11))

        self.label3.grid(row=0, column=0, sticky=tk.W)

        self.text_right = tk.Text(self.frm_right, width='', height='')

        self.text_right.grid(row=1, column=0, padx='')

    def phone_encode(self):

        # 读取text_left内容

        self.text_left.update()

        lines = self.text_left.get(1.0, tk.END)

        self.text_right.delete('1.0', tk.END)

        for line in lines.splitlines():

            if line == '':  # 空行处理

                break

            # 加密后放到text_right内容

            self.text_right.insert(tk.END, javaClass.AESEncode(line)+'\n')

    def phone_decode(self):

        # 读取text_right内容

        self.text_right.update()

        lines = self.text_right.get(1.0, tk.END)

        self.text_left.delete('1.0', tk.END)

        for line in lines.splitlines():

            if line == '':  # 空行处理

                break

            # 加密后放到text_right内容

            self.text_left.insert(tk.END, javaClass.AESDncode(line)+'\n')

    def phone_clear(self):

        #清空text中内容

        self.text_left.delete(0.0, tk.END)

        self.text_left.update()

        self.text_right.delete(0.0, tk.END)

        self.text_right.update()

app = App(root)

classpath = os.path.join(os.path.abspath('.'), './')

startJVM(getDefaultJVMPath(), "-ea", "-Djava.class.path=%s" %(classpath))

javaClass = JClass('Test')

root.mainloop()

shutdownJVM()
注:调用的java类Test从开发代码中获取的,不方便公布
运行效果

最新文章
- 【干货分享】流程DEMO-资产请购单
- 出售Illustrator脚本插件面板(包含面板源码,以及面板上所有的功能源码)
- 关于java中final关键字与线程安全性
- ElasticSearch第一步-环境配置
- Python学习之day3
- C#学习系列-this的使用
- 4.6---找二叉树中序后继(CC150)
- TFS安装与管理
- Command模式
- VSFTPD添加用户
- Retrofit2.0+OkHttp打印Request URL(请求地址参数)
- 【Android 系统开发】CyanogenMod 13.0 源码下载 编译 ROM 制作 ( 手机平台 : 小米4 | 编译平台 : Ubuntu 14.04 LTS 虚拟机)
- bzoj 1558: [JSOI2009]等差数列
- 使用 Nexus Repository Manager 搭建私有docker仓库
- 微信小程序之跳转、请求、带参数请求小例子
- 4-3 重构发送post请求
- Spark的核心RDD(Resilient Distributed Datasets弹性分布式数据集)
- pacbio bax.h5文件处理及ccs计算
- Hdfs dfs命令使用
- java正则表达式使用