LNMP分离式部署
#### LNMP组合工作流程
在LNMP组合工作时,首先是用户通过浏览器输入域名请求Nginx Web服务,如果请求是静态资源,则由Nginx解析返回给用户;如果是动态请求(.php结尾),那么Nginx就会把它通过FastCGI接口(快速接口规则,生产常用方法)发送FastCGI数据包给PHP引擎服务(FastCGI进程php-fpm)进行解析,如果这个动态请求要读取数据库数据,那么PHP就会继续向后请求MySQL数据库,以读取需要的数据,并最终通过Nginx服务把获取的数据返回给用户,这就是LNMP环境的基本请求顺序流程。这个请求流程是企业使用LNMP环境的常用流程。
用户通过浏览器将请求发到nginx
(1)若请求为静态请求,location/{
静态
}
nginx就会去网页目录根据URL的URI部分取得网页,并将网页返回给用户。(磁盘IO读写),图片、视频在存储(NFS)中(代码不放在存储中),此时NFS需要挂载Nginx
(2) 若请求为动态请求,location ~* \.(php|php5)${
fastcgi_pass 127.0.0.1:9000
}
,加快了PHP解析速度),PHP激活JS代码
动态网页由实体文件index.php(放在内存中),通过JS语言到数据库取得数据,并写回index.php文件,再打包给用户(代码不放在存储中)
2. nginx和Apache一样,若没有PHP支持,都处理不了所谓的动态请求,他们自身其实都只能出路静态,只是Apache转发动态数据包的速度快,但是只是单个包速度,Apache并发低。
3. 读取网页时无需挂载存储NFS,但是动态(如上传图片)需要挂载存储NFS
4. fastcgi快速接口有两端:
(1)作为客户端的fastcgi_pass(Nginx安装包包含)
(2)作为服务端的PHP-fpm(PHP安装包包含)
fastcgi数据包格式非常严谨,PHP解析速度非常快,但是越严谨的数据包越大,所以fsatcgi数据包大小 要绝对大于http数据包
#### LNMP的部署方式:
(1)全都部署在一台服务器上
(2)全都不部署在一台服务器上(N+P+M)
(3)只分离MySQL(NP+M)
### 部署LNMP
将nginx和PHP的程序用户设为同一个
1. 安装nginx
```
[root@localhost ~]# tar xf nginx-1.10.2.tar.gz -C /usr/src/
[root@localhost ~]# cd /usr/src/nginx-1.10.2/
[root@localhost ~]# mount /dev/sr0 /media/cdrom
[root@localhost nginx-1.10.2]# yum -y install pcre-devel openssl-devel
[root@localhost nginx-1.10.2]# useradd -s /sbin/nologin -M www
[root@localhost nginx-1.10.2]# ./configure --user=www --group=www --prefix=/usr/local/nginx --with-http_stub_status_module --with-http_ssl_module
[root@localhost nginx-1.10.2]# make && make install
[root@localhost nginx-1.10.2]# ln -s /usr/local/nginx/sbin/* /usr/local/sbin/
[root@localhost conf]# cd /usr/local/nginx/conf/
[root@localhost conf]# egrep -v "#|^$" nginx.conf.default > nginx.conf
[root@localhost conf]# vim nginx.conf
worker_processes 1;
events {
worker_connections 1024;
}
http {
include mime.types;
default_type application/octet-stream;
sendfile on;
keepalive_timeout 65;
server {
listen 80;
server_name localhost;
location / {
root html;
index index.html index.htm;
}
}
}
# nginx编译完毕
```
2. 安装MySQL(PHP需要MySQL的支持环境)
```
[root@localhost ~]# tar xf mysql-5.5.32-linux2.6-x86_64.tar.gz -C /usr/local/
# 创建mysql程序用户
[root@localhost ~]# useradd -s /sbin/nologin -M mysql
[root@localhost mysql-5.5.32-linux2.6-x86_64]# echo "192.168.81.163 LNMP" >> /etc/hosts
[root@localhost mysql-5.5.32-linux2.6-x86_64]# ln -s /usr/local/mysql-5.5.32-linux2.6-x86_64/ /usr/local/mysql
# 初始化MySQL配置文件my.conf
[root@localhost ~]# cd /usr/local/mysql-5.5.32-linux2.6-x86_64/
[root@localhost mysql-5.5.32-linux2.6-x86_64]# /bin/cp support-files/my-small.cnf /etc/my.cnf
# 初始化mysql
[root@localhost mysql]# chown -R mysql.mysql /usr/local/mysql
[root@localhost mysql]# yum -y install libaio
[root@localhost mysql]# /usr/local/mysql/scripts/mysql_install_db --basedir=/usr/local/mysql --datadir=/usr/local/mysql/data/ --user=mysql
Installing MySQL system tables...
OK
Filling help tables...
OK
To start mysqld at boot time you have to copy
support-files/mysql.server to the right place for your system
PLEASE REMEMBER TO SET A PASSWORD FOR THE MySQL root USER !
To do so, start the server, then issue the following commands:
/usr/local/mysql/bin/mysqladmin -u root password 'new-password'
/usr/local/mysql/bin/mysqladmin -u root -h localhost.localdomain password 'new-password'
Alternatively you can run:
/usr/local/mysql/bin/mysql_secure_installation
which will also give you the option of removing the test
databases and anonymous user created by default. This is
strongly recommended for production servers.
See the manual for more instructions.
You can start the MySQL daemon with:
cd /usr/local/mysql ; /usr/local/mysql/bin/mysqld_safe &
You can test the MySQL daemon with mysql-test-run.pl
cd /usr/local/mysql/mysql-test ; perl mysql-test-run.pl
Please report any problems with the /usr/local/mysql/scripts/mysqlbug script!
```
初始化故障排错集锦
错误示例1:
```
usr/local/mysql/bin/mysqld: error while loading shared libraries: libaio.so.1: cannot open shared ob
#错误原因是没有libaio函数库的支持。需要
yum -y install libaio
```
错误示例2:
```
WARNING:The host'mysql'could not be looked up with resolveip
#需要修改主机名解析,使其和uname -n一样,修改后的结果如下:
[root@localhost ~] # grep `uname -n` /etc/hosts
```
错误示例3:
```
ERROR:1004Can't create file '/tmp/#sql300e_1_o.frm'(errno:13)
#原因是/tmp目录的权限有问题。
解决办法为处理/tmp目录,如下:
[root@localhost ~]# ls -ld /tmp
drwxrwxrwt. 3 root root 4096 Jul 14 07:56 /tmp
[root@localhost ~]# chmod -R 1777 /tmp/
```
此故障必须解除,否则,后面会出现登陆不了数据库等问题。
3. 配置并启动MySQL数据库
```
[root@localhost mysql]# cp support-files/mysql.server /etc/init.d/mysqld
[root@localhost mysql]# chmod +x /etc/init.d/mysqld
[root@localhost mysql]# /etc/init.d/mysqld start
Starting MySQL.. SUCCESS!
[root@localhost mysql]# netstat -antup | grep mysql
tcp 0 0 0.0.0.0:3306 0.0.0.0:* LISTEN 4688/mysqld
# 设置MySQL开机自启动
[root@localhost mysql]# chkconfig --add mysqld
[root@localhost mysql]# chkconfig mysqld on
[root@localhost mysql]# chkconfig --list mysqld
mysqld 0:off 1:off 2:on 3:on 4:on 5:on 6:off
[root@localhost mysql]# ln -s /usr/local/mysql/bin/* /usr/local/bin/
[root@localhost mysql]# which mysqladmin
/usr/local/bin/mysqladmin
[root@localhost mysql]# mysqladmin -uroot password '123456'
[root@localhost mysql]# mysql -uroot -p123456
Welcome to the MySQL monitor. Commands end with ; or \g.
Your MySQL connection id is 2
Server version: 5.5.32 MySQL Community Server (GPL)
Copyright (c) 2000, 2013, Oracle and/or its affiliates. All rights reserved.
Oracle is a registered trademark of Oracle Corporation and/or its
affiliates. Other names may be trademarks of their respective
owners.
Type 'help;' or '\h' for help. Type '\c' to clear the current input statement.
mysql>
```
4. PHP(fastcgi方式)服务的安装和准备
```
[root@localhost mysql]# yum -y install zlib-devel libxml2-devel libjpeg-devel libjpeg-turbo-devel libiconv-devel
[root@localhost mysql]# yum -y install freetype-devel libpng-devel gd libcurl-devel libxslt-devel
[root@localhost ~]# rpm -qa zlib-devel libxml2-devel libjpeg-devel libjpeg-turbo-devel libiconv-devel
zlib-devel-1.2.3-29.el6.x86_64
libxml2-devel-2.7.6-14.el6.x86_64
libjpeg-turbo-devel-1.2.1-1.el6.x86_64
#这里仅缺少libiconv-devel包
[root@localhost ~]# rpm -qa freetype-devel libpng-devel gd libcurl-devel libxslt-devel
freetype-devel-2.3.11-14.el6_3.1.x86_64
libpng-devel-1.2.49-1.el6_2.x86_64
libcurl-devel-7.19.7-37.el6_4.x86_64
libxslt-devel-1.1.26-2.el6_3.1.x86_64
gd-2.0.35-11.el6.x86_64
[root@localhost ~]# tar xf libiconv-1.14.tar.gz -C /usr/src/
[root@localhost ~]# cd /usr/src/libiconv-1.14/
[root@localhost libiconv-1.14]# ./configure --prefix=/usr/local/libiconv && make && make install
[root@localhost ~]# rpm -ivh mhash-0.9.9.9-3.el6.x86_64.rpm
warning: mhash-0.9.9.9-3.el6.x86_64.rpm: Header V3 RSA/SHA256 Signature, key ID 0608b895: NOKEY
Preparing... ########################################### [100%]
1:mhash ########################################### [100%]
[root@localhost ~]# rpm -ivh libmcrypt-2.5.8-9.el6.x86_64.rpm
warning: libmcrypt-2.5.8-9.el6.x86_64.rpm: Header V3 RSA/SHA256 Signature, key ID 0608b895: NOKEY
Preparing... ########################################### [100%]
1:libmcrypt ########################################### [100%]
[root@localhost ~]# rpm -ivh libmcrypt-devel-2.5.8-9.el6.x86_64.rpm
warning: libmcrypt-devel-2.5.8-9.el6.x86_64.rpm: Header V3 RSA/SHA256 Signature, key ID 0608b895: NOKEY
Preparing... ########################################### [100%]
1:libmcrypt-devel ########################################### [100%]
[root@localhost ~]# rpm -ivh mcrypt-2.6.8-10.el6.x86_64.rpm
warning: mcrypt-2.6.8-10.el6.x86_64.rpm: Header V3 RSA/SHA256 Signature, key ID 0608b895: NOKEY
Preparing... ########################################### [100%]
1:mcrypt ########################################### [100%]
```
5. 开始安装PHP(fastcgi方式)服务
(1)解压配置PHP
```
[root@localhost ~]# tar xf php-5.3.28.tar.gz -C /usr/src/
[root@localhost ~]# cd /usr/src/php-5.3.28/
[root@localhost php-5.3.28]#
./configure --prefix=/usr/local/php5.3.28 --with-mysql=mysqlnd --with-iconv-dir=/usr/local/libiconv --with-freetype-dir --with-jpeg-dir --with-png-dir --with-zlib --with-libxml-dir=/usr --enable-xml --disable-rpath --enable-safe-mode --enable-bcmath --enable-shmop --enable-sysvsem --enable-inline-optimization --with-curl --with-curlwrappers --enable-mbregex --enable-fpm --enable-mbstring --with-mcrypt --with-gd --enable-gd-native-ttf --with-openssl --with-mhash --enable-pcntl --enable-sockets --with-xmlrpc --enable-zip --enable-soap --enable-short-tags --enable-zend-multibyte --enable-static --with-xsl--with-fpm-user=www --with-fpm-group=www --enable-ftp

(2)编译安装PHP
```
[root@localhost php-5.3.28]# ln -s /usr/local/mysql/lib/libmysqlclient.
libmysqlclient.a libmysqlclient.so.18
libmysqlclient.so libmysqlclient.so.18.0.0
[root@localhost php-5.3.28]# ln -s /usr/local/mysql/lib/libmysqlclient.so.18 /usr/lib64/
[root@localhost php-5.3.28]# touch ext/phar/phar.phar
[root@localhost php-5.3.28]# make
[root@localhost php-5.3.28]# make install
[root@localhost php-5.3.28]# ln -s /usr/local/php5.3.28/ /usr/local/php
[root@localhost php-5.3.28]# cd /usr/local/php
[root@localhost php]# cd /usr/src/php-5.3.28/
[root@localhost php-5.3.28]# ls php.ini*
php.ini-development php.ini-production
[root@localhost php-5.3.28]# cp php.ini-production /usr/local/php/lib/php.ini
[root@localhost php-5.3.28]# cd /usr/local/php/etc/
[root@localhost etc]# ls
pear.conf php-fpm.conf.default
[root@localhost etc]# cp php-fpm.conf.default php-fpm.conf
[root@localhost etc]# /usr/local/php/sbin/php-fpm
[root@localhost etc]# netstat -antup | grep 9000
tcp 0 0 127.0.0.1:9000 0.0.0.0:* LISTEN 129604/php-fpm
[root@localhost etc]# vim php-fpm.conf
151 listen = 127.0.0.1:9000 #若设为分布式部署,需要将IP地址改为对方IP地址
```
6. 配置nginx支持PHP程序请求访问
```
[root@localhost etc]# cd /usr/local/nginx/conf/
[root@localhost conf]# cp nginx.conf nginx.conf.bak
[root@localhost conf]# vim nginx.conf
worker_processes 1;
error_log logs/error.log;
events {
worker_connections 1024;
}
http {
include mime.types;
default_type application/octet-stream;
sendfile on;
keepalive_timeout 65;
server {
listen 80;
server_name blog.yunjisuan.com;
location / {
root html/blog;
index index.html index.htm;
}
location ~ .*\.(php|php5)?$ {
root html/blog;
fastcgi_pass 127.0.0.1:9000;
fastcgi_index index.php;
include fastcgi.conf;
}
}
}
# 启动nginx
[root@localhost nginx]# cd html/
[root@localhost html]# ls
50x.html index.html
[root@localhost html]# mkdir blog
[root@localhost html]# ls
50x.html blog index.html
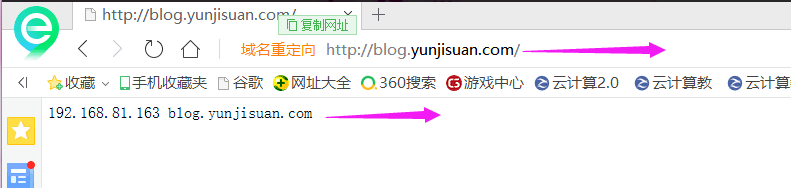
[root@localhost html]# echo "`hostname -I` blog.yunjisuan.com" > blog/index.html
[root@localhost blog]# vim /etc/hosts
127.0.0.1 localhost localhost.localdomain localhost4 localhost4.localdomain4
::1 localhost localhost.localdomain localhost6 localhost6.localdomain6
192.168.214.163 LNMP blog.yunjisuan.com
[root@localhost html]# /usr/local/nginx/sbin/nginx
[root@localhost html]# netstat -antup | grep 80
tcp 0 0 0.0.0.0:80 0.0.0.0:* LISTEN 129672/nginx
tcp 0 0 0.0.0.0:22 0.0.0.0:* LISTEN 1380/sshd
tcp 0 0 :::22 :::* LISTEN 1380/sshd
[root@localhost blog]# curl blog.yunjisuan.com
192.168.214.163 blog.yunjisuan.com
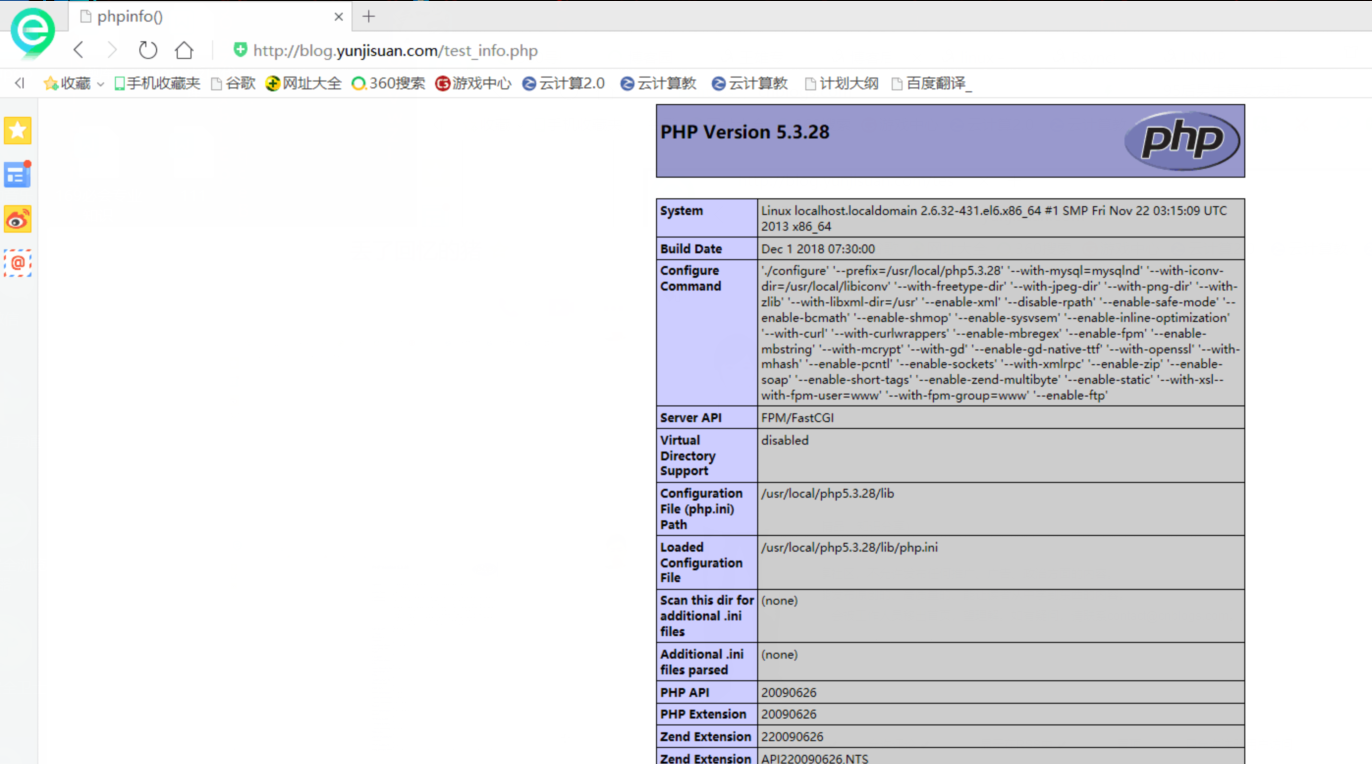
[root@localhost blog]# vim test_info.php
<?php phpinfo(); ?>
#本机/我的电脑/磁盘C/Windows/system32/drivers/etc/hosts
192.168.214.163 blog.yunjisuan.com
```
到浏览器查看静态网页内容

最新文章
- jquery选择器案例
- [教程]MongoDB 从入门到进阶 (User系统)
- 关于Go,你可能不注意的7件事(转的)
- 【iCore3 双核心板】例程五:SYSTICK定时器实验——定时点亮LED
- Intellij 图标介绍及配置文件常识
- c#使用aspose.cells 从datatable导出数据到excel
- 删除Android自带软件方法及adb remount 失败解决方案
- CSS定位规则之BFC 你居然一直不知道的东西!!!!!
- Careercup - Facebook面试题 - 4892713614835712
- Eclipse与tomcat服务器建立关联
- H5 App设计者需要注意的21条禁忌
- 转:struct sockaddr与struct sockaddr_in ,struct sockaddr_un的区别和联系
- NYOJ353 3D dungeon 【BFS】
- tomcat安装和基本配置
- C# DataSet数据导入Excel 修正版- .net FrameWork 4.0以上
- 使用logdashboard查看可视化日志
- dubbo实用知识点总结(三)
- java之导入excel
- log4j常见配置
- UNICODE 区域对照表