一篇文章带你掌握主流数据库框架——MyBatis
一篇文章带你掌握主流数据库框架——MyBatis
MyBatis 是一款优秀的持久层框架,它支持自定义 SQL、存储过程以及高级映射。
在之前的文章中我们学习了MYSQL和JDBC,但是这些东西远远不足以支持我们书写JavaWeb相关的内容
在学习MyBatis前,请先学习Java,Mysql,JDBC,Maven内容
MyBatis学前须知
首先我们先简单介绍一下MyBatis:
- Mybats是一款优秀的持久层框架,用于简化JDBC开发
- MyBatis本是Apache的一个开源项目iBatis,2010年由apache software foundation 迁移到了google code,并改名为MyBatis
- 官网:MyBatis中文网
我们再来介绍一下JavaEE概念:
- JavaEE三层架构:表现层,业务层,持久层
- 表现层:负责接收客户端请求,向客户端响应结果
- 业务层:它负责业务逻辑处理
- 持久层:负责将数据保存到数据库的那一层代码
最后我们了解一下框架:
- 框架是一个半成品软件,是一套可重用的,通用的软件基础代码模型
- 在框架的基础上构建软件编写更加有效,规范,通用,可扩展
MyBatis产生背景
我们在前面提到MyBatis的产生是为了简化JDBC开发
那么我们就先来介绍一下JDBC的缺点:
我们通过一段代码进行解析:
package com.itheima.jdbc;

import org.junit.Test;

import java.sql.*;

import java.util.Date;

    @Test

    public void testPreparedStatement2() throws  Exception {

        // 前置链接操作

        String url = "jdbc:mysql:///db1?useSSL=false&useServerPrepStmts=true";

        String username = "root";

        String password = "1234";

        Connection conn = DriverManager.getConnection(url, username, password);

        // 接收用户输入 用户名和密码

        String name = "zhangsan";

        String pwd = "' or '1' = '1";

        // 定义sql

        String sql = "select * from tb_user where username = ? and password = ?";

        // 获取pstmt对象

        PreparedStatement pstmt = conn.prepareStatement(sql);

        Thread.sleep(10000);

        // 设置?的值

        pstmt.setString(1,name);

        pstmt.setString(2,pwd);

        ResultSet rs = null;

                // 执行sql

        rs = pstmt.executeQuery();

        // 设置?的值

        pstmt.setString(1,"aaa");

        pstmt.setString(2,"bbb");

        // 执行sql

        rs = pstmt.executeQuery();

        // 判断登录是否成功

        if(rs.next()){

            System.out.println("登录成功~");

        }else{

            System.out.println("登录失败~");

        }

        //7. 释放资源

        rs.close();

        pstmt.close();

        conn.close();

    }

}
在上述代码中,我们可以注意到:
/*

硬编码概念: 代码展现形式固定,如果有所更改需要手动修改代码

硬编码动作:注册驱动,获得链接,SQL语句

*/

		// 前置链接操作

        String url = "jdbc:mysql:///db1?useSSL=false&useServerPrepStmts=true";

        String username = "root";

        String password = "1234";

        Connection conn = DriverManager.getConnection(url, username, password);

        // 接收用户输入 用户名和密码

        String name = "zhangsan";

        String pwd = "' or '1' = '1";

/*

操作繁琐:大量代码堆叠

操作繁琐动作:手动设置参数,手动封装结果

*/

		// 获取pstmt对象

        PreparedStatement pstmt = conn.prepareStatement(sql);

        Thread.sleep(10000);

        // 设置?的值

        pstmt.setString(1,name);

        pstmt.setString(2,pwd);

        ResultSet rs = null;

                // 执行sql

        rs = pstmt.executeQuery();

        // 设置?的值

        pstmt.setString(1,"aaa");

        pstmt.setString(2,"bbb");

        // 执行sql

        rs = pstmt.executeQuery();
因而为了解决JDBC的这些缺点,MyBatis应运而生!
MyBatis解决思想:
- 硬编码 -> 配置文件
- 注册驱动,获得连接:在mybatis-config.xml设置其连接池信息
- SQL语句:设置专门的Mapper接口和Mapper.xml设置其信息
- 操作繁琐 - > 自动完成
- 采用SqlSession对象的各类方法直接封装
MyBatis免除了几乎所有的JDBC代码以及设置参数和获得结果集的工作
MyBatis快速入门
我们将以一个案例进行MyBatis的快速入门(资源来自B站黑马程序员老陈的JavaWeb课程)
我们以步骤形式逐步进行:
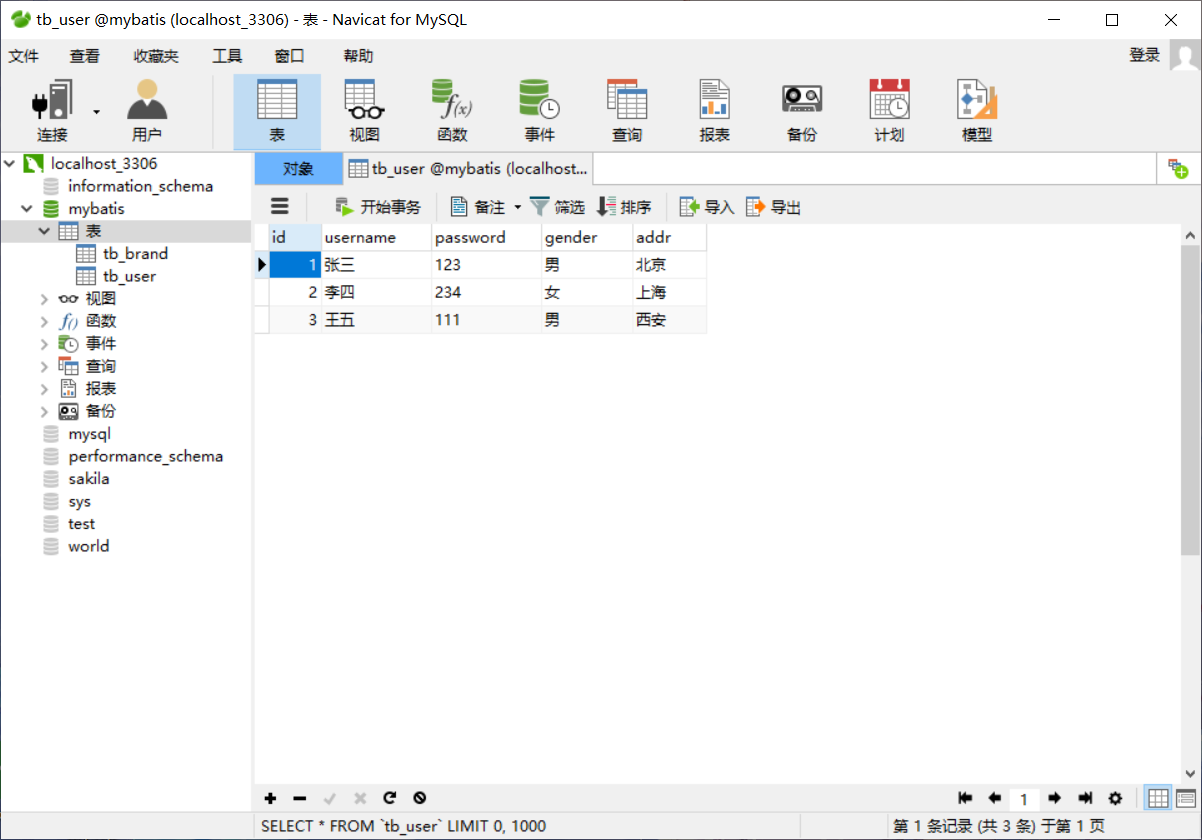
- 准备数据库数据

- 创建模块,导入坐标(这里采用Maven创建项目,在项目自动生成的pom.xml中导入模块坐标即可)
<!--

我们使用mybatis,导入mybatis坐标

我们使用mysql,导入mysql坐标

我们需要进行单元测试,导入junit坐标

我们需要日志,查看错误信息,导入日志坐标(注意:需要导入logback.xml包,可在网络查询)

->

<dependencies>

        <!--mybatis 依赖-->

        <dependency>

            <groupId>org.mybatis</groupId>

            <artifactId>mybatis</artifactId>

            <version>3.5.5</version>

        </dependency>

        <!--mysql 驱动-->

        <dependency>

            <groupId>mysql</groupId>

            <artifactId>mysql-connector-java</artifactId>

            <version>5.1.46</version>

        </dependency>

        <!--junit 单元测试-->

        <dependency>

            <groupId>junit</groupId>

            <artifactId>junit</artifactId>

            <version>4.13</version>

            <scope>test</scope>

        </dependency>

        <!-- 添加slf4j日志api -->

        <dependency>

            <groupId>org.slf4j</groupId>

            <artifactId>slf4j-api</artifactId>

            <version>1.7.20</version>

        </dependency>

        <!-- 添加logback-classic依赖 -->

        <dependency>

            <groupId>ch.qos.logback</groupId>

            <artifactId>logback-classic</artifactId>

            <version>1.2.3</version>

        </dependency>

        <!-- 添加logback-core依赖 -->

        <dependency>

            <groupId>ch.qos.logback</groupId>

            <artifactId>logback-core</artifactId>

            <version>1.2.3</version>

        </dependency>

    </dependencies>
- 编写MyBatis核心配置文件(替换连接信息,解决硬编码问题)
<!--

创建mybatis-config.xml,

写入下列信息(MyBatis官网可查找)

<?xml version="1.0" encoding="UTF-8" ?>

<!DOCTYPE configuration

  PUBLIC "-//mybatis.org//DTD Config 3.0//EN"

  "http://mybatis.org/dtd/mybatis-3-config.dtd">

<configuration>

  <environments default="development">

    <environment id="development">

      <transactionManager type="JDBC"/>

      <dataSource type="POOLED">

        <property name="driver" value="${driver}"/>

        <property name="url" value="${url}"/>

        <property name="username" value="${username}"/>

        <property name="password" value="${password}"/>

      </dataSource>

    </environment>

  </environments>

  <mappers>

    <mapper resource="org/mybatis/example/BlogMapper.xml"/>

  </mappers>

</configuration>

然后我们需要对上述信息进行修改,使其完成连接数据库的问题

-->

<?xml version="1.0" encoding="UTF-8" ?>

<!DOCTYPE configuration

  PUBLIC "-//mybatis.org//DTD Config 3.0//EN"

  "http://mybatis.org/dtd/mybatis-3-config.dtd">

<configuration>

  <environments default="development">

    <environment id="development">

      <transactionManager type="JDBC"/>

        <!--注意:这里dataSource表示数据库连接--->

      <dataSource type="POOLED">

          <!--

			我们需要修改下述信息

			driver:固定com.mysql.jdbc.Driver

			url:jdbc:mysql:/// + 数据库名称 + ?useSSL=false

			username:数据库账号

			password:数据库密码

			-->

        <property name="driver" value="com.mysql.jdbc.Driver"/>

        <property name="url" value="jdbc:mysql:///mybatis?useSSL=false"/>

        <property name="username" value="root"/>

        <property name="password" value="123456"/>

      </dataSource>

    </environment>

  </environments>

    <!--这里mapper表示映射地址:我们所需要的Mapper.xml,在后续我们会在Mapper.xml中书写SQL语句-->

  <mappers>

    <mapper resource="com/itheima/mapper/UserMapper.xml"/>

  </mappers>

</configuration>
- 创建SQL映射文件(统一管理sql语句,解决硬编码问题)
<!--

同样自己创建Mapper.xml文档,这里注意在前面加上前缀,如果你是Usr用户的数据库操作,命名为UserMapper.xml便于区分

导入下述代码(同样,在Mybatis官网可以找到)

<?xml version="1.0" encoding="UTF-8" ?>

<!DOCTYPE mapper

  PUBLIC "-//mybatis.org//DTD Mapper 3.0//EN"

  "http://mybatis.org/dtd/mybatis-3-mapper.dtd">

<mapper namespace="org.mybatis.example.BlogMapper">

  <select id="selectBlog" resultType="Blog">

    select * from Blog where id = #{id}

  </select>

</mapper>

在创建完成后,不要忘记回到上一步,把mapper的resource地址改为该文档所在地址

-->

<?xml version="1.0" encoding="UTF-8" ?>

<!DOCTYPE mapper

  PUBLIC "-//mybatis.org//DTD Mapper 3.0//EN"

  "http://mybatis.org/dtd/mybatis-3-mapper.dtd">

<!--

namespace:名称空间,在后续需要与Mapper接口名称一致保证互联(这里暂时设置为test)

id:查找方法的唯一表示

resultType:返回类型

在<select></select>中间书写语句即可

后续会继续介绍

-->

<mapper namespace="test">

  <select id="selectAll" resultType="User">

    select * from Blog where id = #{id}

  </select>

</mapper>
- 1 定义POJO类(与数据库信息完全相同的类)
// 注意:数据为private,书写get和set方法以及toString方法

package com.itheima.pojo;

// alt + 鼠标左键 整列编辑

public class User {

    private Integer id;

    private String username;

    private String password;

    private String gender;

    private String addr;

    public Integer getId() {

        return id;

    }

    public void setId(Integer id) {

        this.id = id;

    }

    public String getUsername() {

        return username;

    }

    public void setUsername(String username) {

        this.username = username;

    }

    public String getPassword() {

        return password;

    }

    public void setPassword(String password) {

        this.password = password;

    }

    public String getGender() {

        return gender;

    }

    public void setGender(String gender) {

        this.gender = gender;

    }

    public String getAddr() {

        return addr;

    }

    public void setAddr(String addr) {

        this.addr = addr;

    }

    @Override

    public String toString() {

        return "User{" +

                "id=" + id +

                ", username='" + username + '\'' +

                ", password='" + password + '\'' +

                ", gender='" + gender + '\'' +

                ", addr='" + addr + '\'' +

                '}';

    }

}
- 2 主代码展示
// 创建主代码

package com.itheima;

import com.itheima.pojo.User;

import org.apache.ibatis.io.Resources;

import org.apache.ibatis.session.SqlSession;

import org.apache.ibatis.session.SqlSessionFactory;

import org.apache.ibatis.session.SqlSessionFactoryBuilder;

import java.io.IOException;

import java.io.InputStream;

import java.util.List;

/**

 * Mybatis 快速入门代码

 */

public class MyBatisDemo {

    public static void main(String[] args) throws IOException {

        //1. 加载mybatis的核心配置文件,获取 SqlSessionFactory(官网下载)

        /*

        下述为官网下载,我们只需要修改第一行的mybatis-config.xml地址即可

        String resource = "org/mybatis/example/mybatis-config.xml";

		InputStream inputStream = Resources.getResourceAsStream(resource);

		SqlSessionFactory sqlSessionFactory = new SqlSessionFactoryBuilder().build(inputStream);

        */

        String resource = "mybatis-config.xml";

        InputStream inputStream = Resources.getResourceAsStream(resource);

        SqlSessionFactory sqlSessionFactory = new SqlSessionFactoryBuilder().build(inputStream);

        //2. 获取SqlSession对象,用它来执行sql(sqlSessionFactory方法)

        SqlSession sqlSession = sqlSessionFactory.openSession();

        //3. 执行sql(这里的test.selectList是我们的UserMapper.xml中所设置的名称空间.id)

        List<User> users = sqlSession.selectList("test.selectAll");

        System.out.println(users);

        //4. 释放资源

        sqlSession.close();

    }

}
至此,我们已经了解了MyBatis的整体创建流程
在下面我们会以上述入门为标准,进行各种流程上的简化开发
解决SQL语句警告问题(IDEA正式版)
我们在Mapper.xml中书写sql语句时,可能会出现sql表名显示红色(报错)现象
产生原因:IDEA和数据库没有建立连接,不识别表信息
解决方法:在IDEA中配置MYSQL数据库连接
解决优点:代码不再报错,显示所有SQL语句以及表列的补全信息
解决方法:
- 在Database中打开加号,逐步打开Data Source,MYSQL
- 打开页面后,填写USer,Password即可
Mapper代理开发
我们在入门代码中创建了Mapper.xml,并在其中书写代码
我们在主项目的代码中包含有以下这段:
List<User> users = sqlSession.selectList("test.selectAll");
但test.selectAll属于硬编码阶段,且书写方式麻烦
因而产生了Mapper代理开发,同样我们采用案例的形式逐步书写:
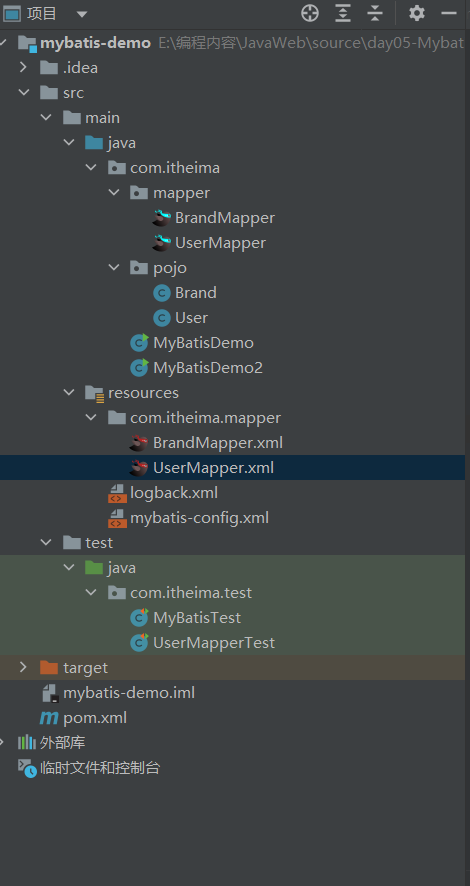
- 定义与SQL映射文件同名的Mapper接口,并将该接口与SQL映射文件放置在同一目录级别下(IDEA2022版已解决这个问题)

- 设置SQL映射文件的namespace属性为Mapper接口全限定名(接口与xml文件产生连接)
<?xml version="1.0" encoding="UTF-8" ?>

<!DOCTYPE mapper

        PUBLIC "-//mybatis.org//DTD Mapper 3.0//EN"

        "http://mybatis.org/dtd/mybatis-3-mapper.dtd">

<!--

    namespace:名称空间

-->

<mapper namespace="com.itheima.mapper.UserMapper">

    <!--statement-->

    <select id="selectAll" resultType="user">

        select *

        from tb_user;

    </select>

</mapper>
- 在Mapper接口中定义方法,方法名就是SQL映射文件中sql语句的id,并保持参数类型和返回值类型一致
package com.itheima.mapper;

import com.itheima.pojo.User;

import org.apache.ibatis.annotations.Param;

import org.apache.ibatis.annotations.Select;

import java.util.Collection;

import java.util.List;

import java.util.Map;

import java.util.Set;

public interface UserMapper {

    List<User> selectAll();

}
- 主代码展示:
package com.itheima;

import com.itheima.mapper.UserMapper;

import com.itheima.pojo.User;

import org.apache.ibatis.io.Resources;

import org.apache.ibatis.session.SqlSession;

import org.apache.ibatis.session.SqlSessionFactory;

import org.apache.ibatis.session.SqlSessionFactoryBuilder;

import java.io.IOException;

import java.io.InputStream;

import java.util.List;

/**

 * Mybatis 代理开发

 */

public class MyBatisDemo2 {

    public static void main(String[] args) throws IOException {

        //1. 加载mybatis的核心配置文件,获取 SqlSessionFactory

        String resource = "mybatis-config.xml";

        InputStream inputStream = Resources.getResourceAsStream(resource);

        SqlSessionFactory sqlSessionFactory = new SqlSessionFactoryBuilder().build(inputStream);

        //2. 获取SqlSession对象,用它来执行sql

        SqlSession sqlSession = sqlSessionFactory.openSession();

        //3.1 获取UserMapper接口的代理对象

        //(采用sqlSession方法获得接口类产生对象,调用对象的方法[这里方法来自xml],并根据Mapper接口设置的返回参数)

        UserMapper userMapper = sqlSession.getMapper(UserMapper.class);

        List<User> users = userMapper.selectAll();

        System.out.println(users);

        //4. 释放资源

        sqlSession.close();

    }

}
Mapper补充内容
在mybatis-config.xml文件中我们设置过mapper内容:
    <mappers>

        <!--加载sql映射文件-->

       <mapper resource="com/itheima/mapper/UserMapper.xml">

    </mappers>
但随着sql映射文件增多,单个书写过于麻烦,所以开发出了package方法
    <mappers>

        <!--加载sql映射文件-->

       <!-- <mapper resource="com/itheima/mapper/UserMapper.xml"/>-->

        <!--Mapper代理方式:通过包扫描的方法,将包中所对应的mapper.xml映射过来-->

        <package name="com.itheima.mapper"/>

    </mappers>
MyBatis核心配置文件
Mybatis核心配置文件就是我们之前写入的mybatis-config.xml文件
现在我们对MyBatis的相关内容进行分析:
- 标签:
- 类型别名可为 Java 类型设置一个缩写名字。
- 它仅用于 XML 配置,意在降低冗余的全限定类名书写。
- 我们可以在标签内书写package标签,并设置文件夹名称,则后续内容中不需要添加该文件夹名称
- 标签:
- MyBatis 可以配置成适应多种环境,这种机制有助于将 SQL 映射应用于多种数据库之中
- 通过default设置信息来更换数据库,default的值为下述environment的id值
- Mapper,dataSource以及内部信息均已介绍,这里不再介绍
下面给出代码展示:
<?xml version="1.0" encoding="UTF-8" ?>

<!DOCTYPE configuration

        PUBLIC "-//mybatis.org//DTD Config 3.0//EN"

        "http://mybatis.org/dtd/mybatis-3-config.dtd">

<configuration>

    <typeAliases>

        <package name="com.itheima.pojo"/>

    </typeAliases>

    <!--

    environments:配置数据库连接环境信息。可以配置多个environment,通过default属性切换不同的environment

    -->

    <environments default="development">

        <environment id="development">

            <transactionManager type="JDBC"/>

            <dataSource type="POOLED">

                <!--数据库连接信息-->

                <property name="driver" value="com.mysql.jdbc.Driver"/>

                <property name="url" value="jdbc:mysql:///mybatis?useSSL=false"/>

                <property name="username" value="root"/>

                <property name="password" value="123456"/>

            </dataSource>

        </environment>

        <environment id="test">

            <transactionManager type="JDBC"/>

            <dataSource type="POOLED">

                <!--数据库连接信息-->

                <property name="driver" value="com.mysql.jdbc.Driver"/>

                <property name="url" value="jdbc:mysql:///mybatis?useSSL=false"/>

                <property name="username" value="root"/>

                <property name="password" value="1234"/>

            </dataSource>

        </environment>

    </environments>

    <mappers>

        <!--加载sql映射文件-->

       <!-- <mapper resource="com/itheima/mapper/UserMapper.xml"/>-->

        <!--Mapper代理方式-->

        <package name="com.itheima.mapper"/>

    </mappers>

</configuration>
MyBatis进阶内容(增删改查)
在下述内容中,我们会通过一个案例进行MyBatis的增删改查并且补充相应知识点
在开始前,我们同样准备环境:
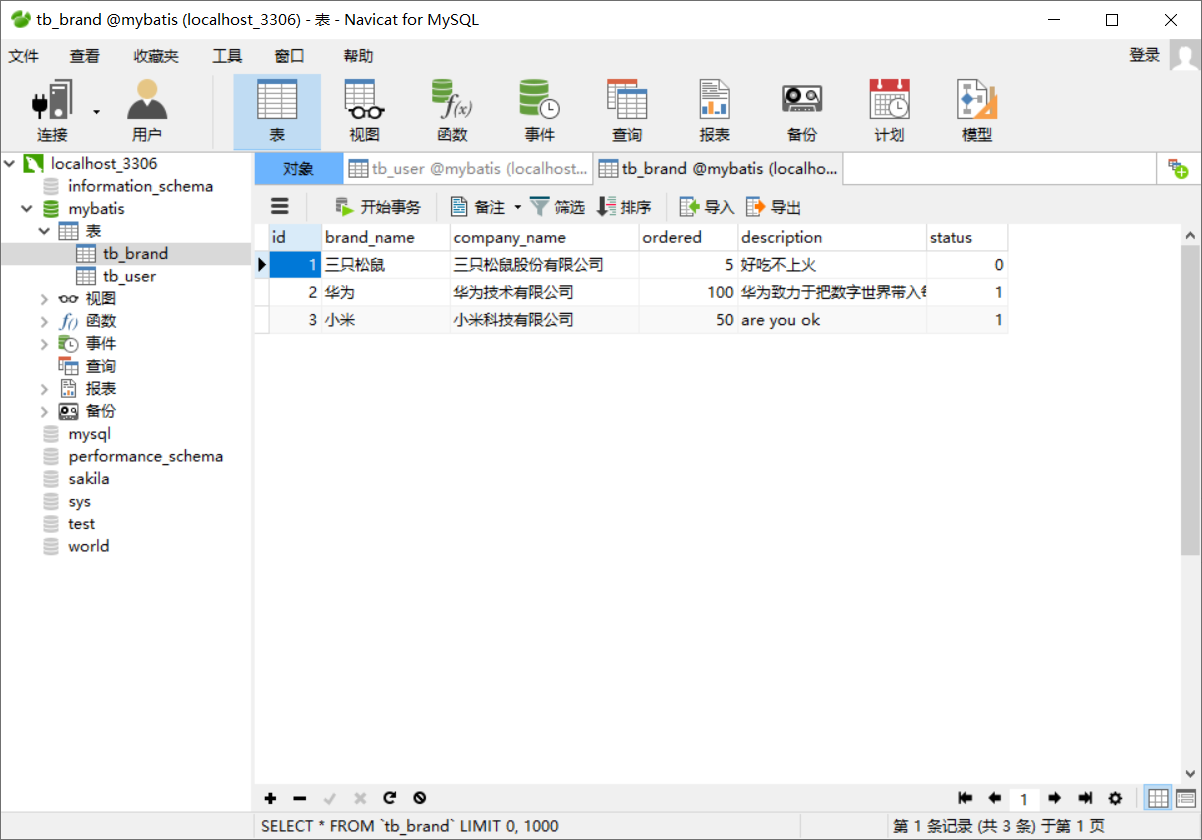
- 数据库表tb_brand

- 实体类Brand
package com.itheima.pojo;

/**

 * 品牌

 *

 * alt + 鼠标左键:整列编辑

 *

 * 在实体类中,基本数据类型建议使用其对应的包装类型

 */

public class Brand {

    // id 主键

    private Integer id;

    // 品牌名称

    private String brandName;

    // 企业名称

    private String companyName;

    // 排序字段

    private Integer ordered;

    // 描述信息

    private String description;

    // 状态:0:禁用  1:启用

    private Integer status;

    public Integer getId() {

        return id;

    }

    public void setId(Integer id) {

        this.id = id;

    }

    public String getBrandName() {

        return brandName;

    }

    public void setBrandName(String brandName) {

        this.brandName = brandName;

    }

    public String getCompanyName() {

        return companyName;

    }

    public void setCompanyName(String companyName) {

        this.companyName = companyName;

    }

    public Integer getOrdered() {

        return ordered;

    }

    public void setOrdered(Integer ordered) {

        this.ordered = ordered;

    }

    public String getDescription() {

        return description;

    }

    public void setDescription(String description) {

        this.description = description;

    }

    public Integer getStatus() {

        return status;

    }

    public void setStatus(Integer status) {

        this.status = status;

    }

    @Override

    public String toString() {

        return "Brand{" +

                "id=" + id +

                ", brandName='" + brandName + '\'' +

                ", companyName='" + companyName + '\'' +

                ", ordered=" + ordered +

                ", description='" + description + '\'' +

                ", status=" + status +

                '}';

    }

}
- 测试用例(在test文件夹下的java文件下创建test即可)

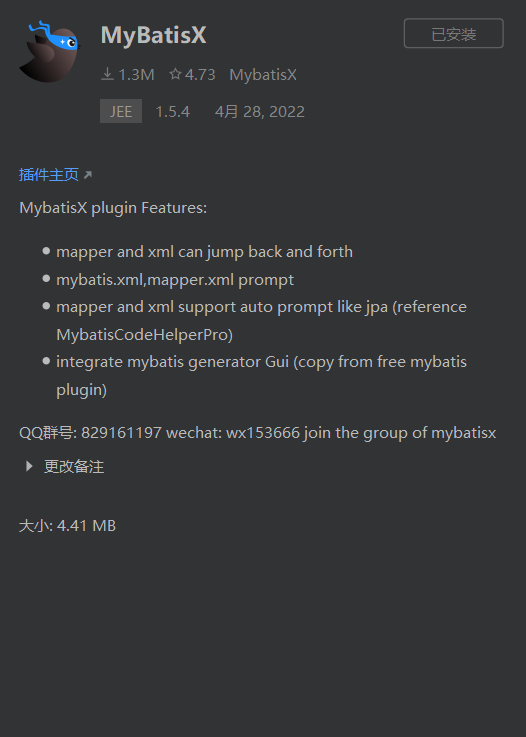
- 安装MyBatisX插件(方便对应Mapper.xml和Mapper接口)

查询数据
我们将会介绍三种数据查询方法:
- 查询所有数据
- 根据ID查询单个数据
- 根据条件查询数据
接下来我们逐一讲解:
查询所有数据
查询所有数据步骤:
- 编写接口方法:Mapper接口(参数:无 返回类型:List)
package com.itheima.mapper;

import com.itheima.pojo.Brand;

import org.apache.ibatis.annotations.Param;

import org.apache.ibatis.annotations.ResultMap;

import org.apache.ibatis.annotations.Select;

import java.util.List;

import java.util.Map;

public interface BrandMapper {

    /**

     * 查询所有

     */

    List<Brand> selectAll();

}
- 编写SQL语句(在xml中编写)
    <select id="selectAll" resultType="brand">

        select *

        from tb_brand;

    </select>
- 执行方式
    @Test

    public void testSelectAll() throws IOException {

        //1. 获取SqlSessionFactory

        String resource = "mybatis-config.xml";

        InputStream inputStream = Resources.getResourceAsStream(resource);

        SqlSessionFactory sqlSessionFactory = new SqlSessionFactoryBuilder().build(inputStream);

        //2. 获取SqlSession对象

        SqlSession sqlSession = sqlSessionFactory.openSession();

        //3. 获取Mapper接口的代理对象

        BrandMapper brandMapper = sqlSession.getMapper(BrandMapper.class);

        //4. 执行方法

        List<Brand> brands = brandMapper.selectAll();

        System.out.println(brands);

        //5. 释放资源

        sqlSession.close();

    }
但是这种方法中,我们会发现brandName和companyName并没有显示
主要原因:
- brandName在MYSQL中定义为brand_name;companyName在MYSQL中定义为company_name
解决方法有两种:
- 给所有名称不同的属性添加别名,使其与MYSQL属性同名
<mapper namespace="com.itheima.mapper.BrandMapper">

	<select id="selectAll" resultMap="brandResultMap">

        select id, brand_name as brandName, company_name as companyName, ordered, description, status

        from tb_brand;

    </select>

</mapper>
- 在xml中添加一段ResultMap属性(推荐!!!)
<mapper namespace="com.itheima.mapper.BrandMapper">

<!--

        数据库表的字段名称  和  实体类的属性名称 不一样,则不能自动封装数据

            * 起别名:对不一样的列名起别名,让别名和实体类的属性名一样

                * 缺点:每次查询都要定义一次别名

                    * sql片段

                        * 缺点:不灵活

            * resultMap:

                1. 定义<resultMap>标签

                2. 在<select>标签中,使用resultMap属性替换 resultType属性

    -->

    <!--

        id:唯一标识

        type:映射的类型,支持别名

    -->

    <resultMap id="brandResultMap" type="brand">

        <!--

            id:完成主键字段的映射

                column:表的列名

                property:实体类的属性名

            result:完成一般字段的映射

                column:表的列名

                property:实体类的属性名

        -->

        <result column="brand_name" property="brandName"/>

        <result column="company_name" property="companyName"/>

    </resultMap>

   <select id="selectAll" resultMap="brandResultMap">

        select *

        from tb_brand;

    </select>

   <select id="selectAll" resultMap="brand">

        select *

        from tb_brand;

    </select>

</mapper>
单个查询
单个查询步骤:
- 编写接口方法:Mapper接口(参数:id 返回类型:Brand)
Brand selectById(int id);
- 编写SQL语句
    <select id="selectById" resultMap="brandResultMap">

        select *

        from tb_brand

        where id = #{id};

    </select>
- 执行方法,测试
    @Test

    public void testSelectById() throws IOException {

        //接收参数

        int id = 1;

        //1. 获取SqlSessionFactory

        String resource = "mybatis-config.xml";

        InputStream inputStream = Resources.getResourceAsStream(resource);

        SqlSessionFactory sqlSessionFactory = new SqlSessionFactoryBuilder().build(inputStream);

        //2. 获取SqlSession对象

        SqlSession sqlSession = sqlSessionFactory.openSession();

        //3. 获取Mapper接口的代理对象

        BrandMapper brandMapper = sqlSession.getMapper(BrandMapper.class);

        //4. 执行方法

        Brand brand = brandMapper.selectById(id);

        System.out.println(brand);

        //5. 释放资源

        sqlSession.close();

    }
知识点讲解:
{}:会将其替换为 ? 放置SQL注入
- ${}:拼接sql,会存在SQL注入问题
- 使用时机:
- 参数传递:#{}
- 表名或列名不固定的情况下:${}
条件查询
这里我们介绍多条件查询:
- 编写接口方法:Mapper接口(参数:所有查询条件 返回结果:List)
    /**

     * 条件查询

     *  * 参数接收

     *      1. 散装参数:如果方法中有多个参数,需要使用@Param("SQL参数占位符名称")

     *      2. 对象参数:对象的属性名称要和参数占位符名称一致

     *      3. map集合参数

     *

     */

    List<Brand> selectByCondition(@Param("status") int status, @Param("companyName") String companyName, @Param("brandName") String brandName);

    List<Brand> selectByCondition(Brand brand);

    List<Brand> selectByCondition(Map map);
- 编写SQL语句:
    <!--

        条件查询:

		这里#{}中的元素和Param所书写的属性相同;

		如果是Brand,则与Brand的属性相同;

		如果是Map,则与Map集合的键相同即可

    -->

    <select id="selectByCondition" resultMap="brandResultMap">

         select *

         from tb_brand

         where status = #{status}

           and company_name like #{companyName}

           and brand_name like #{brandName}

     </select>
- 执行方法,测试:
    @Test

    public void testSelectByCondition() throws IOException {

        //接收参数

        int status = 1;

        String companyName = "华为";

        String brandName = "华为";

        // 处理参数

        companyName = "%" + companyName + "%";

        brandName = "%" + brandName + "%";

        //封装对象

       /* Brand brand = new Brand();

        brand.setStatus(status);

        brand.setCompanyName(companyName);

        brand.setBrandName(brandName);*/

        Map map = new HashMap();

        // map.put("status" , status);

        map.put("companyName", companyName);

        // map.put("brandName" , brandName);

        //1. 获取SqlSessionFactory

        String resource = "mybatis-config.xml";

        InputStream inputStream = Resources.getResourceAsStream(resource);

        SqlSessionFactory sqlSessionFactory = new SqlSessionFactoryBuilder().build(inputStream);

        //2. 获取SqlSession对象

        SqlSession sqlSession = sqlSessionFactory.openSession();

        //3. 获取Mapper接口的代理对象

        BrandMapper brandMapper = sqlSession.getMapper(BrandMapper.class);

        //4. 执行方法

        //List<Brand> brands = brandMapper.selectByCondition(status, companyName, brandName);

//        List<Brand> brands = brandMapper.selectByCondition(brand);

        List<Brand> brands = brandMapper.selectByCondition(map);

        System.out.println(brands);

        //5. 释放资源

        sqlSession.close();

    }
动态查询
动态查询概念:
- 在所有的查询条件中,用户可能并不会全部查询,可能只有挑选条件查询
- 这时如果以之前的代码,会导致导入值为null而导致查询错误
动态SQL语句:
- if语句
<!--

if标签:整体框架

test:判断条件

  <if test="title != null">

		sql语句内容

  </if>

-->

<select id="findActiveBlogWithTitleLike"

     resultType="Blog">

  SELECT * FROM BLOG

  WHERE state = ‘ACTIVE’

  <if test="title != null">

    AND title like #{title}

  </if>

</select>
- where语句
    <!--

        动态条件查询

            * if: 条件判断

                * test:逻辑表达式

            * 问题:

                * 恒等式

                * <where> 替换 where 关键字

    -->

<!--这里的where会根据实际情况,自行添加and或者删除and-->

	<select id="selectByCondition" resultMap="brandResultMap">

        select *

        from tb_brand

        /* where 1 = 1*/

        <where>

            <if test="status != null">

                and status = #{status}

            </if>

            <if test="companyName != null and companyName != '' ">

                and company_name like #{companyName}

            </if>

            <if test="brandName != null and brandName != '' ">

                and brand_name like #{brandName}

            </if>

        </where>
- choose语句
<!--

<choose> <!--相当于switch-->

<when test="status != null"> <!--相当于case-->

-->

<select id="findActiveBlogLike"

     resultType="Blog">

  SELECT * FROM BLOG WHERE state = ‘ACTIVE’

  <choose>

    <when test="title != null">

      AND title like #{title}

    </when>

    <when test="author != null and author.name != null">

      AND author_name like #{author.name}

    </when>

    <otherwise>

      AND featured = 1

    </otherwise>

  </choose>

</select>
我们根据两个案例来解释上述语法:
- 多条件查询语句:
- 编写接口方法:Mapper接口(参数:Brand 返回类型:List)
List<Brand> selectByCondition(Brand brand);
- 编写SQL语句:
    <!--

        动态条件查询

            * if: 条件判断

                * test:逻辑表达式

            * 问题:

                * 恒等式

                * <where> 替换 where 关键字

    -->

    <select id="selectByCondition" resultMap="brandResultMap">

        select *

        from tb_brand

        /* where 1 = 1*/

        <!--这里使用where,防止无条件或者and位置错误-->

        <where>

            <if test="status != null">

                and status = #{status}

            </if>

            <if test="companyName != null and companyName != '' ">

                and company_name like #{companyName}

            </if>

            <if test="brandName != null and brandName != '' ">

                and brand_name like #{brandName}

            </if>

        </where>

    </select>
- 执行方法,测试:
    @Test

    public void testSelectByCondition() throws IOException {

        //接收参数

        int status = 1;

        String companyName = "华为";

        String brandName = "华为";

        // 处理参数

        companyName = "%" + companyName + "%";

        brandName = "%" + brandName + "%";

        //封装对象

        Brand brand = new Brand();

        brand.setStatus(status);

        brand.setCompanyName(companyName);

        brand.setBrandName(brandName);

        //1. 获取SqlSessionFactory

        String resource = "mybatis-config.xml";

        InputStream inputStream = Resources.getResourceAsStream(resource);

        SqlSessionFactory sqlSessionFactory = new SqlSessionFactoryBuilder().build(inputStream);

        //2. 获取SqlSession对象

        SqlSession sqlSession = sqlSessionFactory.openSession();

        //3. 获取Mapper接口的代理对象

        BrandMapper brandMapper = sqlSession.getMapper(BrandMapper.class);

        //4. 执行方法

		List<Brand> brands = brandMapper.selectByCondition(brand);

        System.out.println(brands);

        //5. 释放资源

        sqlSession.close();

    }
- 单条件动态查询:
- 编写接口方法:Mapper接口(参数:Brand 返回类型:List)
List<Brand> selectByConditionSingle(Brand brand);
- 编写SQL语句:
    <select id="selectByConditionSingle" resultMap="brandResultMap">

        select *

        from tb_brand

        <!--这里使用where防止无条件出现导致错误-->

        <where>

            <choose><!--相当于switch-->

                <when test="status != null"><!--相当于case-->

                    status = #{status}

                </when>

                <when test="companyName != null and companyName != '' "><!--相当于case-->

                    company_name like #{companyName}

                </when>

                <when test="brandName != null and brandName != ''"><!--相当于case-->

                    brand_name like #{brandName}

                </when>

            </choose>

        </where>

    </select>
- 执行方法,测试:
    @Test

    public void testSelectByConditionSingle() throws IOException {

        //接收参数

        int status = 1;

        String companyName = "华为";

        String brandName = "华为";

        // 处理参数

        companyName = "%" + companyName + "%";

        brandName = "%" + brandName + "%";

        //封装对象

        Brand brand = new Brand();

        //brand.setStatus(status);

        brand.setCompanyName(companyName);

        //brand.setBrandName(brandName);

        //1. 获取SqlSessionFactory

        String resource = "mybatis-config.xml";

        InputStream inputStream = Resources.getResourceAsStream(resource);

        SqlSessionFactory sqlSessionFactory = new SqlSessionFactoryBuilder().build(inputStream);

        //2. 获取SqlSession对象

        SqlSession sqlSession = sqlSessionFactory.openSession();

        //3. 获取Mapper接口的代理对象

        BrandMapper brandMapper = sqlSession.getMapper(BrandMapper.class);

        //4. 执行方法

        List<Brand> brands = brandMapper.selectByConditionSingle(brand);

        System.out.println(brands);

        //5. 释放资源

        sqlSession.close();

    }
添加数据
在这小节我们会讲到添加功能并附带返回主键:
添加功能
添加功能步骤:
- 编写接口方法:Mapper接口(参数:Brand 返回类型:void )
void add(Brand brand);
- 编写MYSQL语句:
<!--

useGeneratedKeys:对于支持自动生成记录主键的数据库,如:MySQL,SQL Server,此时设置useGeneratedKeys参数值为true,在执行添加记录之后可以获取到数据库自动生成的主键ID。

keyProperty:后面跟数据库中自动增长的列名,这时该属性值就会反馈在Java代码中

-->

<insert id="add" useGeneratedKeys="true" keyProperty="id">

        insert into tb_brand (brand_name, company_name, ordered, description, status)

        values (#{brandName}, #{companyName}, #{ordered}, #{description}, #{status});

    </insert>
- 代码调试,测试:
    @Test

    public void testAdd() throws IOException {

        //接收参数

        int status = 1;

        String companyName = "波导手机";

        String brandName = "波导";

        String description = "手机中的战斗机";

        int ordered = 100;

        //封装对象

        Brand brand = new Brand();

        brand.setStatus(status);

        brand.setCompanyName(companyName);

        brand.setBrandName(brandName);

        brand.setDescription(description);

        brand.setOrdered(ordered);

        //1. 获取SqlSessionFactory

        String resource = "mybatis-config.xml";

        InputStream inputStream = Resources.getResourceAsStream(resource);

        SqlSessionFactory sqlSessionFactory = new SqlSessionFactoryBuilder().build(inputStream);

        //2. 获取SqlSession对象

        SqlSession sqlSession = sqlSessionFactory.openSession();

        // 这里openSession的参数未设置时为手动提交信息,设置true后为自动提交事务

        //SqlSession sqlSession = sqlSessionFactory.openSession(true);

        //3. 获取Mapper接口的代理对象

        BrandMapper brandMapper = sqlSession.getMapper(BrandMapper.class);

        //4. 执行方法(这里就可以对brand的id进行提取,并输出)

        brandMapper.add(brand);

        Integer id = brand.getId();

        System.out.println(id);

        // 执行add后并未立刻执行,我们需要提交事务才能反馈到数据库中

        sqlSession.commit();

        //5. 释放资源

        sqlSession.close();

    }
修改数据
该小节中我们会介绍两种修改方法:
- 全字段修改
- 单字段修改
我们会在下述内容中一一讲解:
全字段修改
- 编写接口方法:Mapper接口(参数:所有数据 返回类型:int(修改行)或void)
int update(Brand brand);
- 编写MYSQL语句:
    <update id="update">

        update tb_brand

        set	brand_name = #{brandName},

            company_name = #{companyName},

            ordered = #{ordered},

            description = #{description},

            status = #{status}

        where id = #{id};

    </update>
- 执行方法,测试:
    @Test

    public void testUpdate() throws IOException {

        //接收参数

        int status = 0;

        String companyName = "波导手机";

        String brandName = "波导";

        String description = "波导手机,手机中的战斗机";

        int ordered = 200;

        int id = 6;

        //封装对象

        Brand brand = new Brand();

        brand.setStatus(status);

        brand.setCompanyName(companyName);

        brand.setBrandName(brandName);

        brand.setDescription(description);

        brand.setOrdered(ordered);

        brand.setId(id);

        //1. 获取SqlSessionFactory

        String resource = "mybatis-config.xml";

        InputStream inputStream = Resources.getResourceAsStream(resource);

        SqlSessionFactory sqlSessionFactory = new SqlSessionFactoryBuilder().build(inputStream);

        //2. 获取SqlSession对象

        SqlSession sqlSession = sqlSessionFactory.openSession();

        //SqlSession sqlSession = sqlSessionFactory.openSession(true);

        //3. 获取Mapper接口的代理对象

        BrandMapper brandMapper = sqlSession.getMapper(BrandMapper.class);

        //4. 执行方法

        int count = brandMapper.update(brand);

        System.out.println(count);

        //提交事务

        sqlSession.commit();

        //5. 释放资源

        sqlSession.close();

    }
单字段修改
- 编写接口方法:Mapper接口(参数:所有数据 返回类型:int(修改行)或void)
int update(Brand brand);
- 编写MYSQL语句:
    <update id="update">

        update tb_brand

        <set>

            <if test="brandName != null and brandName != ''">

                brand_name = #{brandName},

            </if>

            <if test="companyName != null and companyName != ''">

                company_name = #{companyName},

            </if>

            <if test="ordered != null">

                ordered = #{ordered},

            </if>

            <if test="description != null and description != ''">

                description = #{description},

            </if>

            <if test="status != null">

                status = #{status}

            </if>

        </set>

        where id = #{id};

    </update>
- 执行方法,测试:
    @Test

    public void testUpdate() throws IOException {

        //接收参数

        int status = 0;

        String companyName = "波导手机";

        String brandName = "波导";

        String description = "波导手机,手机中的战斗机";

        int ordered = 200;

        int id = 6;

        //封装对象

        Brand brand = new Brand();

        brand.setStatus(status);

//        brand.setCompanyName(companyName);

//        brand.setBrandName(brandName);

//        brand.setDescription(description);

//        brand.setOrdered(ordered);

        brand.setId(id);

        //1. 获取SqlSessionFactory

        String resource = "mybatis-config.xml";

        InputStream inputStream = Resources.getResourceAsStream(resource);

        SqlSessionFactory sqlSessionFactory = new SqlSessionFactoryBuilder().build(inputStream);

        //2. 获取SqlSession对象

        SqlSession sqlSession = sqlSessionFactory.openSession();

        //SqlSession sqlSession = sqlSessionFactory.openSession(true);

        //3. 获取Mapper接口的代理对象

        BrandMapper brandMapper = sqlSession.getMapper(BrandMapper.class);

        //4. 执行方法

        int count = brandMapper.update(brand);

        System.out.println(count);

        //提交事务

        sqlSession.commit();

        //5. 释放资源

        sqlSession.close();

    }
删除功能
这节介绍删除功能的两种形式:
- 单个删除
- 多个删除
我们将会在下面一一讲解:
单个删除
- 编写接口方法:Mapper接口(参数:id 返回类型:void)
void deleteById(int id);
- 编写MYSQL:
    <delete id="deleteById">

        delete from tb_brand where id = #{id};

    </delete>
- 代码执行,测试:
    @Test

    public void testDeleteById() throws IOException {

        //接收参数

        int id = 6;

        //1. 获取SqlSessionFactory

        String resource = "mybatis-config.xml";

        InputStream inputStream = Resources.getResourceAsStream(resource);

        SqlSessionFactory sqlSessionFactory = new SqlSessionFactoryBuilder().build(inputStream);

        //2. 获取SqlSession对象

        SqlSession sqlSession = sqlSessionFactory.openSession();

        //SqlSession sqlSession = sqlSessionFactory.openSession(true);

        //3. 获取Mapper接口的代理对象

        BrandMapper brandMapper = sqlSession.getMapper(BrandMapper.class);

        //4. 执行方法

        brandMapper.deleteById(id);

        //提交事务

        sqlSession.commit();

        //5. 释放资源

        sqlSession.close();

    }
多个删除
- 编写接口方法:Mapper接口(参数:int[] id 返回类型:void)
void deleteByIds(int[] ids);
- 编写MYSQL代码:
    <!--

        mybatis会将数组参数,封装为一个Map集合。

            * 默认:array = 数组

            * 使用@Param注解改变map集合的默认key的名称

    -->

    <!--

    foreach:类似于for强化语句

    collection:集合/数组

    item:数组中的单个值

    separator:分割符

    open:开始处添加符号

    close:结尾处添加符合

    -->

    <delete id="deleteByIds">

        delete from tb_brand where id

        in

        <!--这部分整合出来类似于:(id1,id2,id3....)-->

            <foreach collection="array" item="id" separator="," open="(" close=")">

                #{id}

            </foreach>

             ;

    </delete>
- 代码运行,测试:
    @Test

    public void testDeleteByIds() throws IOException {

        //接收参数

        int[] ids = {5,7,8};

        //1. 获取SqlSessionFactory

        String resource = "mybatis-config.xml";

        InputStream inputStream = Resources.getResourceAsStream(resource);

        SqlSessionFactory sqlSessionFactory = new SqlSessionFactoryBuilder().build(inputStream);

        //2. 获取SqlSession对象

        SqlSession sqlSession = sqlSessionFactory.openSession();

        //SqlSession sqlSession = sqlSessionFactory.openSession(true);

        //3. 获取Mapper接口的代理对象

        BrandMapper brandMapper = sqlSession.getMapper(BrandMapper.class);

        //4. 执行方法

        brandMapper.deleteByIds(ids);

        //提交事务

        sqlSession.commit();

        //5. 释放资源

        sqlSession.close();

    }
参数传递
MyBatis接口方法中可以接收各种各样的参数,MyBatis底层对这些参数有着不同的封装处理方法
我们在下面一一介绍:
多参数传递
在接口多参数传递中会把所有参数转移为Map集合
会转化为两种Map集合:
arg集合,下标从0开始: arg[0]
Param集合,下标从1开始: Param[1]
我们在xml中也可以直接使用arg或param来直接表示(但不推荐,因为不能直观得到信息)
我们所推荐的做法是使用@Param注解:
在参数前加上注解@Param("")
注意:这里使用Param注解实际上是对Param集合的键进行修改,也就是说你的Param集合将不再能够使用
单参数传递
常见的单参数传递分为六种:
POJO类型: 直接使用, 属性名 和 参数占位符 名称一致即可
Map集合: 直接使用,键名 和 参数占位符 名称一致即可
Collection: 封装为Map集合
- map.put("arg0",collection集合);
- map.put("collection",collection集合);
List: 封装为Map集合
- map.put("arg0",List集合);
- map.put("collection",List集合);
- map.put("list",List集合);
Array:封装为Map
- map.put("arg0",数组);
- map.put("array",数组);
其他类型:直接使用
注解开发
我们先来介绍注解开发的格式:
- 注解开发写在Mapper接口的方法中
// 相当于节省了xml的一步,直接在接口中定义方法

@Select("select * from tb_user where id = #{id}")

List<Brand> selectAll();
当然,注解的方法也分为四种:
- @Select
- @Insert
- @Update
- @Delete
注解的优缺点:
- 优点 : 注解完成简单功能,方便快捷
- 缺点 : 注解会导致Java代码繁琐,在接口中书写大量Java和MYSQL代码导致可读性变差
使用注解来映射简单语句会使代码显得更加简洁,但对于稍微复杂一点的语句,Java 注解不仅力不从心,还会让你本就复杂的 SQL 语句更加混乱不堪。 因此,如果你需要做一些很复杂的操作,最好用 XML 来映射语句。
选择何种方式来配置映射,以及认为是否应该要统一映射语句定义的形式,完全取决于你和你的团队。 换句话说,永远不要拘泥于一种方式,你可以很轻松的在基于注解和 XML 的语句映射方式间自由移植和切换。
结束语
好的,关于MyBatis的内容就介绍到这里,希望能为你带来帮助!
附录
该文章属于学习内容,具体参考B站黑马程序员陈老师的JavaWeb课程
这里附上链接:01-MyBatis简介_哔哩哔哩_bilibili
最新文章
- ubuntu 16.04安装docker
- 用js写的比较简单3D旋转效果
- java基础3_流程控制语句
- Alpha版本冲刺现场演示和阶段验收的总结
- 支持取消操作和暂停操作的Backgroundworker
- fibonacci数列从a到b的个数
- JavaScript并非“按值传递”
- 工具项与菜单项实现相同的功能(DevExpress)
- excel中 lookup的使用
- BinaryReader 和BinaryWriter 读写类对象
- 大数据时代的数据存储,非关系型数据库MongoDB(一)
- API接口服务端
- 一、 开篇(ASP.NET MVC5 系列)
- FPGA浮点数定点化
- lambda-基于谓词筛选值序列
- django之路由层
- lakala GradientBoostedTrees
- 如何下载spring的jar包?
- CSS精灵技术
- HBase在数据统计应用中的使用心得