linux部署django项目流程(全)
2024-08-20 07:16:24
1.python3和python2共存配置
流程在下面网址中
https://www.cnblogs.com/vinic-xxm/p/11358894.html
2.安装依赖包
yum install zlib-devel bzip2-devel openssl-devel ncurses-devel sqlite-devel readline-devel tk-devel gcc make -y
3.导出django开发环境清单
pip freeze > packet.txt
4.在linux环境中批量安装清单环境包
pip3 install -r packer.txt
5.将完整的django项目上传到linux系统中
6.项目测试,关闭防火墙
systemctl stop firewalld
运行项目观察是否正常运行
7.安装配置uwsgi
pip3 install uwsgi
创建软连接
ln -s /usr/local/python3/bin/uwsgi /usr/bin/uwsgi
8测试uwsgi环境
uwsgi --http 10.10.14.180:80 --file 项目名/wsgi.py --static-map=/static=static
9配置uwsgi配置文件
mkdir script

vim uwsgi.ini

[uwsgi]

chdir=/opt/OurBlog   #项目目录

module=OurBlog.wsgi:application  #指定项目的application

socket=/opt/script/uwsgi.sock  #指定sock的文件路径

workers=5  #进程个数

pidfile=/opt/script/uwsgi.pid

http=192.168.2.69:8000  #指定IP端口

static-map=/static=/opt/OurBlog/static  #指定静态文件

uid=root  #用户

gid=root  #组

master=true  #启用主进程

vacuum=true  #自动移除unix Socket和pid文件当服务停止的时候

enable-threads=true #启用线程

thunder-lock=true #序列化接受的内容,如果可能的话

harakiri=30 #设置自中断时间

post-buffering=4096 #设置缓冲

daemonize=/opt/script/uwsgi.log #设置日志目录
10启动uwsgi
Uwsgi --ini uwsgi.ini

文件夹下多出uwsgi.log,uwsgi.pid,uwsgi.sock三个文件
11安装nginx
wget -c https://nginx.org/download/nginx-1.12.2.tar.gz
12解压nginx包
tar -zxvf nginx...
13编译安装
./configure \

make && make install
14创建软连接
ln -s /usr/local/nginx/sbin/nginx /usr/bin/nginx
15启动nginx
nginx
16关闭uwsgi及nginx
pkill -9 uwsgi

pkill -9 nginx
17备份nginx配置文件
在/usr/local/nginx/conf目录下
cp nginx.conf nginx.conf.bak
18创建error.log日志文件
在/var/log目录下
mkdir nginx
cd nginx
touch error.log
19修改nginx配置信息
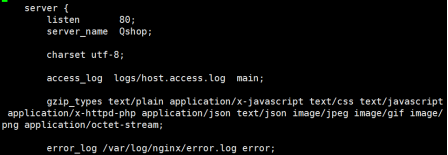
将format注释解掉!
access_log /var/log/nginx/access.log main; #访问日志路径,注意:这个目录可能没有,需要创建
gzip_types text/plain application/x-javascript text/css text/javascript application/x-httpd-php application/json text/json image/jpeg image/gif image/png application/octet-stream; #压缩格式
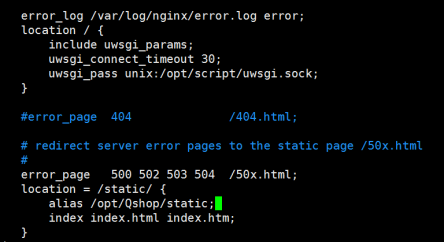
error_log /var/log/nginx/error.log error; #错误日志注意:这个目录可能没有,需要创建
location / {
include uwsgi_params; #nginx加载uwsgi模块
uwsgi_connect_timeout 30; #连键超时时间
uwsgi_pass unix:/opt/script/uwsgi.sock; #nginx对应的uwsgi socket文件
}
location = /static/ {
alias /opt/OurBlog/static; #静态文件路径
index index.html index.htm; #首页
}
20关闭uwsgi和nginx然后重启项目
修改uwsgi.ini文件中ip为127.0.0.1:8000
查看80端口命令
netstat -nltp | grep 80最新文章
- Yii2 assets注册的css样式文件没有加载
- [deviceone开发]-do_SegmentView和do_SlideView联动的示例
- 各组对final发布产品的排名
- 同一服务器配置DataGuard
- Zepto源码
- SQL事物
- 直播源格式转换教程——rtmp/rtsp/http/m3u8!!
- 使用异步任务加载网络上json数据并加载到ListView中
- openstack instance snapshort
- Maven POM.xml (转)
- Benefits of Cold Showers: 7 Reasons Why Taking Cool Showers Is Good For Your Health
- Entity Framework 6.1-Code First【转】
- vue-router的简单实现原理
- python 全栈开发,Day69(Django的视图层,Django的模板层)
- error: C++ preprocessor "/lib/cpp" fails sanity check错误解决方法
- Asp.Net上传大文件带进度条swfupload
- noip 瑞士轮 - 归并
- centos6搭建redis集群搭建(单机多节点)
- springTask任务调度
- js.ajax优缺点,工作流程