vuejs之vue和springboot后端进行通信
一、新建一个vue项目,建立好后的相关文件
查看一下新建好的vue项目的结构:
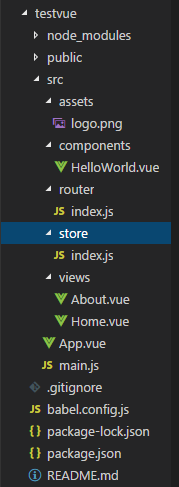
当前各个文件中的内容:
App.vue:主入口
<template>

  <div id="app">

    <div id="nav">

      <router-link to="/">Home</router-link> |

      <router-link to="/about">About</router-link>

    </div>

    <router-view/>

  </div>

</template>

<style>

#app {

  font-family: Avenir, Helvetica, Arial, sans-serif;

  -webkit-font-smoothing: antialiased;

  -moz-osx-font-smoothing: grayscale;

  text-align: center;

  color: #2c3e50;

}

#nav {

  padding: 30px;

}

#nav a {

  font-weight: bold;

  color: #2c3e50;

}

#nav a.router-link-exact-active {

  color: #42b983;

}

</style>
main.js:Vue.config.productionTip用于切换是生产环境还是开发环境。这里创建Vue对象的时候同时关联上了App.vue中的id名为app的div标签。引入路由router的js文件以及存储数据的store。
import Vue from 'vue'

import App from './App.vue'

import router from './router'

import store from './store'

Vue.config.productionTip = false

new Vue({

  router,

  store,

  render: h => h(App)

}).$mount('#app')
router/index.js:这里定义路由对应的模板。有两种方式,一种是在开头先引入,例如Home.vue。另一种是先不引入,之后在component中引入。
import Vue from 'vue'

import VueRouter from 'vue-router'

import Home from '../views/Home.vue'

Vue.use(VueRouter)

const routes = [

  {

    path: '/',

    name: 'Home',

    component: Home

  },

  {

    path: '/about',

    name: 'About',

    // route level code-splitting

    // this generates a separate chunk (about.[hash].js) for this route

    // which is lazy-loaded when the route is visited.

    component: () => import(/* webpackChunkName: "about" */ '../views/About.vue')

  }

]

const router = new VueRouter({

  mode: 'history',

  base: process.env.BASE_URL,

  routes

})

export default router
store/index.js
import Vue from 'vue'

import Vuex from 'vuex'

Vue.use(Vuex)

export default new Vuex.Store({

  state: {

  },

  mutations: {

  },

  actions: {

  },

  modules: {

  }

})
views/About.vue
<template>

  <div class="about">

    <h1>This is an about page</h1>

  </div>

</template>
views/Home.vue:这里面可以将component中的vue文件进行引入。
<template>

  <div class="home">

    <img alt="Vue logo" src="../assets/logo.png">

    <HelloWorld msg="Welcome to Your Vue.js App"/>

  </div>

</template>

<script>

// @ is an alias to /src

import HelloWorld from '@/components/HelloWorld.vue'

export default {

  name: 'Home',

  components: {

    HelloWorld

  }

}

</script>
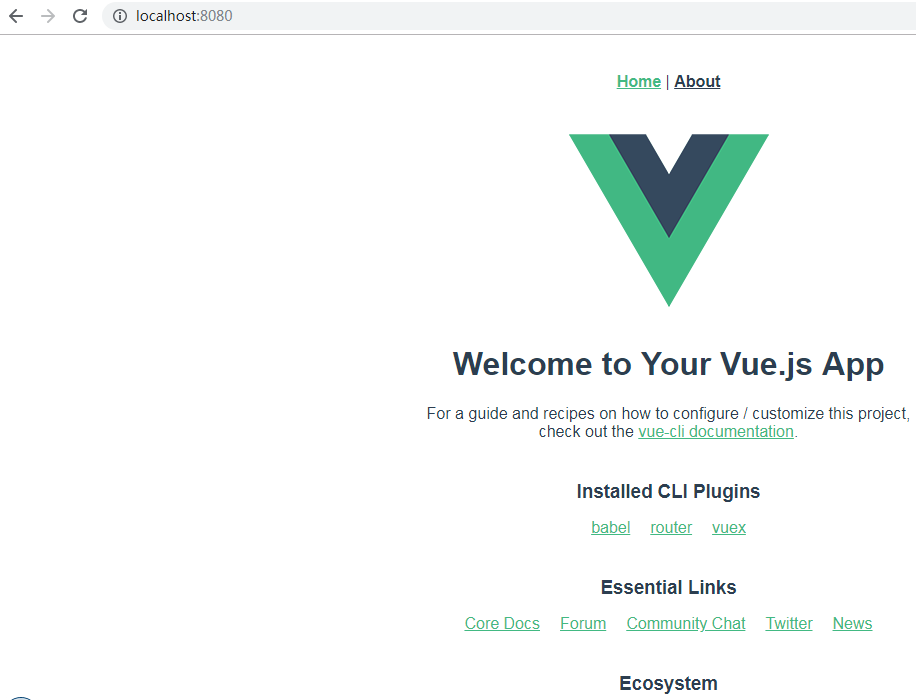
当前效果是:
点击About:
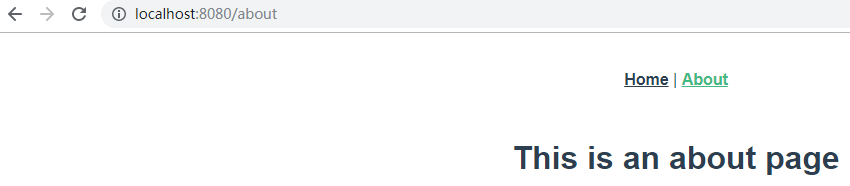
就将内容切换到了About.vue。
二、自己定义页面并进行路由
在views下新建一个Test.vue
<template>

  <!--只允许有一个根节点-->

  <div class="test">

    <table>

      <tr>

        <td>编号</td>

        <td>姓名</td>

        <td>年龄</td>

        <td>性别</td>

        <td>邮箱</td>

        <td>爱好</td>

        <td>自我介绍</td>

      </tr>

      <tr v-for="(item, index) in users"

          :key="index">

        <td>{{item.id}}</td>

        <td>{{item.username}}</td>

        <td>{{item.age}} </td>

        <td>{{item.gender}}</td>

        <td>{{item.email}}</td>

        <td>{{item.hobby}}</td>

        <td>{{item.introduce}}</td>

      </tr>

    </table>

  </div>

</template>

<script>

export default {

  name: "Book",

  data () {

    return {

      msg: "hello world",

      users: {},

    }

  },

  created () {

    const that = this;

    axios.get('http://localhost:8181/user/findAll/')

      .then(function (response) {

        console.log(response);

        that.users = response.data;

      })

  }

}

</script>

<style scoped>

</style>
在router/index.js中
import Vue from 'vue'

import VueRouter from 'vue-router'

import Home from '../views/Home.vue'

import Test from '../views/Test.vue'

Vue.use(VueRouter)

const routes = [

  {

    path: '/test',

    name: 'Test',

    component: Test,

  },

  {

    path: '/',

    name: 'Home',

    component: Home

  },

  {

    path: '/about',

    name: 'About',

    // route level code-splitting

    // this generates a separate chunk (about.[hash].js) for this route

    // which is lazy-loaded when the route is visited.

    component: () => import(/* webpackChunkName: "about" */ '../views/About.vue')

  }

]

const router = new VueRouter({

  mode: 'history',

  base: process.env.BASE_URL,

  routes

})

export default router
在App.vue中
<template>

  <div id="app">

    <div id="nav">

      <router-link to="/">Home</router-link> |

      <router-link to="/about">About</router-link> |

      <router-link to="/test">Test</router-link>

    </div>

    <router-view/>

  </div>

</template>

<style>

#app {

  font-family: Avenir, Helvetica, Arial, sans-serif;

  -webkit-font-smoothing: antialiased;

  -moz-osx-font-smoothing: grayscale;

  text-align: center;

  color: #2c3e50;

}

#nav {

  padding: 30px;

}

#nav a {

  font-weight: bold;

  color: #2c3e50;

}

#nav a.router-link-exact-active {

  color: #42b983;

}

</style>
三、新建一个springboot项目,勾选上lombok、web、jpa、mysql
(1)配置连接数据库以及jpa相关:后盾使用8181端口,前端使用8080端口。
spring:

  datasource:

    url: jdbc:mysql://localhost:3306/test

    username: root

    password: 123456

    driver-class-name: com.mysql.jdbc.Driver

  jpa:

    #控制台显示SQL

    show-sql: true

    properties:

     hibernate:

      format_sql: true

server:

  port: 8181
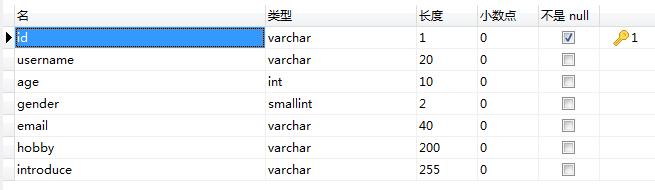
(2)数据库相关设计
(3) 新建一个entity包用于存放实体类、一个repository包用于存放jpa类,一个config包用于存放后端和前端跨域交互配置,一个controller。
User.java
package com.gong.springbootvue.entity;

import lombok.Data;

import javax.persistence.Entity;

import javax.persistence.Id;

@Entity

@Data

public class User {

    @Id

    private Integer id;

    private String username;

    private Integer age;

    private Integer gender;

    private String email;

    private String hobby;

    private String introduce;

}
Entity用于标识是一个实体类,Data用于自动生成getter和setter等方法,Id用于标识主键。
UserRepository.java
package com.gong.springbootvue.repository;

import com.gong.springbootvue.entity.User;

import org.springframework.data.jpa.repository.JpaRepository;

public interface UserRepository  extends JpaRepository<User,Integer> {

}
继承了JpaRepository之后就会有相应的增删改查方法了,不需要自己写,第一个泛型是实体类类型,第二个泛型是主键类型。
UserController.java
package com.gong.springbootvue.controller;

import com.gong.springbootvue.entity.User;

import com.gong.springbootvue.repository.UserRepository;

import org.springframework.beans.factory.annotation.Autowired;

import org.springframework.stereotype.Controller;

import org.springframework.web.bind.annotation.RequestMapping;

import org.springframework.web.bind.annotation.ResponseBody;

import java.util.List;

@Controller

@RequestMapping("/user")

public class UserController {

    @Autowired

    UserRepository userRepository;

    @ResponseBody

    @RequestMapping("/findAll")

    public List<User> getAll(){

        return userRepository.findAll();

    }

}
VueConfig.java
package com.gong.springbootvue.config;

import org.springframework.context.annotation.Configuration;

import org.springframework.web.servlet.config.annotation.CorsRegistry;

import org.springframework.web.servlet.config.annotation.WebMvcConfigurer;

@Configuration

public class VueConfig implements WebMvcConfigurer{

    @Override

    public void addCorsMappings(CorsRegistry registry) {

        registry.addMapping("/**")

                .allowedOrigins("*")

                .allowedMethods("GET","HEAD","POST","PUT","DELETE","OPTIONS")

                .allowCredentials(true)

                .maxAge(3600)

                .allowedHeaders("*");

    }

}
四、分别启动后端服务和前端服务
先看下后端是否能正确运行:

再看下前端:
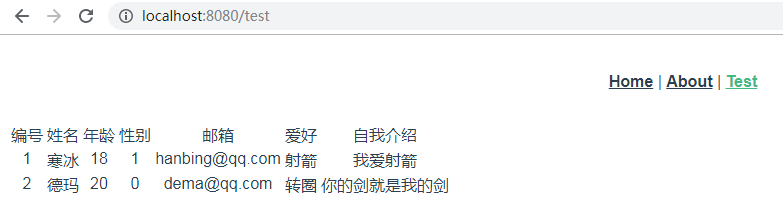
说明前端与后端交互成功。
总结:
后端中要配置与前端不同的端口,同时定义一个配置类用于配置与Vue进行交互。
前端使用axios发送请求获取后端传过来的json格式的数据,相关数据可以赋给data中的数据。使用created()方法在刷新页面时就发送请求。
最新文章
- ES6之变量常量字符串数值
- PSP(11.24~11.30)
- postgreSQL 统计语句
- CSS3 使用自定义字体
- java json与对象或者集合互转
- Enterprise Library - Data Access Application Block 6.0.1304
- php 魔鬼训练
- 在Visual Studio 2013/2015上使用C#开发Android/IOS安装包和操作步骤
- 通过正则表达式获取url中参数
- 如何优化cocos2d程序的内存使用和程序大小:第一部分_(转)
- Qt下如何修改文件的时间(全平台修改)
- 如何在.Net中使用Redis
- CSharp Oracle 登陆
- Nodejs的模块系统以及require的机制
- 分布式版本控制系统Git的安装及使用
- 【LeetCode】89.Gary Code
- linux安装jdk和tomcat命令
- 基于opencv和QT的摄像头采集代码( GoQTtemplate3持续更新)
- format格式
- PHP实现无符号右移(js中的 >>>)