2019-07-29 ThinkPHP简单的增删改查
2024-08-24 14:39:45
在model里面,建立表名Model.class.php的控制器,用以连接数据表,代码如下
namespace Home\Model;

use Think\Model;

class NewsModel extends Model{

}
模型类的作用大多数情况是操作数据表的,如果按照系统的规范来命名模型类的话,大多数情况下是可以自动对应数据表。模型类的命名规则是除去表前缀的数据表名称,采用驼峰法命名,并且首字母大写,然后加上模型层的名称(默认定义是Model)。
有了数据表信息后,我们就在控制器中,传送数据,显示页面。
class IndexController extends Controller {

    public function index(){

                $res = D('news');

            $row = $res->select();

            $this->assign('arr',$row);

            $this->display();

        }

    }
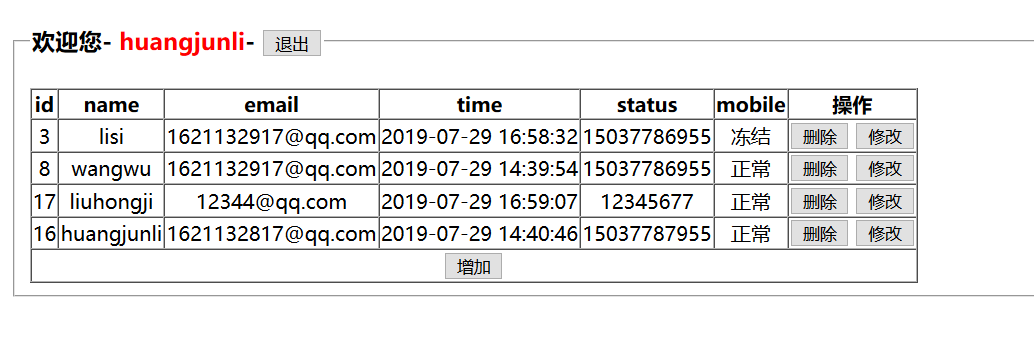
传入数据后,我们就可以建立相应的视图代码,并把页面显示出来。
html部分代码
<html>

 <head><title>列表页面</title></head>

 <body>

    <fieldset>

        <legend><h3>欢迎您- <font color="red">{$cname}</font>- <button onclick="exit_c()">退出</button></h3></legend>

    <table border=1 cellspacing=0>

        <th>id</th>

        <th>name</th>

        <th>email</th>

        <th>time</th>

        <th>status</th>

        <th>mobile</th>

        <th>操作</th>

        <foreach name="arr" item="vo">

            <tr align="center">

                <td>{$vo.id}</td>

                <td>{$vo.name}</td>

                <td>{$vo.email}</td>

                <!--时间戳格式化-->

                <td>{$vo.time|date="Y-m-d H:i:s",###}</td>

                <td>{$vo.mobile}</td>

                <td>

                <!--if else 判断语句-->

                <if condition="$vo['status'] eq 1">正常

                <elseif condition="$vo['status'] eq 2"/>冻结

                </if>

                </td>

                <td>

                    <button onclick="del({$vo['id']})">删除</button>

                    <button onclick="upd({$vo['id']})">修改</button>

                </td>

            </tr>

        </foreach>

        <tr>

            <td colspan=7 align="center">

                <button onclick="adda()">增加</button>

            </td>

        </tr>

    </table>

    </fieldset>

 </body>

 </html>

 <script type="text/javascript">

    //删除

    function del(id){

        location.href="del?id="+id;

    }

    //修改

    function upd(id)

    {

        location.href="upda?id="+id;

    }

    //添加

    function adda()

    {

        location.href="adda";

    }

    //清理掉cookie

    function exit_c(){

        location.href="exit_c";

    }

 </script>
增
点击增加按钮后,触发adda方法,去找到index控制器中的adda方法。
//显示添加页

    public function adda(){

        $this->display('user_add');

    }
再去创建视图
<html>

    <head><title>用户添加</title></head>

        <fieldset>

        <legend><h3>用户添加</h3></legend>

    <form action="add" method="post">

        用户名:<input type="text" name="name"><br><br>

        <input type="hidden" value="{$row['id']}" name="id"/>

        用户密码:<input type="password" name="password"><br><br>

        邮箱号:<input type="text" name="email"><br><br>

        手机号:<input type="text" name="mobile"><br><br>

        <input type="submit" value="提交">

        </fieldset>

    </form>

</html>
然后看action后面是什么,它会自动去寻找index控制器的相对应方法,然后我们只需要接值,创建新数据即可。
//添加处理页面

    public function add(){

        $res = D('news');

        $data['name']=$_POST['name'];

        $data['email']=$_POST['email'];

        $data['mobile']=$_POST['mobile'];

        $data['password']=$_POST['password'];

        $data['time']=time();

        $data['status']='1';

        $row = $res->add($data);

        if($row)

            {

                $this->success('添加成功','/index.php/home/index/index',3);

            }else{

                $this->error('添加失败','/index.php/home/index/index',3);

            }

        }
删
删除与添加方法类似,点击html中的删除按钮,传一个id,找到index控制器对应方法,根据id删除即可
//删除处理

    public function del(){

        $res = D('news');

        $id=$_GET['id'];

        $where = array('id'=>$id);

        $row = $res->where($where)->delete();

        if($row)

            {

                $this->success('删除成功','/index.php/home/index/index');

            }else{

                $this->error('删除失败','/index.php/home/index/index');

            }

    }
改
改的思路是,点击html中修改按钮,传id给相对应的index控制器中的方法,查出一条数据,再把这一条数据传送给修改显示页,在修改后,再把修改后的数据传入index控制器中的方法修改即可。
//修改时查出要修改的数据 并且传送数据 显示修改页

    public function upda(){

        $id=$_GET['id'];

        $res = D('news');

        $where = array('id'=>$id);

        $row = $res->where($where)->find();

        $this->assign('row',$row);

        $this->display('user_update');

    }
html页代码
<html>

    <head><title>数据修改页面</title></head>

        <fieldset>

        <legend><h3>用户修改</h3></legend>

    <form action="upd" method="post">

        用户名:<input type="text" name="name" value="{$row['name']}"><br><br>

        <input type="hidden" value="{$row['id']}" name="id"/>

        用户密码:<input type="password" name="password" value="{$row['password']}"><br><br>

        邮箱号:<input type="text" name="email" value="{$row['email']}"><br><br>

        手机号:<input type="text" name="mobile" value="{$row['mobile']}"><br><br>

        用户状态:<select name="status">

                <option value="1" <if condition="$row['status'] eq 1">selected</if>>正常</option>

                <option value="2" <if condition="$row['status'] eq 2">selected</if>>冻结</option>

        </select><br>

        <input type="submit" value="提交">

    </form>

    </fieldset>

</html>
再传入index控制器,修改
//修改的处理页面 接到新值 并且进行修改处理

    public function upd(){

        $res = D('news');

        $data['name']=$_POST['name'];

        $data['password']=$_POST['password'];

        $data['status']=$_POST['status'];

        $data['time']=time();

        $data['email']=$_POST['email'];

        $data['mobile']=$_POST['mobile'];

        $id = $_POST['id'];

        //echo $id;

        $where = array('id'=>$_POST['id']);

        $row = $res->where($where)->save($data);

        if($row)

            {

                $this->success('修改成功','/index.php/home/index/index');

            }else{

                $this->error('修改失败','/index.php/home/index/index');

            }

    }
验证码
//实例化验证码类 生成一张验证码图片

    public function code(){

        $code = new \Think\Verify();

        $code->codeSet = "0123456789";

        $code->entry();

    }

    //登录时 判断是否有post传值 如果没有则显示登录页 若有则进行登陆处理

    public function user_login(){

        if(IS_POST){

            $uname = I('post.name');

            $upassword = I('post.password');

            $code = I('post.code');

            $row = $this->check_code($code);

            if($row){

                    $user = D('news');

                    $where = array('name'=>$uname,"password"=>$upassword);

                    $user_row = $user->where($where)->find();

                    if($user_row){

                        cookie('name',$uname,3600);

                        $this->success('登录成功','/index.php/home/index/index',3);

                    }else{

                        $this->error('登录失败 账号或密码有误','/index.php/home/index/user_login',3);

                    }

            }else{

                $this->error('登录失败 验证码错误','/index.php/home/index/user_login',3);

            }

        }else{

            $this->display();

        }

    }

    //验证验证码的方法

    public function check_code($code){

        $verify = new \Think\Verify();

        return $verify->check($code,$id);

    }
html部分代码
<html>

    <head><title>用户登录</title></head>

    <body>

        <fieldset>

        <legend><h3>用户登录</h3></legend>

        <form action="user_login" method="post">

            用户名:<input type="text" name="name"><br><br>

            用户密码:<input type="password" name="password"><br><br>

            验证码:<input type="text" name="code"><img src="/index.php/home/index/code" alt="验证码图片"  width="150px" onclick="this.src='/index.php/home/index/code?time='+Math.random()"/><br><br>

            <input type="submit" value="登录">

        </form>

        </fieldset>

    </body>

</html>
最新文章
- JSON.stringify的使用方法
- 自己修改的两个js文件
- SQL Server FileStream
- 磁盘阵列RAID原理、种类及性能优缺点对比
- iOS开发笔记9:NSUserDefaults存储自定义实体对象
- iScroll5 API速查随记
- SQL Server 2012大数据导入Oracle的解决方案
- CART
- 属性动画(Property Animation)资源
- Zabbix监控IO
- sass 变量
- 漫谈“采样”(sampling)
- nginx rewrite规则笔记
- 如何使用iOS开发者授权以及如何申请证书
- Linux下Oracle开机启动
- WebRTC 学习之 Conference 实现混音混屏
- [No0000FA]C# 接口(Interface)
- unigui如何把webApp的子功能映射到微信公众号菜单
- nginx 反向代理说明
- ThinkPhp输入参数过滤