nginx实战四
nginx负载均衡
Nginx通过upstream和proxy_pass实现了负载均衡。本质上也是Nginx的反向代理功能,只不过后端的server为多个。
1.简单的轮询
upstream www {

    server 172.37.150.109:80;

    server 172.37.150.101:80;

    server 172.37.150.110:80;

}

server {

    listen 80;

    server_name www.aminglinux.com;

    location / {

        proxy_pass http://www/; (对应upstream的名字)

        proxy_set_header Host   $host;

        proxy_set_header X-Real-IP      $remote_addr;

        proxy_set_header X-Forwarded-For $proxy_add_x_forwarded_for;

    }

}

说明:当被代理的机器有多台时,需要使用upstream来定义一个服务器组,

其中www名字可以自定义,在后面的proxy_pass那里引用。

这样nginx会将请求均衡地轮询发送给www组内的三台服务器。
2.带权重轮询+ip_hash算法
upstream www {

    server 172.37.150.109:80 weight=50;

    server 172.37.150.101:80 weight=100;

    server 172.37.150.110:80 weight=50;

    ip_hash;

}

server {

    listen 80;

    server_name www.aminglinux.com;

    location / {

        proxy_pass http://www/;

        proxy_set_header Host   $host;

        proxy_set_header X-Real-IP      $remote_addr;

        proxy_set_header X-Forwarded-For $proxy_add_x_forwarded_for;

    }

}

说明:可以给www组内的三台机器配置权重,权重越高,则分配到的请求越多。

ip_hash为nginx负载均衡算法,原理很简单,它根据请求所属的客户端IP计算得到一个数值,然后把请求发往该数值对应的后端。

所以同一个客户端的请求,都会发往同一台后端,除非该后端不可用了。ip_hash能够达到保持会话的效果。
3.upstream其他配置
upstream www {

        server 172.37.150.109:80 weight=50 max_fails=3 fail_timeout=30s;

        server 172.37.150.101:80 weight=100;

        server 172.37.150.110:80 down;

        server 172.37.150.110:80 backup;

}

server

{

    listen 80;

    server_name www.aminglinux.com;

    location / {

        proxy_next_upstream off;

        proxy_pass http://www/;

        proxy_set_header Host   $host;

        proxy_set_header X-Real-IP      $remote_addr;

        proxy_set_header X-Forwarded-For $proxy_add_x_forwarded_for;

    }

}

说明:down,表示当前的server不参与负载均衡;

backup,为预留的机器,当其他的server(非backup)出现故障或者忙的时候,才会请求backup机器;

max_fails,允许请求失败的次数,默认为1。当失败次数达到该值,就认为该机器down掉了。 失败的指标是由proxy_next_upstream模块定义,其中404状态码不认为是失败。

fail_timeount,定义失败的超时时间,也就是说在该时间段内达到max_fails,才算真正的失败。默认是10秒。

proxy_next_upstream,通过后端服务器返回的响应状态码,表示服务器死活,可以灵活控制后端机器是否加入分发列表。

语法: proxy_next_upstream error | timeout | invalid_header | http_500 | http_502 | http_503 | http_504 |http_404 | off ...;

默认值: proxy_next_upstream error timeout

error      # 和后端服务器建立连接时,或者向后端服务器发送请求时,或者从后端服务器接收响应头时,出现错误

timeout    # 和后端服务器建立连接时,或者向后端服务器发送请求时,或者从后端服务器接收响应头时,出现超时

invalid_header  # 后端服务器返回空响应或者非法响应头

http_500   # 后端服务器返回的响应状态码为500

http_502   # 后端服务器返回的响应状态码为502

http_503   # 后端服务器返回的响应状态码为503

http_504   # 后端服务器返回的响应状态码为504

http_404   # 后端服务器返回的响应状态码为404

off        # 停止将请求发送给下一台后端服务器
4.根据不同的uri
upstream aa.com {

                      server 192.168.0.121;

                      server 192.168.0.122;

     }

    upstream bb.com {

                       server 192.168.0.123;

                       server 192.168.0.124;

    }

    server {

        listen       80;

        server_name  www.aminglinux.com;

        location ~ aa.php

        {

            proxy_pass http://aa.com/;

            proxy_set_header Host   $host;

            proxy_set_header X-Real-IP      $remote_addr;

            proxy_set_header X-Forwarded-For $proxy_add_x_forwarded_for;

        }

        location ~ bb.php

        {

              proxy_pass http://bb.com/;

              proxy_set_header Host   $host;

              proxy_set_header X-Real-IP      $remote_addr;

              proxy_set_header X-Forwarded-For $proxy_add_x_forwarded_for;

        }

        location /

        {

              proxy_pass http://bb.com/;

              proxy_set_header Host   $host;

              proxy_set_header X-Real-IP      $remote_addr;

              proxy_set_header X-Forwarded-For $proxy_add_x_forwarded_for;

        }

}

说明:请求aa.php的,会到aa.com组,请求bb.php的会到bb.com,其他请求全部到bb.com。
5.根据不同的目录
upstream aaa.com

{

            server 192.168.111.6;

}

upstream bbb.com

{

            server 192.168.111.20;

}

server {

        listen 80;

        server_name www.aminglinux.com;

        location /aaa/

        {

            proxy_pass http://aaa.com/aaa/;

            proxy_set_header Host   $host;

            proxy_set_header X-Real-IP      $remote_addr;

            proxy_set_header X-Forwarded-For $proxy_add_x_forwarded_for;

        }

        location /bbb/

        {

            proxy_pass http://bbb.com/bbb/;

            proxy_set_header Host   $host;

            proxy_set_header X-Real-IP      $remote_addr;

            proxy_set_header X-Forwarded-For $proxy_add_x_forwarded_for;

        }

        location /

        {

            proxy_pass http://bbb.com/;

            proxy_set_header Host   $host;

            proxy_set_header X-Real-IP      $remote_addr;

            proxy_set_header X-Forwarded-For $proxy_add_x_forwarded_for;

        }

}
nginx访问控制-deny和allow
https://coding.net/u/aminglinux/p/nginx/git/blob/master/access/deny_allow.md
Nginx的deny和allow指令是由ngx_http_access_module模块提供,Nginx安装默认内置了该模块。

除非在安装时有指定 --without-http_access_module。
语法:allow/deny address | CIDR | unix: | all

它表示,允许/拒绝某个ip或者一个ip段访问.如果指定unix:,那将允许socket的访问。

注意:unix在1.5.1中新加入的功能。

在nginx中,allow和deny的规则是按顺序执行的。
示例1:

location /

{

    allow 192.168.0.0/24;

    allow 127.0.0.1;

    deny all;

}

说明:这段配置值允许192.168.0.0/24网段和127.0.0.1的请求,其他来源IP全部拒绝。

示例2:

location ~ "admin"

{

    allow 110.21.33.121;

    deny all

}

说明:访问的uri中包含admin的请求,只允许110.21.33.121这个IP的请求。
实验:添加deny all
[root@centos-03 vhost]# vim 1.conf ^C

[root@centos-03 vhost]# cat 1.conf

server {

        listen 80;

        server_name www.1.com;

        index index.html;

        root /data/wwwroot/www.1.com;

        access_log /tmp/1.log;

        deny all;

        location ^~ /abc

        {

                echo "^~";

        }

        location = /abc/1.html

        {

                echo "=";

        }

}

[root@centos-03 vhost]#
1.再访问www.1.com时变成403了
[root@centos-03 vhost]# /usr/local/nginx/sbin/nginx -t

nginx: the configuration file /usr/local/nginx/conf/nginx.conf syntax is ok

nginx: configuration file /usr/local/nginx/conf/nginx.conf test is successful

[root@centos-03 vhost]# /usr/local/nginx/sbin/nginx -s reload

[root@centos-03 vhost]# curl -x127.0.0.1:80 www.1.com -I

HTTP/1.1 403 Forbidden

Server: nginx/1.14.0

Date: Fri, 27 Jul 2018 18:40:04 GMT

Content-Type: text/html

Content-Length: 169

Connection: keep-alive

[root@centos-03 vhost]#
2.我们再添加 allow 127.0.0.1;访问正常(也可以添加一个网段allow 192.168.242.0/24)
[root@centos-03 vhost]# vim 1.conf ^C

[root@centos-03 vhost]# cat 1.conf

server {

        listen 80;

        server_name www.1.com;

        index index.html;

        root /data/wwwroot/www.1.com;

        access_log /tmp/1.log;

        allow 127.0.0.1;

        deny all;

        location ^~ /abc

        {

                echo "^~";

        }

        location = /abc/1.html

        {

                echo "=";

        }

}

[root@centos-03 vhost]# /usr/local/nginx/sbin/nginx -t

nginx: the configuration file /usr/local/nginx/conf/nginx.conf syntax is ok

nginx: configuration file /usr/local/nginx/conf/nginx.conf test is successful

[root@centos-03 vhost]# /usr/local/nginx/sbin/nginx -s reload

[root@centos-03 vhost]# curl -x127.0.0.1:80 www.1.com

www.1.com

[root@centos-03 vhost]#
3.允许网段192.168.242.0/24网段的访问admin目录,其他的都拒绝
[root@centos-03 vhost]# vim 1.conf ^C

[root@centos-03 vhost]# cat 1.conf

server {

        listen 80;

        server_name www.1.com;

        index index.html;

        root /data/wwwroot/www.1.com;

        access_log /tmp/1.log;

        location ~ admin

        {

                allow 192.168.242.0/24;

                deny all;

        }

        location ^~ /abc

        {

                echo "^~";

        }

        location = /abc/1.html

        {

                echo "=";

        }

}

[root@centos-03 vhost]#
[root@centos-03 vhost]# curl -x192.168.242.133:80 www.1.com -I

HTTP/1.1 403 Forbidden

Server: nginx/1.14.0

Date: Fri, 27 Jul 2018 18:57:04 GMT

Content-Type: text/html

Content-Length: 169

Connection: keep-alive

[root@centos-03 vhost]# curl -x192.168.242.133:80 www.1.com/admin/ -I

HTTP/1.1 404 Not Found

Server: nginx/1.14.0

Date: Fri, 27 Jul 2018 18:57:22 GMT

Content-Type: text/html

Content-Length: 169

Connection: keep-alive

[root@centos-03 vhost]#
nginx访问控制-location
https://coding.net/u/aminglinux/p/nginx/git/blob/master/access/location.md
在生产环境中,我们会对某些特殊的请求进行限制,比如对网站的后台进行限制访问。

这就用到了location配置。
location /aming/

{

    deny all;

}

说明:针对/aming/目录,全部禁止访问,这里的deny all可以改为return 403.
location ~ ".bak|\.ht"

{

    return 403;

}

说明:访问的uri中包含.bak字样的或者包含.ht的直接返回403状态码。

测试链接举例:

1. www.aminglinux.com/123.bak

2. www.aminglinux.com/aming/123/.htalskdjf
location ~ (data|cache|tmp|image|attachment).*\.php$

{

    deny all;

}

说明:请求的uri中包含data、cache、tmp、image、attachment并且以.php结尾的,全部禁止访问。

测试链接举例:

1. www.aminglinux.com/aming/cache/1.php

2. www.aminglinux.com/image/123.phps

3. www.aminglinux.com/aming/datas/1.php
[root@centos-03 vhost]# vim 1.conf ^C

[root@centos-03 vhost]# cat 1.conf

server {

        listen 80;

        server_name www.1.com;

        index index.html;

        root /data/wwwroot/www.1.com;

        access_log /tmp/1.log;

        location ~ ".bak|\.htp"

        {

                return 403;

        }

}

[root@centos-03 vhost]# /usr/local/nginx/sbin/nginx -t

nginx: the configuration file /usr/local/nginx/conf/nginx.conf syntax is ok

nginx: configuration file /usr/local/nginx/conf/nginx.conf test is successful

[root@centos-03 vhost]# /usr/local/nginx/sbin/nginx -s reload

[root@centos-03 vhost]# curl -x127.0.0.1:80 www.1.com/index.html.bak

<html>

<head><title>403 Forbidden</title></head>

<body bgcolor="white">

<center><h1>403 Forbidden</h1></center>

<hr><center>nginx/1.14.0</center>

</body>

</html>

[root@centos-03 vhost]# curl -x127.0.0.1:80 www.1.com/index.html.b2ak

<html>

<head><title>404 Not Found</title></head>

<body bgcolor="white">

<center><h1>404 Not Found</h1></center>

<hr><center>nginx/1.14.0</center>

</body>

</html>

[root@centos-03 vhost]#
nginx访问控制-基于document_uri
https://coding.net/u/aminglinux/p/nginx/git/blob/master/access/document_uri.md
这就用到了变量$document_uri,根据前面所学内容,该变量等价于$uri,其实也等价于location匹配。
if ($document_uri ~ "/admin/")

{

    return 403;

}

说明:当请求的uri中包含/admin/时,直接返回403.

if结构中不支持使用allow和deny。

测试链接:

1. www.aminglinux.com/123/admin/1.html 匹配

2. www.aminglinux.com/admin123/1.html  不匹配

3. www.aminglinux.com/admin.php  不匹配
if ($document_uri = /admin.php)

{

    return 403;

}

说明:请求的uri为/admin.php时返回403状态码。

测试链接:

1. www.aminglinux.com/admin.php 匹配

2. www.aminglinux.com/123/admin.php  不匹配
if ($document_uri ~ '/data/|/cache/.*\.php$')

{

    return 403;

}

说明:请求的uri包含data或者cache目录,并且是php时,返回403状态码。

测试链接:

1. www.aminglinux.com/data/123.php  匹配

2. www.aminglinux.com/cache1/123.php 不匹配
nginx访问控制-基于request_uri
https://coding.net/u/aminglinux/p/nginx/git/blob/master/access/request_uri.md
$request_uri比$docuemnt_uri多了请求的参数。

主要是针对请求的uri中的参数进行控制。
if ($request_uri ~ "gid=\d{9,12}")

{

    return 403;

}

说明:\d{9,12}是正则表达式,表示9到12个数字,例如gid=1234567890就符号要求。

测试链接:

1. www.aminglinux.com/index.php?gid=1234567890&pid=111  匹配

2. www.aminglinux.com/gid=123  不匹配

背景知识:

曾经有一个客户的网站cc攻击,对方发起太多类似这样的请求:/read-123405150-1-1.html

实际上,这样的请求并不是正常的请求,网站会抛出一个页面,提示帖子不存在。

所以,可以直接针对这样的请求,return 403状态码。
nginx访问控制-基于user_agent
https://coding.net/u/aminglinux/p/nginx/git/blob/master/access/user_agent.md
user_agent大家并不陌生,可以简单理解成浏览器标识,包括一些蜘蛛爬虫都可以通过user_agent来辨识。

通过观察访问日志,可以发现一些搜索引擎的蜘蛛对网站访问特别频繁,它们并不友好。

为了减少服务器的压力,其实可以把除主流搜索引擎蜘蛛外的其他蜘蛛爬虫全部封掉。

另外,一些cc攻击,我们也可以通过观察它们的user_agent找到规律。
if ($user_agent ~ 'YisouSpider|MJ12bot/v1.4.2|YoudaoBot|Tomato')

{

    return 403;

}

说明:user_agent包含以上关键词的请求,全部返回403状态码。

测试:

1. curl -A "123YisouSpider1.0"

2. curl -A "MJ12bot/v1.4.1"
nginx访问控制-基于http_referer
https://coding.net/u/aminglinux/p/nginx/git/blob/master/access/referer.md
在前面讲解rewrite时,曾经用过该变量,当时实现了防盗链功能。

其实基于该变量,我们也可以做一些特殊的需求。
背景:网站被黑挂马,搜索引擎收录的网页是有问题的,当通过搜索引擎点击到网站时,却显示一个博彩网站。

由于查找木马需要时间,不能马上解决,为了不影响用户体验,可以针对此类请求做一个特殊操作。

比如,可以把从百度访问的链接直接返回404状态码,或者返回一段html代码。

if ($http_referer ~ 'baidu.com')

{

    return 404;

}

或者

if ($http_referer ~ 'baidu.com')

{

    return 200 "<html><script>window.location.href='//$host$request_uri';</script></html>";

}
[root@centos-03 vhost]# vim 1.conf ^C

[root@centos-03 vhost]# cat 1.conf

server {

        listen 80;

        server_name www.1.com;

        index index.html;

        root /data/wwwroot/www.1.com;

        access_log /tmp/1.log;

        if ($http_referer ~* 'baidu.com')

        {

                return 405;

        }

}

[root@centos-03 vhost]# /usr/local/nginx/sbin/nginx -s reload

[root@centos-03 vhost]# curl -x127.0.0.1:80 -e "http://www.baidu.com/aaa" www.1.com -I

HTTP/1.1 405 Not Allowed

Server: nginx/1.14.0

Date: Fri, 27 Jul 2018 22:44:37 GMT

Content-Type: text/html

Content-Length: 173

Connection: keep-alive

[root@centos-03 vhost]#
nginx访问控制-限速1
https://coding.net/u/aminglinux/p/nginx/git/blob/master/access/limit.md

可以通过ngx_http_limit_conn_module和ngx_http_limit_req_module模块来实现限速的功能。
ngx_http_limit_conn_module
该模块主要限制下载速度。
并发限制
配置示例

http

{

    ...

    limit_conn_zone $binary_remote_addr zone=aming:10m;

    ...

    server

    {

        ...

        limit_conn aming 10;

        ...

    }

}

说明:首先用limit_conn_zone定义了一个内存区块索引aming,大小为10m,它以$binary_remote_addr作为key。

该配置只能在http里面配置,不支持在server里配置。

limit_conn 定义针对aming这个zone,并发连接为10个。在这需要注意一下,这个10指的是单个IP的并发最多为10个。
速度限制
location ~ /download/ {

    ...

    limit_rate_after 512k;

    limit_rate 150k;

    ...

}

说明:limit_rate_after定义当一个文件下载到指定大小(本例中为512k)之后开始限速;

limit_rate 定义下载速度为150k/s。

注意:这两个参数针对每个请求限速。
ngx_http_limit_req_module
该模块主要用来限制请求数。
limit_req_zone
语法: limit_req_zone $variable zone=name:size rate=rate;

默认值: none

配置段: http

设置一块共享内存限制域用来保存键值的状态参数。 特别是保存了当前超出请求的数量。

键的值就是指定的变量(空值不会被计算)。

如limit_req_zone $binary_remote_addr zone=one:10m rate=1r/s;

说明:区域名称为one,大小为10m,平均处理的请求频率不能超过每秒一次,键值是客户端IP。

使用$binary_remote_addr变量, 可以将每条状态记录的大小减少到64个字节,这样1M的内存可以保存大约1万6千个64字节的记录。

如果限制域的存储空间耗尽了,对于后续所有请求,服务器都会返回 503 (Service Temporarily Unavailable)错误。

速度可以设置为每秒处理请求数和每分钟处理请求数,其值必须是整数,

所以如果你需要指定每秒处理少于1个的请求,2秒处理一个请求,可以使用 “30r/m”。
limit_req
语法: limit_req zone=name [burst=number] [nodelay];

默认值: —

配置段: http, server, location

设置对应的共享内存限制域和允许被处理的最大请求数阈值。

如果请求的频率超过了限制域配置的值,请求处理会被延迟,所以所有的请求都是以定义的频率被处理的。

超过频率限制的请求会被延迟,直到被延迟的请求数超过了定义的阈值,

这时,这个请求会被终止,并返回503 (Service Temporarily Unavailable) 错误。

这个阈值的默认值为0。如:

limit_req_zone $binary_remote_addr zone=aming:10m rate=1r/s;

server {

    location /upload/ {

        limit_req zone=aming burst=5;

    }

}

限制平均每秒不超过一个请求,同时允许超过频率限制的请求数不多于5个。

如果不希望超过的请求被延迟,可以用nodelay参数,如:

limit_req zone=aming burst=5 nodelay;
示例
http {

    limit_req_zone $binary_remote_addr zone=aming:10m rate=1r/s;

    server {

        location  ^~ /download/ {

            limit_req zone=aming burst=5;

        }

    }

}
设定白名单IP
如果是针对公司内部IP或者lo(127.0.0.1)不进行限速,如何做呢?这就要用到geo模块了。

假如,预把127.0.0.1和192.168.100.0/24网段设置为白名单,需要这样做。

在http { }里面增加:

geo $limited {

    default 1;

    127.0.0.1/32 0;

    192.168.100.0/24 0;

}

map $limited $limit {

	1 $binary_remote_addr;

    0 "";

}

原来的 “limit_req_zone $binary_remote_addr ” 改为“limit_req_zone $limit”

完整示例:

http {

	geo $limited {

		default 1;

		127.0.0.1/32 0;

		192.168.100.0/24 0;

	}

	map $limited $limit {

		1 $binary_remote_addr;

		0 "";

	}

    limit_req_zone $limit zone=aming:10m rate=1r/s;

    server {

        location  ^~ /download/ {

            limit_req zone=aming burst=5;

        }

    }

}
实验:分别添加配置文件
[root@centos-03 vhost]# vim ../nginx.conf

http {

    include       mime.types;

    default_type  application/octet-stream;

    limit_conn_zone $binary_remote_addr zone=aming:10m;

    limit_conn_status 503;

    limit_conn_log_level error;

    log_format  main  '$remote_addr
[root@centos-03 vhost]# vim 1.conf

[root@centos-03 vhost]# cat 1.conf

server {

        listen 80;

        server_name www.1.com;

        index index.html;

        root /data/wwwroot/www.1.com;

        access_log /tmp/1.log;

        location /

        {

                limit_conn aming 2;

        }

}

[root@centos-03 vhost]#
[root@centos-03 vhost]# /usr/local/nginx/sbin/nginx -s reload
[root@centos-03 vhost]# /usr/local/nginx/sbin/nginx -t

nginx: the configuration file /usr/local/nginx/conf/nginx.conf syntax is ok

nginx: configuration file /usr/local/nginx/conf/nginx.conf test is successful

[root@centos-03 vhost]#
[root@centos-03 vhost]# yum install -y httpd (安装apache支持ab命令)
[root@centos-03 vhost]# vi /etc/hosts^C
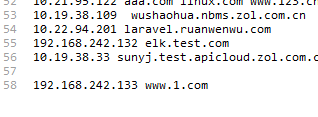
[root@centos-03 vhost]# cat /etc/hosts
127.0.0.1 localhost localhost.localdomain localhost4 localhost4.localdomain4
::1 localhost localhost.localdomain localhost6 localhost6.localdomain6
192.168.242.131 centos-01
192.168.242.132 centos-02
192.168.242.133 centos-03
127.0.0.1 www.1.com (添加host)
[root@centos-03 vhost]#
压测
[root@centos-03 vhost]# ab -n 5 -c 5 http://www.1.com/

This is ApacheBench, Version 2.3 <$Revision: 1430300 $>

Copyright 1996 Adam Twiss, Zeus Technology Ltd, http://www.zeustech.net/

Licensed to The Apache Software Foundation, http://www.apache.org/

Benchmarking www.1.com (be patient).....done

Server Software:        nginx/1.14.0

Server Hostname:        www.1.com

Server Port:            80

Document Path:          /

Document Length:        10 bytes

Concurrency Level:      5

Time taken for tests:   0.002 seconds

Complete requests:      5

Failed requests:        0

Write errors:           0

Total transferred:      1200 bytes

HTML transferred:       50 bytes

Requests per second:    2403.85 [#/sec] (mean)

Time per request:       2.080 [ms] (mean)

Time per request:       0.416 [ms] (mean, across all concurrent requests)

Transfer rate:          563.40 [Kbytes/sec] received

Connection Times (ms)

              min  mean[+/-sd] median   max

Connect:        0    0   0.1      0       0

Processing:     1    1   0.1      1       1

Waiting:        1    1   0.0      1       1

Total:          1    1   0.1      1       1

Percentage of the requests served within a certain time (ms)

  50%      1

  66%      1

  75%      1

  80%      1

  90%      1

  95%      1

  98%      1

  99%      1

 100%      1 (longest request)

[root@centos-03 vhost]#
[root@centos-03 vhost]# cat /tmp/1.log (效果不明显文件太小了无压力)

127.0.0.1 - - [28/Jul/2018:07:20:24 +0800] "GET / HTTP/1.0" 200 10 "-" "ApacheBench/2.3"

127.0.0.1 - - [28/Jul/2018:07:20:24 +0800] "GET / HTTP/1.0" 200 10 "-" "ApacheBench/2.3"

127.0.0.1 - - [28/Jul/2018:07:20:24 +0800] "GET / HTTP/1.0" 200 10 "-" "ApacheBench/2.3"

127.0.0.1 - - [28/Jul/2018:07:20:24 +0800] "GET / HTTP/1.0" 200 10 "-" "ApacheBench/2.3"

127.0.0.1 - - [28/Jul/2018:07:20:24 +0800] "GET / HTTP/1.0" 200 10 "-" "ApacheBench/2.3"

[root@centos-03 vhost]#
127.0.0.1 - - [28/Jul/2018:07:52:39 +0800] "GET /filebeat-6.3.1-x86_64.rpm HTTP/1.0" 503 213 "-" "ApacheBench/2.3"

127.0.0.1 - - [28/Jul/2018:07:52:39 +0800] "GET /filebeat-6.3.1-x86_64.rpm HTTP/1.0" 503 213 "-" "ApacheBench/2.3"

127.0.0.1 - - [28/Jul/2018:07:52:39 +0800] "GET /filebeat-6.3.1-x86_64.rpm HTTP/1.0" 200 12799471 "-" "ApacheBench/2.3"

127.0.0.1 - - [28/Jul/2018:07:52:39 +0800] "GET /filebeat-6.3.1-x86_64.rpm HTTP/1.0" 200 12799471 "-" "ApacheBench/2.3"

[root@centos-03 www.1.com]#
nginx访问控制-限速2
1.限制速度添加配置选项
[root@centos-03 vhost]# vim 1.conf ^C

[root@centos-03 vhost]# cat 1.conf

server {

        listen 80;

        server_name www.1.com;

        index index.html;

        root /data/wwwroot/www.1.com;

        access_log /tmp/1.log;

        location /

        {

                #limit_conn aming 2;

                limit_rate 10k;

        }

}

[root@centos-03 vhost]#
[root@centos-03 vhost]# /usr/local/nginx/sbin/nginx -s reload

[root@centos-03 vhost]#
2.浏览器测试下载速度,在本地添加host配置
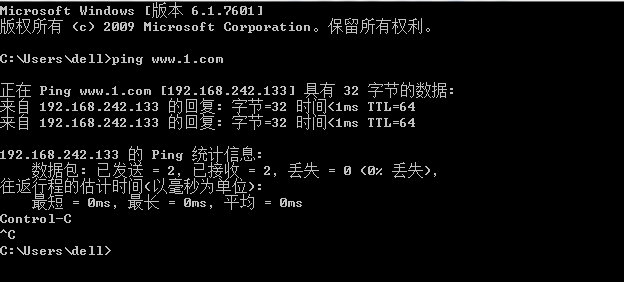
3.下载速度变成每秒10k左右
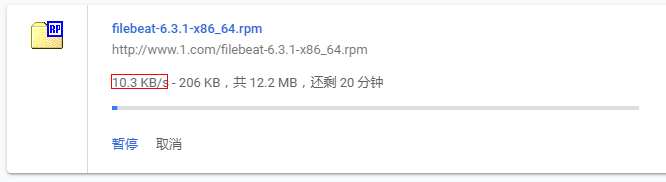
4.改为限制为1000试试
        access_log /tmp/1.log;

        location /

        {

                #limit_conn aming 2;

                limit_rate 1000k;

        }
[root@centos-03 vhost]# /usr/local/nginx/sbin/nginx -t

nginx: the configuration file /usr/local/nginx/conf/nginx.conf syntax is ok

nginx: configuration file /usr/local/nginx/conf/nginx.conf test is successful

[root@centos-03 vhost]# /usr/local/nginx/sbin/nginx -s reload

[root@centos-03 vhost]#

nginx访问控制-限速3
1.添加配置文件
[root@centos-03 vhost]# vim ../nginx.conf

http {

    include       mime.types;

    default_type  application/octet-stream;

    limit_conn_zone $binary_remote_addr zone=aming:10m;

    limit_conn_status 503;

    limit_conn_log_level error;

    limit_req_zone $binary_remote_addr zone=aming1:10m rate=2r/s;

    log_format  main  '$remote_addr - $remote_user [$time_local] "$request" '

                      '$status $body_bytes_sent "$http_referer" '

                      '"$http_user_agent" "$http_x_forwarded_for" $host $server_port';
2.配置虚拟主机配置文件
[root@centos-03 vhost]# vim 1.conf

server {

        listen 80;

        server_name www.1.com;

        index index.html;

        root /data/wwwroot/www.1.com;

        access_log /tmp/1.log;

        #location /

        #{

                #limit_conn aming 2;

                #limit_rate 1000k;

        #}

        limit_req zone=aming1 burst=5;

}
3.ab请求测试
[root@centos-03 vhost]# /usr/local/nginx/sbin/nginx -s reload

[root@centos-03 vhost]# ab -n 10 -c 10 http://www.1.com/filebeat-6.3.1-x86_64.rpm

This is ApacheBench, Version 2.3 <$Revision: 1430300 $>

Copyright 1996 Adam Twiss, Zeus Technology Ltd, http://www.zeustech.net/

Licensed to The Apache Software Foundation, http://www.apache.org/

Benchmarking www.1.com (be patient).....done

Server Software:        nginx/1.14.0

Server Hostname:        www.1.com

Server Port:            80

Document Path:          /filebeat-6.3.1-x86_64.rpm

Document Length:        213 bytes

Concurrency Level:      10

Time taken for tests:   2.509 seconds

Complete requests:      10

Failed requests:        6

   (Connect: 0, Receive: 0, Length: 6, Exceptions: 0)

Write errors:           0

Non-2xx responses:      4

Total transferred:      76799974 bytes

HTML transferred:       76797678 bytes

Requests per second:    3.98 [#/sec] (mean)

Time per request:       2509.443 [ms] (mean)

Time per request:       250.944 [ms] (mean, across all concurrent requests)

Transfer rate:          29887.10 [Kbytes/sec] received

Connection Times (ms)

              min  mean[+/-sd] median   max

Connect:        0    0   0.1      0       0

Processing:     2  756 952.9    507    2508

Waiting:        1  752 950.0    501    2502

Total:          2  756 952.9    507    2508

Percentage of the requests served within a certain time (ms)

  50%    507

  66%   1008

  75%   1508

  80%   2012

  90%   2508

  95%   2508

  98%   2508

  99%   2508

 100%   2508 (longest request)

[root@centos-03 vhost]#
4.查看日志
[root@centos-03 vhost]# tail -n 10 /tmp/1.log

127.0.0.1 - - [28/Jul/2018:08:28:20 +0800] "GET /filebeat-6.3.1-x86_64.rpm HTTP/1.0" 503 213 "-" "ApacheBench/2.3"

127.0.0.1 - - [28/Jul/2018:08:28:20 +0800] "GET /filebeat-6.3.1-x86_64.rpm HTTP/1.0" 503 213 "-" "ApacheBench/2.3"

127.0.0.1 - - [28/Jul/2018:08:28:20 +0800] "GET /filebeat-6.3.1-x86_64.rpm HTTP/1.0" 503 213 "-" "ApacheBench/2.3"

127.0.0.1 - - [28/Jul/2018:08:28:20 +0800] "GET /filebeat-6.3.1-x86_64.rpm HTTP/1.0" 503 213 "-" "ApacheBench/2.3"

127.0.0.1 - - [28/Jul/2018:08:28:20 +0800] "GET /filebeat-6.3.1-x86_64.rpm HTTP/1.0" 200 12799471 "-" "ApacheBench/2.3"

127.0.0.1 - - [28/Jul/2018:08:28:20 +0800] "GET /filebeat-6.3.1-x86_64.rpm HTTP/1.0" 200 12799471 "-" "ApacheBench/2.3"

127.0.0.1 - - [28/Jul/2018:08:28:21 +0800] "GET /filebeat-6.3.1-x86_64.rpm HTTP/1.0" 200 12799471 "-" "ApacheBench/2.3"

127.0.0.1 - - [28/Jul/2018:08:28:21 +0800] "GET /filebeat-6.3.1-x86_64.rpm HTTP/1.0" 200 12799471 "-" "ApacheBench/2.3"

127.0.0.1 - - [28/Jul/2018:08:28:22 +0800] "GET /filebeat-6.3.1-x86_64.rpm HTTP/1.0" 200 12799471 "-" "ApacheBench/2.3"

127.0.0.1 - - [28/Jul/2018:08:28:22 +0800] "GET /filebeat-6.3.1-x86_64.rpm HTTP/1.0" 200 12799471 "-" "ApacheBench/2.3"

[root@centos-03 vhost]#
5.添加nodelay(这样限速就不受影响了)
[root@centos-03 vhost]# vim 1.conf
server {

        listen 80;

        server_name www.1.com;

        index index.html;

        root /data/wwwroot/www.1.com;

        access_log /tmp/1.log;

        #location /

        #{

                #limit_conn aming 2;

                #limit_rate 1000k;

        #}

        limit_req zone=aming1 burst=5 nodelay;

}
6.ab测试瞬间完成(生产环境中不建议加nodelay)
[root@centos-03 vhost]# !ab

ab -n 10 -c 10 http://www.1.com/filebeat-6.3.1-x86_64.rpm

This is ApacheBench, Version 2.3 <$Revision: 1430300 $>

Copyright 1996 Adam Twiss, Zeus Technology Ltd, http://www.zeustech.net/

Licensed to The Apache Software Foundation, http://www.apache.org/

Benchmarking www.1.com (be patient).....done

Server Software:        nginx/1.14.0

Server Hostname:        www.1.com

Server Port:            80

Document Path:          /filebeat-6.3.1-x86_64.rpm

Document Length:        213 bytes

Concurrency Level:      10

Time taken for tests:   0.021 seconds

Complete requests:      10

Failed requests:        6

   (Connect: 0, Receive: 0, Length: 6, Exceptions: 0)

Write errors:           0

Non-2xx responses:      4

Total transferred:      76799974 bytes

HTML transferred:       76797678 bytes

Requests per second:    469.04 [#/sec] (mean)

Time per request:       21.320 [ms] (mean)

Time per request:       2.132 [ms] (mean, across all concurrent requests)

Transfer rate:          3517822.45 [Kbytes/sec] received

Connection Times (ms)

              min  mean[+/-sd] median   max

Connect:        0    0   0.1      0       0

Processing:     4   14   7.9     20      20

Waiting:        1    4   1.2      4       4

Total:          5   14   7.9     20      20

Percentage of the requests served within a certain time (ms)

  50%     20

  66%     20

  75%     20

  80%     20

  90%     20

  95%     20

  98%     20

  99%     20

 100%     20 (longest request)

[root@centos-03 vhost]#
最新文章
- 新建jfinal2.2项目并连接mysql
- C#查找以某个字母开头另一字母结尾的字符串
- [js]事件综合 整理
- CreateDIBSection函数
- java小经验
- vs2010编译error_code
- 使用IdentityServer4,在一个ASPNetCore项目中,配置oidc和api的AccessToken两种认证授权
- 优化MySQL性能的几种方法-总结
- CSS中float属性
- 用sql的avg(score)求完平均值后,保存两位小数的方法(用于查询或视图)
- Python3 复制和深浅copy
- Kotlin Linux下的环境搭建
- P3211 [HNOI2011]XOR和路径
- linux shell 编程参考
- linux下hex转ascii
- CentOS下使用autoenv实现进入特定目录后运行特定环境变量
- angularJS module里的'服务'
- 关于c语言struct和typedef
- 泰克 Tektronix THS720A 示波器 显示屏维修记录
- Security 安全框架1