Linux系统学习之 二:新手必须掌握的Linux命令2
2018-10-03 22:20:48
一、文件目录管理命令
1、touch 命令
用于创建空白文件或设置文件的时间,格式为“touch [选项] [文件]”。
参数:
-a :仅修改“读取时间(atime)”
-m:仅修改“修改时间(mtime)”
-d:同时修改 atime 与 mtime
2、mkdir 命令
用于创建空白的目录,格式为“mkdir [选项] 目录”。
mkdir -p:递归创建具有嵌套叠层关系的文件目录
[root@centos110 ~]# mkdir linuxprobe

[root@centos110 ~]# cd linuxprobe

[root@centos110 linuxprobe]# mkdir -p a/b/c/d/e

[root@centos110 linuxprobe]# tree

.

└── a

    └── b

        └── c

            └── d

                └── e

 directories,  files
3、cp 命令
用于复制文件或目录,格式为“cp [选项] 源文件 目标文件”。
Linux系统中,复制操作具体分为3种情况:
(1)如果目标文件是目录,则会把源文件复制到该目录中;
(2)如果目标文件也是普通文件,则会询问是否要覆盖它;
(3)如果目标文件不存在,则执行正常的复制操作;
参数:
-p :保留原始文件的属性
-d:若对象为“链接文件”,则保留该“链接文件”的属性
-r:递归持续复制(用于目录)
-i:若目标文件存在则询问是否覆盖
-a:相当于-pdr(p、d、r 为上述参数)
4、mv 命令
用于剪切文件或者将文件重命名,格式为“mv [选项] 源文件 [目标路径 | 目标文件名]”。
5、rm 命令
用于删除文件或目录,格式为“rm [选项] 文件”。
rm -f:不询问,直接删除
rm -r:删除目录
6、dd 命令 (重点)
用于按照指定大小和个数的数据块来复制文件或转换文件,格式为“dd [参数]”。
设备文件 /dev/zero,不会占用系统存储空间,却可以提供无穷无尽的数据;
因此可以使用它作为dd命令的输入文件,来生成一个指定大小的文件。
dd命令参数:
if:输入的文件名
of:输出的文件名
bs:设置每个“块”的大小
count:设置要复制“块”的个数
例:用 dd命令 从 /dev/zero 设备文件中取出一个大小为560M的数据块,然后保存成名为 560_file 的文件:
 [root@centos110 ~]# dd if=/dev/zero of=560_file count= bs=560M

 + records in

 + records out

  bytes ( MB) copied, 62.0188 s, 9.5 MB/s
7、file 命令
用于查看文件的类型,格式为“file 文件名”。
 [root@centos110 ~]# file anaconda-ks.cfg

 anaconda-ks.cfg: ASCII text

 [root@centos110 ~]# file /dev/sda

 /dev/sda: block special
二、打包压缩与搜索命令
1、tar 命令
用于对文件进行打包压缩或解压,格式为“tar [选项] [文件] ”。
 1 -c:创建压缩文件

 2 -x:解开压缩文件

 -t:查看压缩包内有哪些文件

 4 -z:用Gzip压缩或解压,后缀.gz

 5 -j:用bzip2压缩或解压,后缀.bz2

 6 -J:创建.tar.xz包,后缀.xz

 -v:显示压缩或解压过程

 -f:目标文件名  #特别重要,必须放在参数的最后一位

 -p:保留原始的权限与属性

 -P:使用绝对路径来压缩(大写P)

 -C:指定解压到的目录
 打包文件:        # tar [参数] 新建文件名 源文件路径

 [root@centos110 ~]# tar -cvf grub2.tar /boot/grub2

 tar: Removing leading `/' from member names

 /boot/grub2/

 /boot/grub2/device.map

 /boot/grub2/i386-pc/

 ......

 解包文件:        # tar [参数] 包文件名

 [root@centos110 ~]# tar -xvf grub2.tar

 boot/grub2/

 boot/grub2/device.map

 boot/grub2/i386-pc/

 boot/grub2/i386-pc/gcry_rmd160.mod

 ......
# 创建.tar.gz包
1 [root@centos110 ~]# tar -zcvf etc.tar.gz /etc   #归档并压缩目录/etc

 tar: Removing leading `/' from member names

 ......

 [root@centos110 ~]# tar -zxvf etc.tar.gz -C /opt   #解压缩,并指定解压到/opt目录

 ......

 [root@centos110 ~]# ls /opt

 a.sh  bak.sh  case-if.sh  etc  for-.sh  rh  root.tar.gz  sh-.sh  test-.sh
# 创建.tar.bz2包
1 [root@centos110 ~]# tar -jcvf etc.tar.bz2 /etc > /dev/null  #归档并压缩目录/etc

 tar: Removing leading `/' from member names

 ......

 [root@centos110 ~]# tar -jxvf etc.tar.bz2 -C /opt > /dev/null  #解压并指定解压到/opt目录

 [root@centos110 ~]# ls /opt

 a.sh  bak.sh  case-if.sh  etc  for-.sh  rh  root.tar.gz  sh-.sh  test-.sh
# 创建.tar.xz包
1 [root@centos110 ~]# tar -Jcvf etc.tar.xz /etc

 ......

 [root@centos110 ~]# tar -xvf etc.tar.xz
2、grep 命令
用于在文本中执行关键词搜索,并显示匹配的结果,格式为“grep [选项] [文件]”。
#grep 命令参数:

1 -b:将可执行文件(binary)当做文本文件(text)来搜索

 -c:仅显示找到的行数

 -i:忽略大小写
  # 最常用的两个参数,几乎能完成日后80%的工作需要

4 -n:显示行号

5 -v:反向选择—仅列出没有“关键词”的行
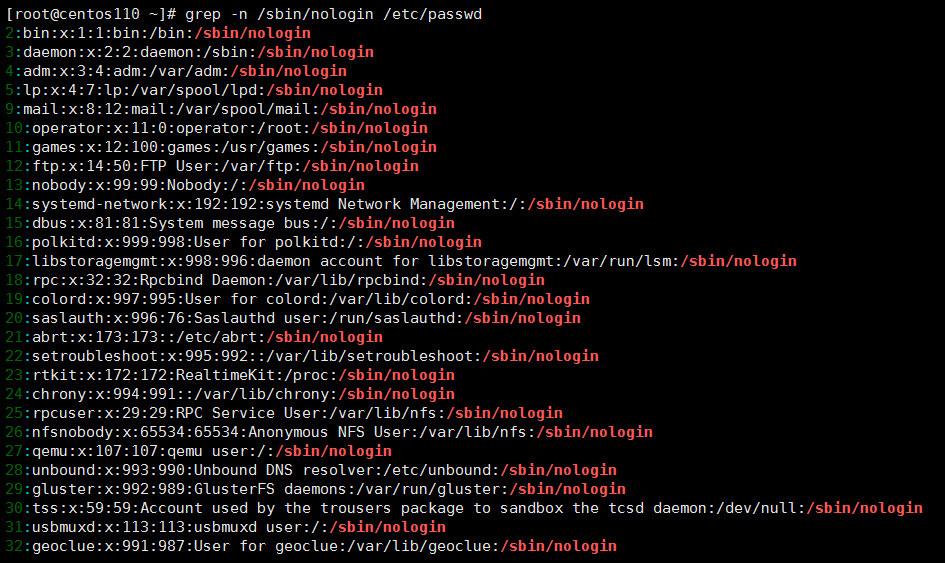
示例:使用grep 命令查找当前系统中不允许登录系统的所有用户信息:
#grep -n /sbin/nologin /etc/passwd
3、find 命令
用于按照指定条件来查找文件,格式为“find [查找路径] 寻找条件 操作”。
 # find 命令参数及其作用
 1 -name  #匹配名称

 -perm  #匹配权限(mode为完全匹配,-mode为包含即可)

 -user  #匹配所有者

 -group  #匹配所有组

 -mtime -n +n  #匹配修改内容的时间(-n指 n 天以内,+n 指 n 天以前)

 -atime -n +n  #匹配访问文件的时间(-n指 n 天以内,+n 指 n 天以前)

 -ctime -n +n  #匹配修改文件权限的时间(-n指 n 天以内,+n 指 n 天以前)

 -nouser   #匹配无所有字的文件

 -nogroup  #匹配无所有组的文件

 -newer f1  !f2   #匹配比文件f1新但比f2旧的文件

 --type b/d/c/p/l/f  #匹配文件类型(后面的字符参数依次表示块设备、目录、字符设备、管道、链接文件、文本文件)

 -size  #匹配文件的大小(+50KB为查找超过50KB的文件,而-50KB为查找小于50KB的文件)

 -prune  #忽略某个目录

 -exec ......{} \  #后面可跟用于进一步处理搜索结果的命令
# 获取/etc目录中所有以host开头的文件列表
1 [root@centos110 ~]# find /etc -name "host*"

 /etc/host.conf

 /etc/hosts

 /etc/hosts.allow

 /etc/hosts.deny
 # 在这个系统中搜索权限中包括SUID权限的所有文件
 1 [root@centos110 ~]# find / -perm -4000

 find: ‘/proc//task//fd/’: No such file or directory

 find: ‘/proc//task//fdinfo/’: No such file or directory

 find: ‘/proc//fd/’: No such file or directory

 find: ‘/proc//fdinfo/’: No such file or directory

 /usr/bin/fusermount

 /usr/bin/passwd

 /usr/bin/chfn

 /usr/bin/chsh

 /usr/bin/chage

 /usr/bin/gpasswd

 /usr/bin/newgrp

 /usr/bin/staprun

 /usr/bin/crontab
......
 # 在整个文件系统中找出所有归属于md用户的文件并复制到 /root/findresults 目录下
 # 该示例的重点是“-exec {} \;”参数,其中的{}表示 find 命令搜索出的每一个文件,并且命令的结尾必须是“\;”
 1 [root@centos110 ~]# mkdir /root/findresults

 [root@centos110 ~]# find / -user md -exec cp -a {} /root/findresults/ \;

 find: ‘/proc//task//fd/’: No such file or directory

 find: ‘/proc//task//fdinfo/’: No such file or directory

 find: ‘/proc//fd/’: No such file or directory

 find: ‘/proc//fdinfo/’: No such file or directory

 cp: ‘/root/findresults/md’ and ‘/root/findresults/md’ are the same file

 cp: cannot overwrite non-directory ‘/root/findresults/md’ with directory ‘/home/md’

 [root@centos110 ~]# ls /root/findresults

                                                                             gdm                               parser-sha1.txt

 3.22                                                                            gnome-initial-setup-done          photos

 abrt                                                                            gnome.json                        Pictures

......省略输出内容......
最新文章
- js学习笔记
- 分享一个Visual Studio的背景插件,让堆码更富情趣
- Python基础之条件和循环
- Java—网络技术
- Linux系统下如何查看已经登录用户
- spring mvc拦截器
- 【HDU 5733】tetrahedron
- 字典的循环和if语句
- C# 获取路径中文件名、目录、扩展名等
- C51 函数/程序段的定位
- Object.create函数
- SQL于union, EXCEPT 和 INTERSECT用法
- IBM的websphere MQ的c#使用
- Spark记录-Scala多线程
- sass - 公用方法封装
- 2017-2018-2 20179205《网络攻防技术与实践》Windows攻击实验
- 常用jdbc操作
- mybatis 环境搭建和基本说明
- 有关使用 iview 表单验证的问题
- Atitit.异步编程 java .net php python js 的比较
热门文章
- [PWA] Check Online Status by using the NavigatorOnLine API
- BZOJ 1605 [Usaco2008 Open]Crisis on the Farm 牧场危机 DP
- 《鸟哥的Linux私房菜-基础学习篇(第三版)》(五)
- 一个基于cocos2d-x 3.0和Box2d的demo小程序
- nginx安装【linux下安装】
- VassistX 凝视 模板
- 2014年百度之星程序设计大赛 - 资格赛 第一题 Energy Conversion
- Winform设计-小百货 涵盖基础插件学习(适合新手)
- POJ 1101 译文
- SVN 报错 sqlite[S11]: database disk image is malformed