转-TabHost组件(一)(实现底部菜单导航)
http://www.cnblogs.com/lichenwei/p/3974009.html
什么是TabHost?

TabHost选项卡,说到这个组件,不得不先说一件事情,翻翻谷歌提供给我们的API,我们可以发现这样的一段话:

它告诉我们,这个组件在安卓4.0之后已经被废弃了,建议我们新的程序应该使用Fragment组件来代替它。
其实并不出乎意料,使用过TabHost的朋友应该都知道:
1、它的设计违反了Activity单一窗口原则,它可以同时加载多个Activity,然后再它们之间进行来回切换。
2、有个很致命的问题就是当我们点击别的选项时,按下Back后退键,它会使整个应用程序都退出,而不是切换到前一个选项卡,虽然我们可以在主程序里覆写OnKeyDown这个方法,但这样就会导致每一次按下Back后退键都只能回到第一个选项菜单。
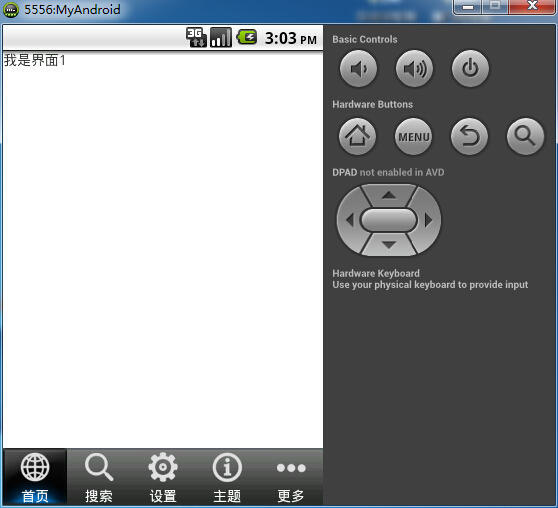
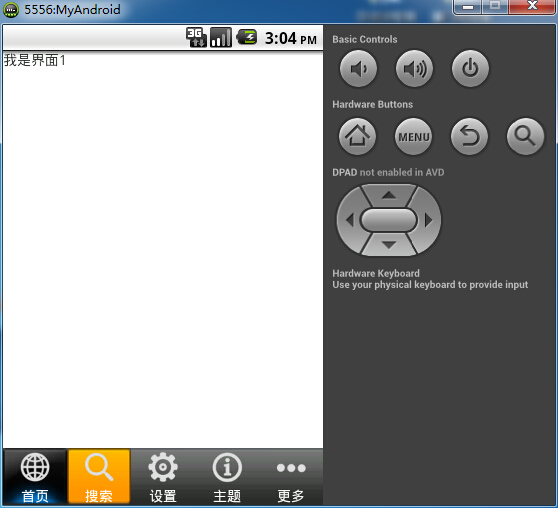
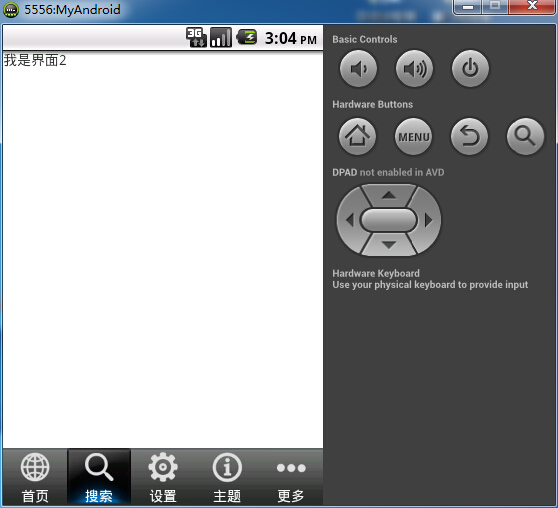
但作为开发者,这个具有历史里程碑的组件,我们还是需要去掌握下,下面给几张图来看下今天要实现的效果:
下面附上代码(注释很详细)
实现TabHost有两种方式:
方式一:直接让一个Activity程序继承TabActivity类(通过getTabHost取得实例);

activity_main.xml(为了使选项卡显示在屏幕下方,这里采用了相对布局)

 1 <TabHost xmlns:android="http://schemas.android.com/apk/res/android"

 2     android:id="@+id/mytabhost"

 3     android:layout_width="fill_parent"

 4     android:layout_height="fill_parent">

 5

 6     <!-- 需要一个布局管理器 -->

 7

 8     <RelativeLayout

 9         android:layout_width="fill_parent"

10         android:layout_height="fill_parent"

11         >

12

13                 <!--

14        由于TabHost是继承于FrameLayout,所以需要一个FrameLaytout布局(内容页) ,id

15        必须为tabcontent

16         -->

17

18         <FrameLayout

19             android:id="@android:id/tabcontent"

20             android:layout_width="fill_parent"

21             android:layout_height="fill_parent"

22             >

23         </FrameLayout>

24

25         <!-- TabWidget必须标签,用来存放tab标签,且id必须为tabs -->

26

27         <TabWidget

28             android:id="@android:id/tabs"

29             android:layout_width="fill_parent"

30             android:layout_height="wrap_content"

31             android:background="@drawable/tab_widget_background"

32             android:layout_alignParentBottom="true"

33             >

34         </TabWidget>

35

36     </RelativeLayout>

37

38 </TabHost>
TabHost的布局的文件必须遵循下面几点:
1、所有的用于标签配置的文件,必须以“<TabHost>”为根节点;
2、为了保证标签页和标签内容显示正常(例如:标签提示要放在标签显示内容之上)则可以采用一个布局管理器进行布局(例如:LinearLayout,RelativeLayout..)
3、定义一个“<TagWidget>”的标签,用于表示整个标签容器,另外在定义此组件ID为“tabs”,表示允许加入多个标签
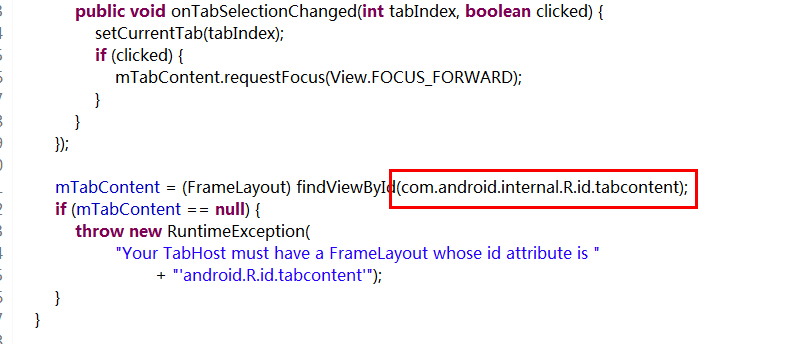
至于为什么要遵循这些条件,我们打看下TabHost的源码就可以发现:


 1 <?xml version="1.0" encoding="utf-8"?>

 2 <LinearLayout xmlns:android="http://schemas.android.com/apk/res/android"

 3     android:layout_width="wrap_content"

 4     android:layout_height="wrap_content"

 5     android:gravity="center_horizontal"

 6      android:background="@drawable/tab_selector"

 7     android:orientation="vertical" >

 8

 9     <ImageView

10         android:id="@+id/image"

11         android:layout_width="wrap_content"

12         android:layout_height="wrap_content"

13         android:padding="3dp" />

14

15     <TextView

16         android:id="@+id/title"

17         android:layout_width="wrap_content"

18         android:layout_height="wrap_content"

19         android:textColor="@android:color/white"/>

20

21 </LinearLayout>
3、一个选择器,用于美观效果
tab_selector.xml
 1 <?xml version="1.0" encoding="utf-8"?>

 2 <selector xmlns:android="http://schemas.android.com/apk/res/android" >

 3     <item

 4         android:state_pressed="true" android:drawable="@drawable/tab_item_p"

 5         ></item>

 6     <item

 7         android:state_selected="true" android:drawable="@drawable/tab_item_d"

 8         ></item>

 9

10 </selector>
4、跳转Activity的布局文件(由于基本一致,这里只给出其中一个)
tabactivity.xml
 1 <?xml version="1.0" encoding="utf-8"?>

 2 <RelativeLayout xmlns:android="http://schemas.android.com/apk/res/android"

 3     android:layout_width="match_parent"

 4     android:layout_height="match_parent" >

 5

 6     <LinearLayout

 7         android:layout_width="match_parent"

 8         android:layout_height="match_parent"

 9         android:orientation="vertical" >

10

11

12         <TextView

13             android:id="@+id/title"

14             android:layout_width="wrap_content"

15             android:layout_height="wrap_content"

16             android:text="我是界面1"/>

17     </LinearLayout>

18

19 </RelativeLayout>
 1 package com.example.tabhosttest;

 2

 3 import android.app.ActivityGroup;

 4 import android.content.Intent;

 5 import android.os.Bundle;

 6 import android.view.View;

 7 import android.widget.ImageView;

 8 import android.widget.TabHost;

 9 import android.widget.TabHost.TabSpec;

10 import android.widget.TextView;

11

12 public class MainActivity extends ActivityGroup{

13

14     private TabHost tabHost;//声明一个TabHost对象

15

16     //资源文件

17     private Class activitys[]={TabActivity1.class,TabActivity2.class,TabActivity3.class,TabActivity4.class,TabActivity5.class};//跳转的Activity

18     private String title[]={"首页","搜索","设置","主题","更多"};//设置菜单的标题

19     private int image[]={R.drawable.tab_icon1,R.drawable.tab_icon2,R.drawable.tab_icon3,R.drawable.tab_icon4,R.drawable.tab_icon5,};//设置菜单

20

21     @Override

22     protected void onCreate(Bundle savedInstanceState) {

23         super.onCreate(savedInstanceState);

24         setContentView(R.layout.activity_main);

25         initTabView();//初始化tab标签

26

27     }

28

29     private void initTabView() {

30         //实例化tabhost

31         this.tabHost=(TabHost) findViewById(R.id.mytabhost);

32         //由于继承了ActivityGroup,所以需要在setup方法里加入此参数,若继承TabActivity则可省略

33         tabHost.setup(this.getLocalActivityManager());

34

35         //创建标签

36         for(int i=0;i<activitys.length;i++){

37             //实例化一个view作为tab标签的布局

38             View view=View.inflate(this, R.layout.tab_layout, null);

39

40             //设置imageview

41             ImageView imageView=(ImageView) view.findViewById(R.id.image);

42             imageView.setImageDrawable(getResources().getDrawable(image[i]));

43             //设置textview

44             TextView textView=(TextView) view.findViewById(R.id.title);

45             textView.setText(title[i]);

46             //设置跳转activity

47             Intent intent=new Intent(this, activitys[i]);

48

49             //载入view对象并设置跳转的activity

50             TabSpec spec=tabHost.newTabSpec(title[i]).setIndicator(view).setContent(intent);

51

52             //添加到选项卡

53             tabHost.addTab(spec);

54         }

55

56     }

57

58

59 }
这里有个重载方法setIndicator(),这里是用来设置标签页:
1、public TabHost.TabSpec setIndicator(CharSequence label)
设置标题,此时无图标
2、public TabHost.TabSpec setIndicator(CharSequence label, Drawable icon)
设置标题、图标(这里的图标可以用getResources().getDrawable(int id))来设置
3、public TabHost.TabSpec setIndicator(View view)
设置自定义view
还有个setContent(Intent intent),这里是用来设置标签内容的,也就是我们要跳转的Activity
由于这里有5个选项卡,因此就有5个Activity,具体内容就看自己需求了,这里就不再给出
记得写完Activity要在AndroidManifest.xml配置文件中声明
 1 <?xml version="1.0" encoding="utf-8"?>

 2 <manifest xmlns:android="http://schemas.android.com/apk/res/android"

 3     package="com.example.tabhosttest"

 4     android:versionCode="1"

 5     android:versionName="1.0" >

 6

 7     <uses-sdk

 8         android:minSdkVersion="8"

 9         android:targetSdkVersion="21" />

10

11     <application

12         android:allowBackup="true"

13         android:icon="@drawable/ic_launcher"

14         android:label="@string/app_name"

15         android:theme="@style/AppTheme" >

16         <activity

17             android:name=".MainActivity"

18             android:label="@string/app_name" >

19             <intent-filter>

20                 <action android:name="android.intent.action.MAIN" />

21

22                 <category android:name="android.intent.category.LAUNCHER" />

23             </intent-filter>

24         </activity>

25         <activity

26             android:name="com.example.tabhosttest.TabActivity1"

27             android:label="@string/app_name" >

28         </activity>

29         <activity

30             android:name="com.example.tabhosttest.TabActivity2"

31             android:label="@string/app_name" >

32         </activity>

33         <activity

34             android:name="com.example.tabhosttest.TabActivity3"

35             android:label="@string/app_name" >

36         </activity>

37         <activity

38             android:name="com.example.tabhosttest.TabActivity4"

39             android:label="@string/app_name" >

40         </activity>

41         <activity

42             android:name="com.example.tabhosttest.TabActivity5"

43             android:label="@string/app_name" >

44         </activity>

45     </application>

46

47 </manifest>
好了,到这里底部导航菜单就实现了,试试吧~
这里再来个不一样的实现方法,更为简洁方便《安卓开发复习笔记——TabHost组件(二)(实现底部菜单导航)》
最新文章
- Oracle触发器原理、创建、修改、删除
- Android Activity 切换动画(非原创)
- JMS总结
- [12]APUE:高级 I/O
- COM思想的背后
- 2-legged oauth & 3-legged oauth
- Linguistic corpora 种子语料库-待分析对象-分析与更新语料库
- wikioi 1202 求和(求n个数的和)
- OWASP
- eslint 代码缩进 报错及解决
- Linux下查看CPU型号,内存大小,硬盘空间,进程等的命令(详解)
- app自动化问题点整理
- 19.3.19 使用Flask框架搭建一个简易登录服务器
- OSI,TCP/IP,五层协议的体系结构,以及各层协议
- [Luogu4916]魔力环[Burnside引理、组合计数、容斥]
- HTML <frame> 标签的 src 属性
- Ubuntu12搭建nutch1.2+tomcat7+jdk1.6
- golang数据传输格式-序列化与反序列化
- Window 64bit环境搭建Web Starter Kit
- BZOJ5291 BJOI2018链上二次求和(线段树)