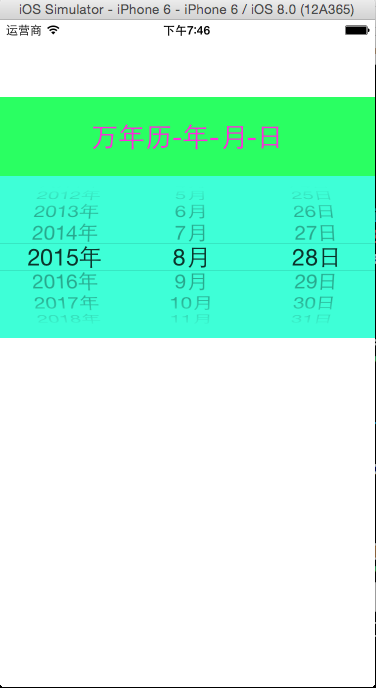
iOS:选择器控件UIPickerView的详解和演示
选择器控件UIPickerView:
@protocol UIPickerViewDataSource, UIPickerViewDelegate;
@interface UIPickerView : UIView <NSCoding>
@property(nonatomic,assign) id<UIPickerViewDataSource> dataSource; // default is nil,设置代理
@property(nonatomic,assign) id<UIPickerViewDelegate> delegate; // default is nil,设置代理
@property(nonatomic) BOOL showsSelectionIndicator; // default is NO
@property(nonatomic,readonly) NSInteger numberOfComponents; //列数
二、协议UIPickerViewDataSource
@protocol UIPickerViewDataSource<NSObject>
@required //必须要实现的方法
// 返回的列显示的数量。
- (NSInteger)numberOfComponentsInPickerView:(UIPickerView *)pickerView;
//返回行数在每个组件(每一列)
- (NSInteger)pickerView:(UIPickerView *)pickerView numberOfRowsInComponent:(NSInteger)component;
@end
三、协议UIPickerViewDelegate
@protocol UIPickerViewDelegate<NSObject>
@optional //可以选择执行的方法
//每一列组件的列宽度
- (CGFloat)pickerView:(UIPickerView *)pickerView widthForComponent:(NSInteger)component;
//每一列组件的行高度
- (CGFloat)pickerView:(UIPickerView *)pickerView rowHeightForComponent:(NSInteger)component;
// 返回每一列组件的每一行的标题内容
- (NSString *)pickerView:(UIPickerView *)pickerView titleForRow:(NSInteger)row forComponent:(NSInteger)component;
// 返回每一列组件的每一行的标题内容的属性
- (NSAttributedString *)pickerView:(UIPickerView *)pickerView attributedTitleForRow:(NSInteger)row forComponent:(NSInteger)component;
// 返回每一列组件的每一行的视图显示
- (UIView *)pickerView:(UIPickerView *)pickerView viewForRow:(NSInteger)row forComponent:(NSInteger)component reusingView:(UIView *)view;
//执行选择某列某行的操作
- (void)pickerView:(UIPickerView *)pickerView didSelectRow:(NSInteger)row inComponent:(NSInteger)component;
@end
 #import <UIKit/UIKit.h>

 @interface ViewController : UIViewController<UIPickerViewDataSource,UIPickerViewDelegate>

 @property(nonatomic,strong)NSArray *years;

 @property(nonatomic,strong)NSArray *months;

 @property(nonatomic,strong)NSArray *days;

 @end
#import "ViewController.h"

   @interface ViewController ()

   @property (weak, nonatomic) IBOutlet UIPickerView *pickerView;

   @end

   @implementation ViewController

  - (void)viewDidLoad

  {

      [super viewDidLoad];

      //初始化数据

      NSMutableArray *multYears = [NSMutableArray array];//年

      for(int i=; i<; i++)

      {

          NSString *year = [NSString stringWithFormat:@"20%02d年",i+];

          [multYears addObject:year];

      }

      self.years = multYears;

      NSMutableArray *multMonths = [NSMutableArray arrayWithCapacity:];//月

      for(int i=; i<=; i++)

      {

          NSString *month = [NSString stringWithFormat:@"%d月",i];

          [multMonths addObject:month];

      }

      self.months = multMonths;

      NSMutableArray *multDays = [NSMutableArray arrayWithCapacity:];//日

      for(int i=; i<=; i++)

      {

          NSString *day = [NSString stringWithFormat:@"%d日",i];

          [multDays addObject:day];

      }

      self.days = multDays;

      //设置pickerView的数据源和代理

      self.pickerView.dataSource = self;

      self.pickerView.delegate = self;

      //显示当前日期

      NSDate *now = [NSDate date];

      //分解日期

      NSCalendar  *calendar = [[NSCalendar alloc]initWithCalendarIdentifier:NSCalendarIdentifierGregorian];

      NSCalendarUnit unitFlags = NSCalendarUnitYear|NSCalendarUnitMonth|NSCalendarUnitDay;

      NSDateComponents *components = [calendar components:unitFlags fromDate:now];

      //设置pickerView显示当前日期

      NSInteger year = [components year];

      [self.pickerView selectRow:year-- inComponent: animated:year];

      NSInteger month = [components month];

      [self.pickerView selectRow:month- inComponent: animated:month];

      NSInteger day = [components day];

      [self.pickerView selectRow:day- inComponent: animated:day];

  }

  #pragma mark - pickerView的代理方法

  -(NSInteger)numberOfComponentsInPickerView:(UIPickerView *)pickerView

  {

      return ;

  }

  -(NSInteger)pickerView:(UIPickerView *)pickerView numberOfRowsInComponent:(NSInteger)component

  {

      NSInteger row = ;

      switch (component)

      {

          case :

              row = self.years.count;

              break;

          case :

              row = self.months.count;

              break;

          case :

              row = self.days.count;

              break;

      }

      return  row;

  }

  -(NSString*)pickerView:(UIPickerView *)pickerView titleForRow:(NSInteger)row forComponent:(NSInteger)component

  {

      NSString *title;

      switch (component)

      {

          case :

              title = self.years[row];

              break;

          case :

              title = self.months[row];

              break;

          case :

              title = self.days[row];

              break;

     }

     return  title;

 }

 -(void)pickerView:(UIPickerView *)pickerView didSelectRow:(NSInteger)row inComponent:(NSInteger)component

 {

     NSString *strDate = [NSString stringWithFormat:@"%@-%@-%@",

                          self.years[[pickerView selectedRowInComponent:]],

                          self.months[[pickerView selectedRowInComponent:]],

                          self.days[[pickerView selectedRowInComponent:]]];

     NSLog(@"%@",strDate);

 }

 @end
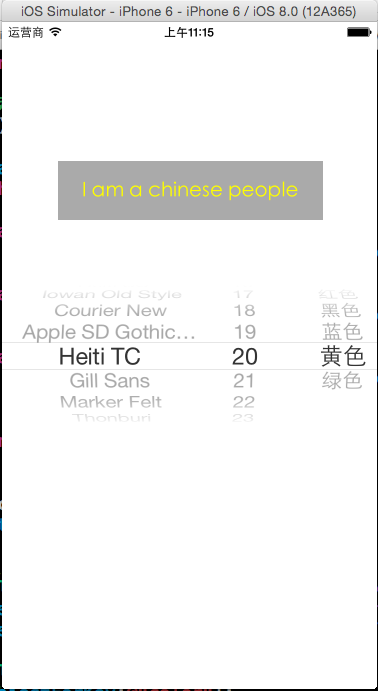
演示二:制作简单的字体表,包括字体类型、大小、颜色
源码如下:
 #import <UIKit/UIKit.h>

 @interface ViewController : UIViewController<UIPickerViewDataSource,UIPickerViewDelegate>

 @property(nonatomic,strong) NSArray *fontNames;

 @property(nonatomic,strong) NSArray *fontSizes;

 @property(nonatomic,strong) NSArray *fontColors;

 @end
 #import "ViewController.h"

   @interface ViewController ()

   @property (weak, nonatomic) IBOutlet UILabel *label;

   @property (weak, nonatomic) IBOutlet UIPickerView *pickerView;

   @end

  @implementation ViewController

  - (void)viewDidLoad {

      [super viewDidLoad];

      //初始化数据

      self.fontNames = [UIFont familyNames];//字体名字

      NSMutableArray *mutsize = [NSMutableArray arrayWithCapacity:];//字体大小

      for(int i=; i<=; i++)

      {

          [mutsize addObject:[NSString stringWithFormat:@"%d",+i]];

      }

      self.fontSizes = mutsize;

      self.fontColors = @[

                          @{@"name":@"红色",@"color":[UIColor redColor]},

                          @{@"name":@"黑色",@"color":[UIColor blackColor]},

                          @{@"name":@"蓝色",@"color":[UIColor blueColor]},

                          @{@"name":@"黄色",@"color":[UIColor yellowColor]},

                          @{@"name":@"绿色",@"color":[UIColor greenColor]}

                         ];

      //设置pickerView的代理和数据源

      self.pickerView.dataSource = self;

      self.pickerView.delegate = self;

      //设置label的font

      self.label.font = [UIFont fontWithName:self.fontNames[] size:[self.fontSizes[] integerValue]];

      self.label.textColor = [self.fontColors[] objectForKey:@"color"];

  }

  #pragma mark - pickerView的代理方法

  -(NSInteger)numberOfComponentsInPickerView:(UIPickerView *)pickerView

  {

      return  ;

  }

  -(NSInteger)pickerView:(UIPickerView *)pickerView numberOfRowsInComponent:(NSInteger)component

  {

      NSInteger row = ;

      switch (component)

      {

          case :

              row = self.fontNames.count;

              break;

          case :

              row = self.fontSizes.count;

              break;

          case :

              row = self.fontColors.count;

              break;

      }

      return row;

  }

  -(NSString*)pickerView:(UIPickerView *)pickerView titleForRow:(NSInteger)row forComponent:(NSInteger)component

  {

      NSString *title;

      switch (component)

      {

          case :

              title = self.fontNames[row];

              break;

          case :

              title = self.fontSizes[row];

              break;

          case :

              title = [self.fontColors[row] objectForKey:@"name"];

              break;

      }

      return  title;

  }

  //设置每一列的宽度

  -(CGFloat)pickerView:(UIPickerView *)pickerView widthForComponent:(NSInteger)component

  {

      CGFloat width = 0.0f;

      switch (component)

      {

          case :

              width = pickerView.frame.size.width/;

              break;

          case :

              width = pickerView.frame.size.width/;

              break;

          case :

              width = pickerView.frame.size.width/;

              break;

      }

      return width;

  }

  -(void)pickerView:(UIPickerView *)pickerView didSelectRow:(NSInteger)row inComponent:(NSInteger)component

 {

     //设置label的font

     self.label.font = [UIFont fontWithName:self.fontNames[[pickerView selectedRowInComponent:]] size:[self.fontSizes[[pickerView selectedRowInComponent:]] integerValue]];

     self.label.textColor = [self.fontColors[[pickerView selectedRowInComponent:]] objectForKey:@"color"];

 }

 @end
演示三:制作简单的图库浏览器
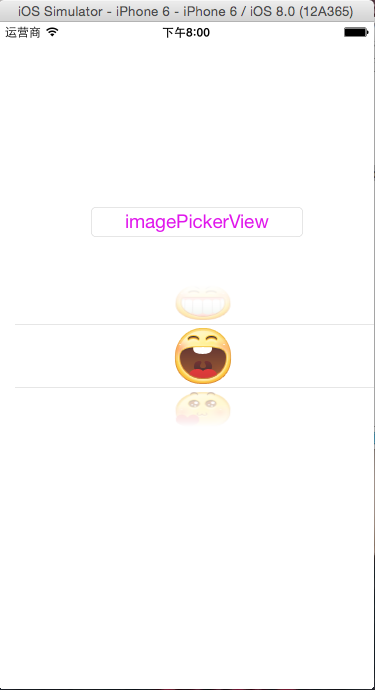
源码如下:
#import <UIKit/UIKit.h>

@interface ViewController : UIViewController<UIPickerViewDelegate,UIPickerViewDataSource>

@end
#import "ViewController.h"

  @interface ViewController ()

  @property (weak, nonatomic) IBOutlet UIPickerView *pickerView;

  @property (strong,nonatomic)NSArray *imageNames;

  @end

  @implementation ViewController

 - (void)viewDidLoad {

     [super viewDidLoad];

     //初始化数据

     NSMutableArray *mutImageNames = [NSMutableArray arrayWithCapacity:];

     for(int i=; i<; i++)

     {

         [mutImageNames addObject:[NSString stringWithFormat:@"%d.png",i]];

     }

     self.imageNames = mutImageNames;

     //设置pickerView的数据源和代理

     self.pickerView.dataSource = self;

     self.pickerView.delegate = self;

 }

 #pragma mark - pickerview代理方法

 -(NSInteger)numberOfComponentsInPickerView:(UIPickerView *)pickerView

 {

     return ;

 }

 -(NSInteger)pickerView:(UIPickerView *)pickerView numberOfRowsInComponent:(NSInteger)component

 {

     return self.imageNames.count;

 }

 //设置行高

 -(CGFloat)pickerView:(UIPickerView *)pickerView rowHeightForComponent:(NSInteger)component

 {

     UIImage *image = [UIImage imageNamed:self.imageNames[]];

     return image.size.height;

 }

 //设置每行显示的视图

 -(UIView *)pickerView:(UIPickerView *)pickerView viewForRow:(NSInteger)row forComponent:(NSInteger)component reusingView:(UIView *)view

 {

     UIImage *image = [UIImage imageNamed:self.imageNames[row]];

     //UIImageView *imageView = [[UIImageView alloc]initWithImage:image];

     //imageView.frame = CGRectMake(0, 0, image.size.width, image.size.height);

     //return imageView;

     UIButton *button = [[UIButton alloc]initWithFrame:CGRectMake(, ,image.size.width, image.size.height)];

     [button setBackgroundImage:image forState:UIControlStateNormal];

     [button addTarget:self action:@selector(buttonClicked:) forControlEvents:UIControlEventTouchUpInside];

     return button;

 }

 -(void)buttonClicked:(UIButton *)sender

 {

     NSLog(@"button clicked");

 }

 @end
最新文章
- RabbitMQ学习系列(四): 几种Exchange 模式
- 使用Aircrack-ng进行无线安全审计
- selenium webdriver的各种driver
- [转]Entity Framework技术导游系列开篇与热身
- java 网络编程(五)----TCP进阶篇上传文本文件
- 《Java7中 下划线的新特性》
- Ajax HTML, JS
- 从今天起,正式步入cnblogs,向曾经的脚印说声对不起!
- Cloud Foundry中gorouter对StickySession的支持
- 在EBS中如何创建CUX_TOP
- Ants (POJ 1852)
- Arduino单片机使用和开发问题记录(转)
- JS 引擎执行机制
- Django里自定义用户登陆及登陆后跳转到登陆前页面的实现
- L1-033 出生年
- bzoj4980: 第一题
- 关于TypeScript中null,undefined的使用
- nginx初探,下载安装配置负载均衡
- UnicodeDecodeError: 'ascii' codec can't decode byte 0xe5 in position 85
- 史上最全的web前端开发程序员学习清单!